Projects 📝
A project is a centralized space to organize all the files, versions, feedback, and review decisions relating to a single project. This could contain a mixture of print assets, social posts, promotional videos, web designs, and anything else you need to get your project over the line.
In Filestage, each project has its own dashboard with a customizable workflow to take your files from v1 to approval. This makes sure every file in a project goes through the same process, while also allowing you to have different review processes for different projects.
Folders 📁
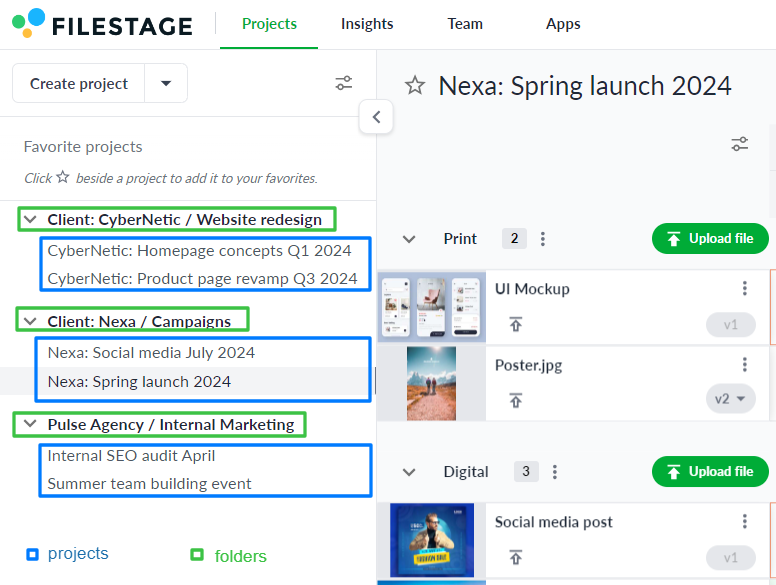
Folders are a way of grouping your projects to make them easy to find later. Most teams organize their projects by client or department, giving everyone quick access to what they need.
Example: Let's say the agency works with several clients and also has internal projects. Here’s how we can organize it in Filestage:
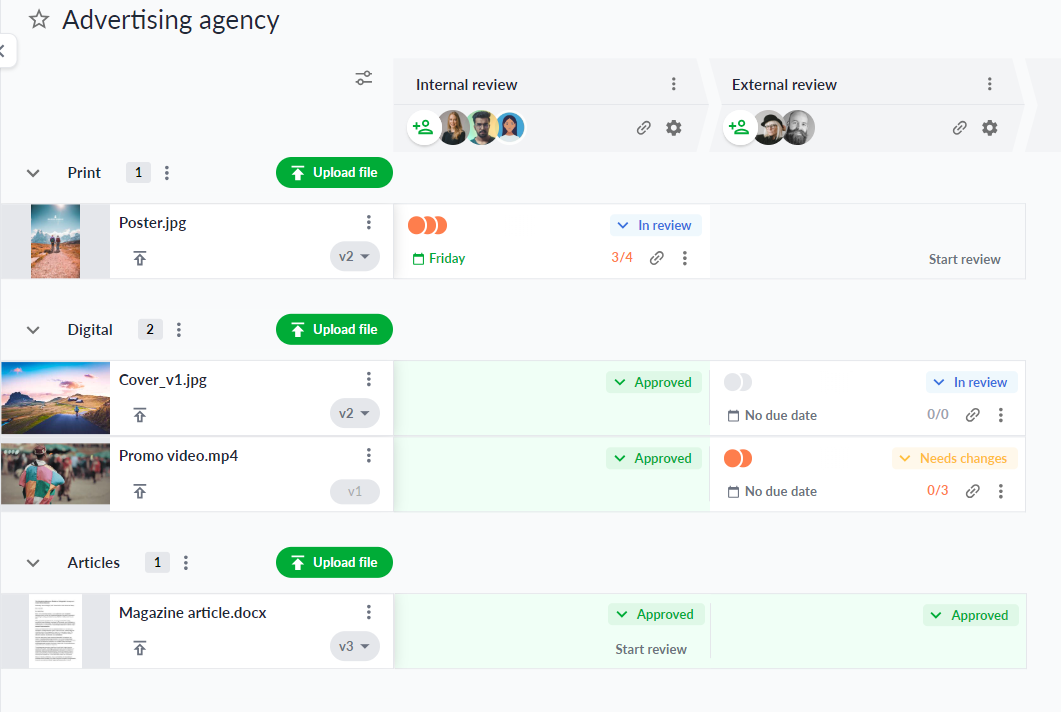
Sections 🔖
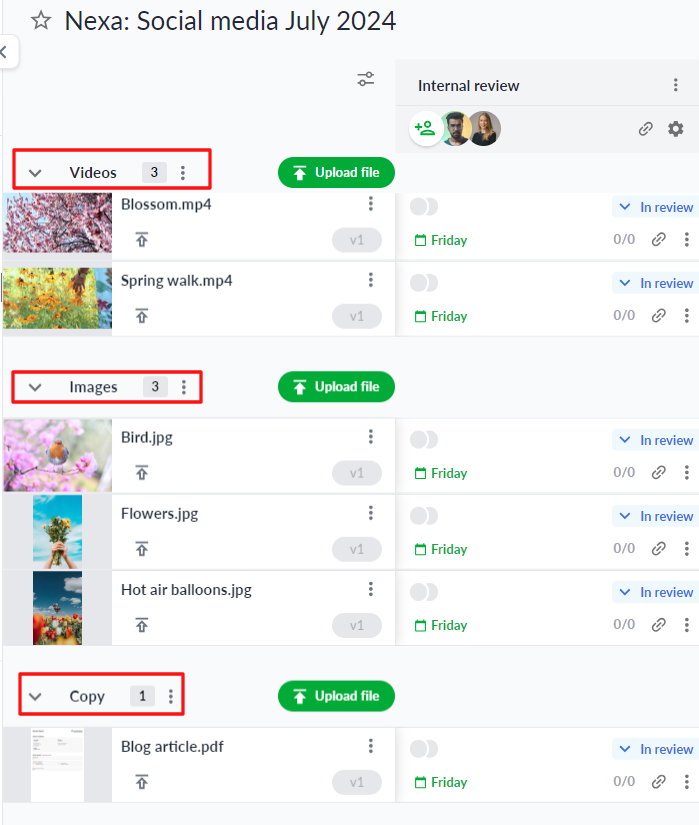
When you’re working with lots of different files, it can be helpful to organize them into sections. These appear as labels above your files and can be expanded or collapsed to help you focus.
By default, your project will include a section called “All files”. But you can rename this and create new ones to suit your needs.
Here are a few ideas for how you can use sections:
File types – e.g. Videos, Designs, Copy
Marketing channels – e.g. Social, Print, TV
Project stages – e.g. Briefs, Concepts, Assets
Once you get up and running with Filestage, you can find yourself going from 10 to 100 projects very quickly. So here are a few naming tips to help you stay organized from the start:
Be specific – Clearly state the client name, project type, or campaign and include specific details like the month, quarter, or year
Be consistent – Use consistent naming conventions across all your projects and folders. For example, start with the client name, followed by the project type, and then the specific focus and date.
Include dates – When relevant, include the time frame of the project (e.g. month/year or quarter/year). This can be helpful when sorting projects or choosing what to archive.
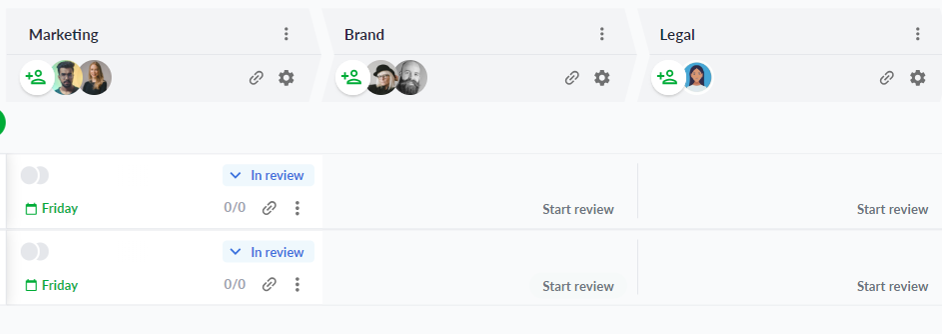
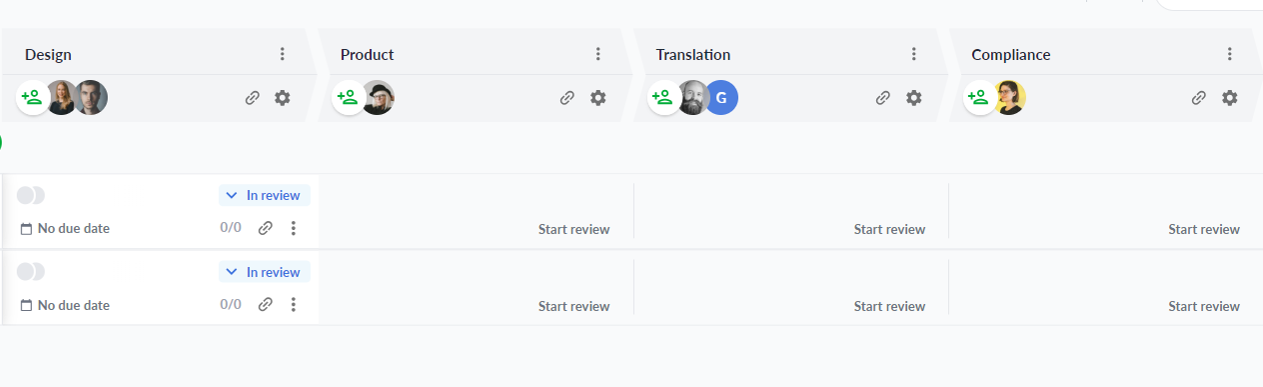
Reviewer groups appear as columns in your project dashboard. Each one represents a different group of stakeholders in your approval workflow.
When you create a project, “Reviewer group 1” will be there by default. You can then rename it and add extra reviewer groups to suit your needs – and these can be different for every project.
❗It's important to note that reviewers can only access versions and comments within their group. They can’t see any comments or discussions in other reviewer groups. This helps to keep you in control of who sees what and when files are moved from one reviewer group to the next.
Here are a few examples for different use cases:
Advertising agency – Internal and External
In-house marketing team – Marketing, Brand, Legal
Packaging agency – Design, Product, Translation, Compliance
💡Top tip: Get analytics on your company's review and approval process with Insights, so you can make optimizations and boost productivity. Learn more
Save your reviewer groups as a template so you can set up new projects with the same approval process in a couple of clicks. This is especially helpful if your review process often involves the same departments.
After you have created a project template, you can select it when creating a new project.