You can provide feedback on files by leaving comments. There are several ways to create and manage comments, including adding attachments and mentioning other users.
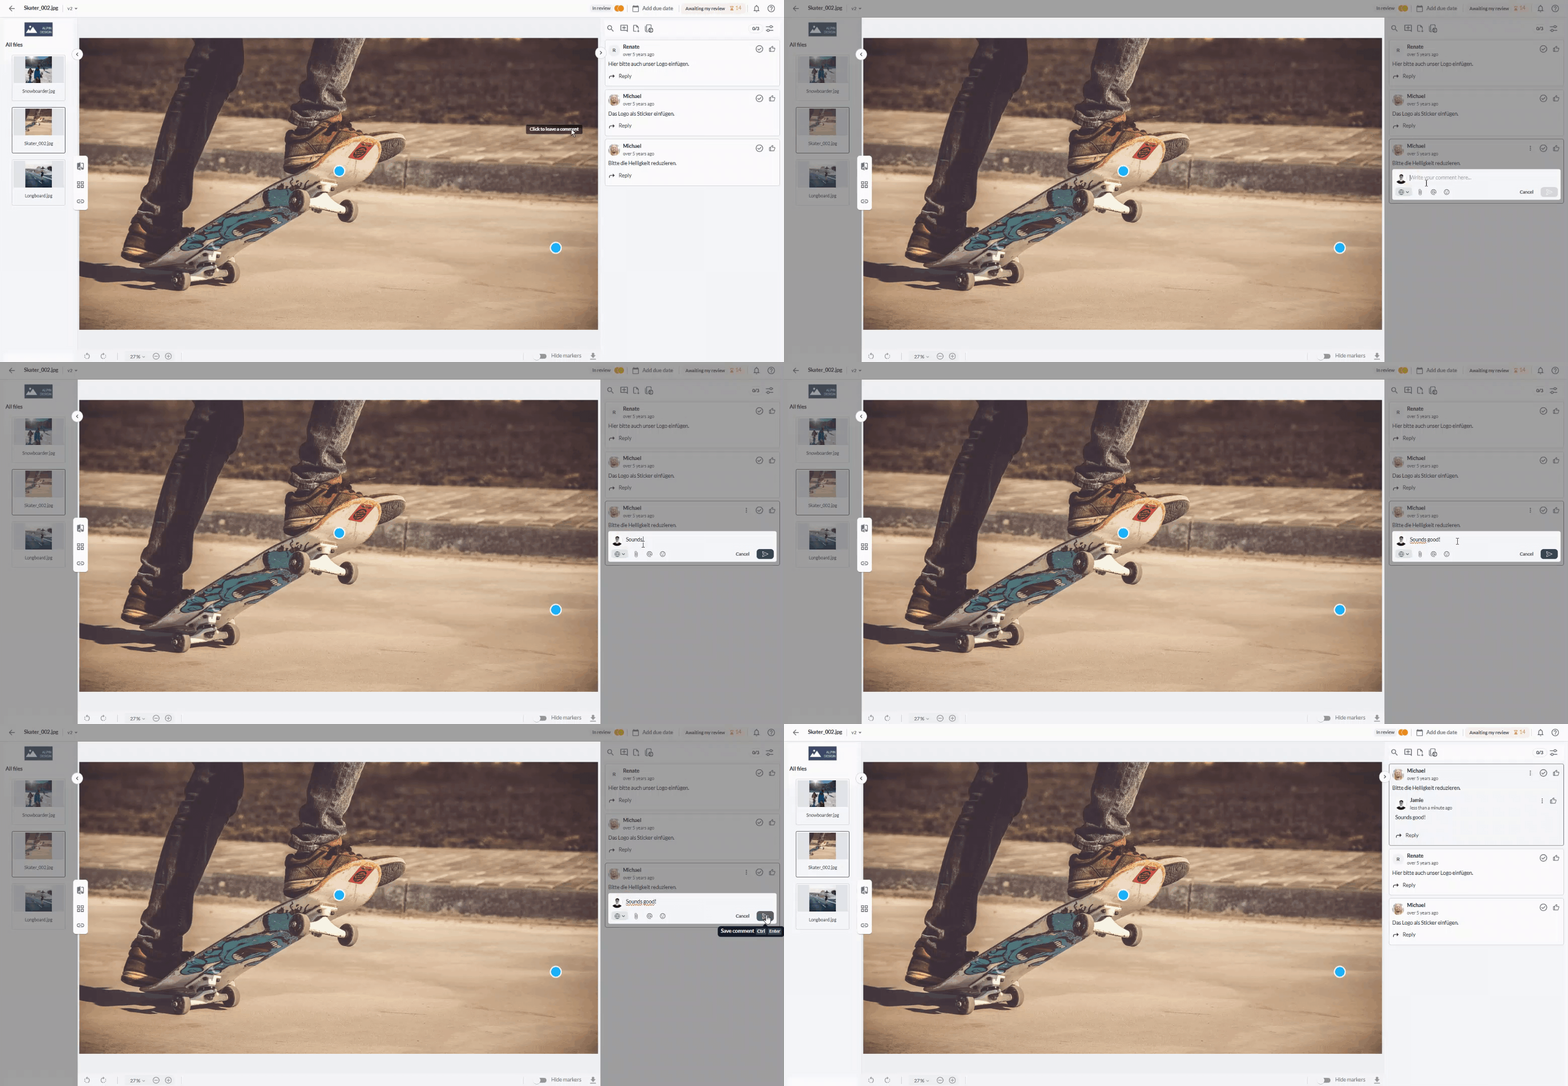
You can either create comments with a marker by clicking in the file or a general comments without a marker.
Click on the Write a general comment icon above the comment toolbar.
Write your comment.
Click on the Save comment button or use the keyboard shortcut Ctrl + Enter.
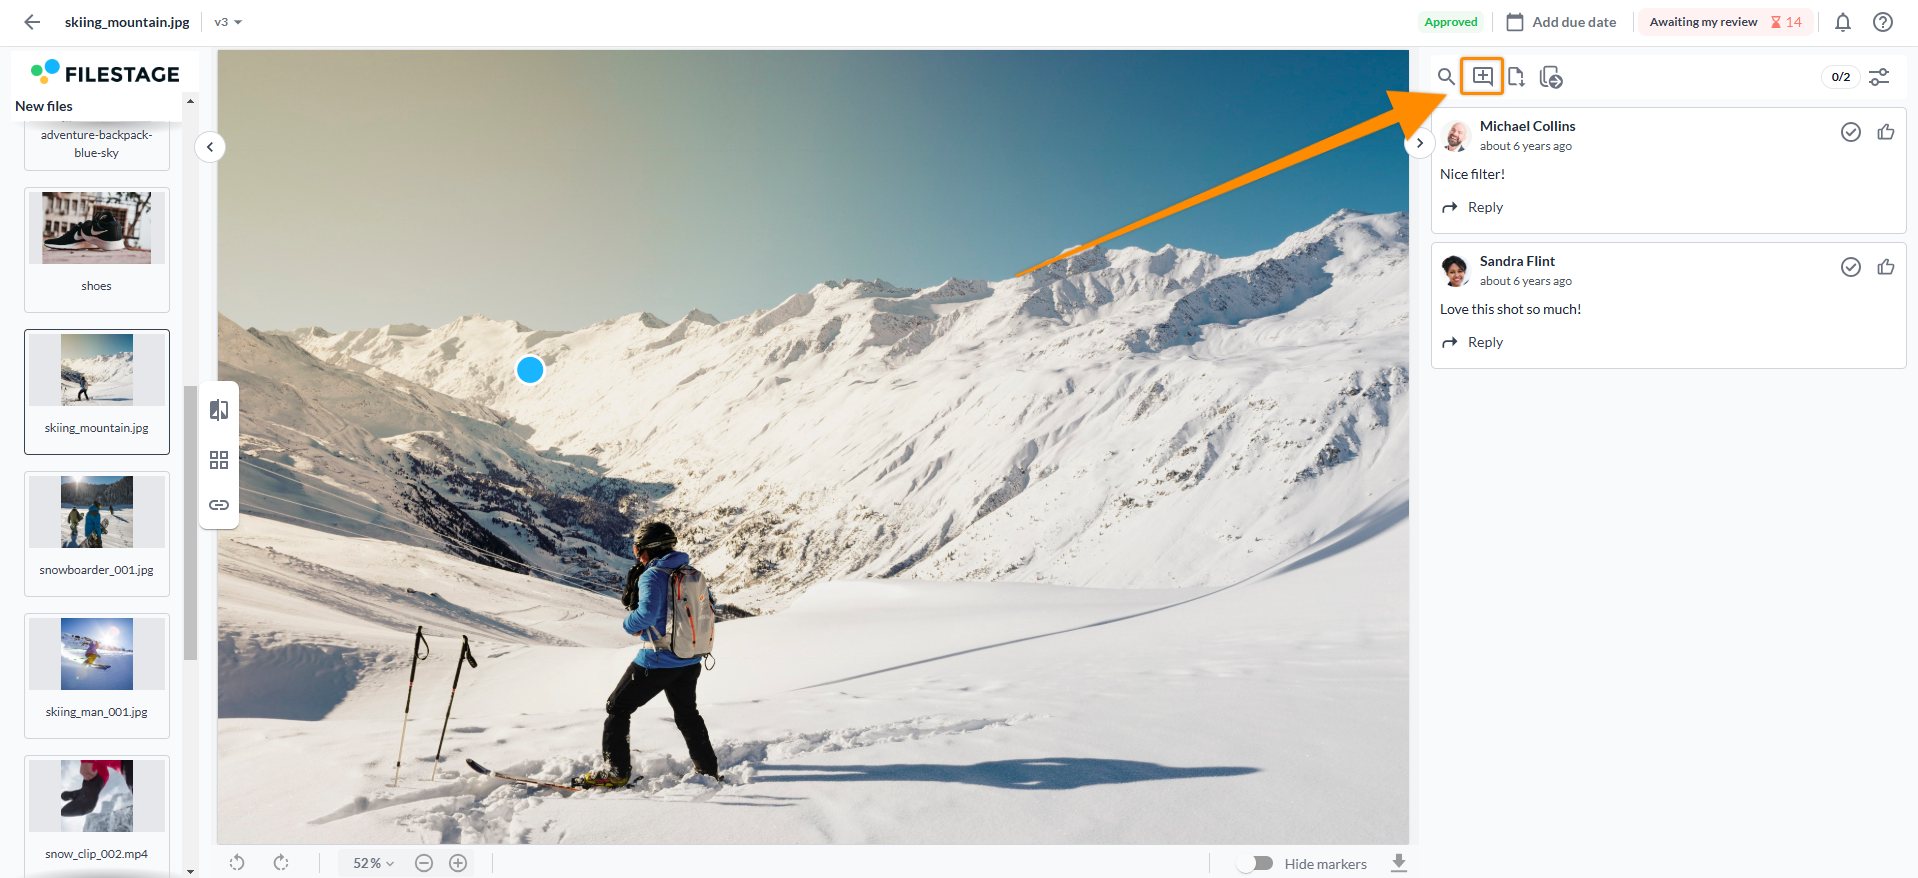
Click on the corresponding position in the file.
Write your comment.
Click on the Save comment button or use the keyboard shortcut Ctrl + Enter.
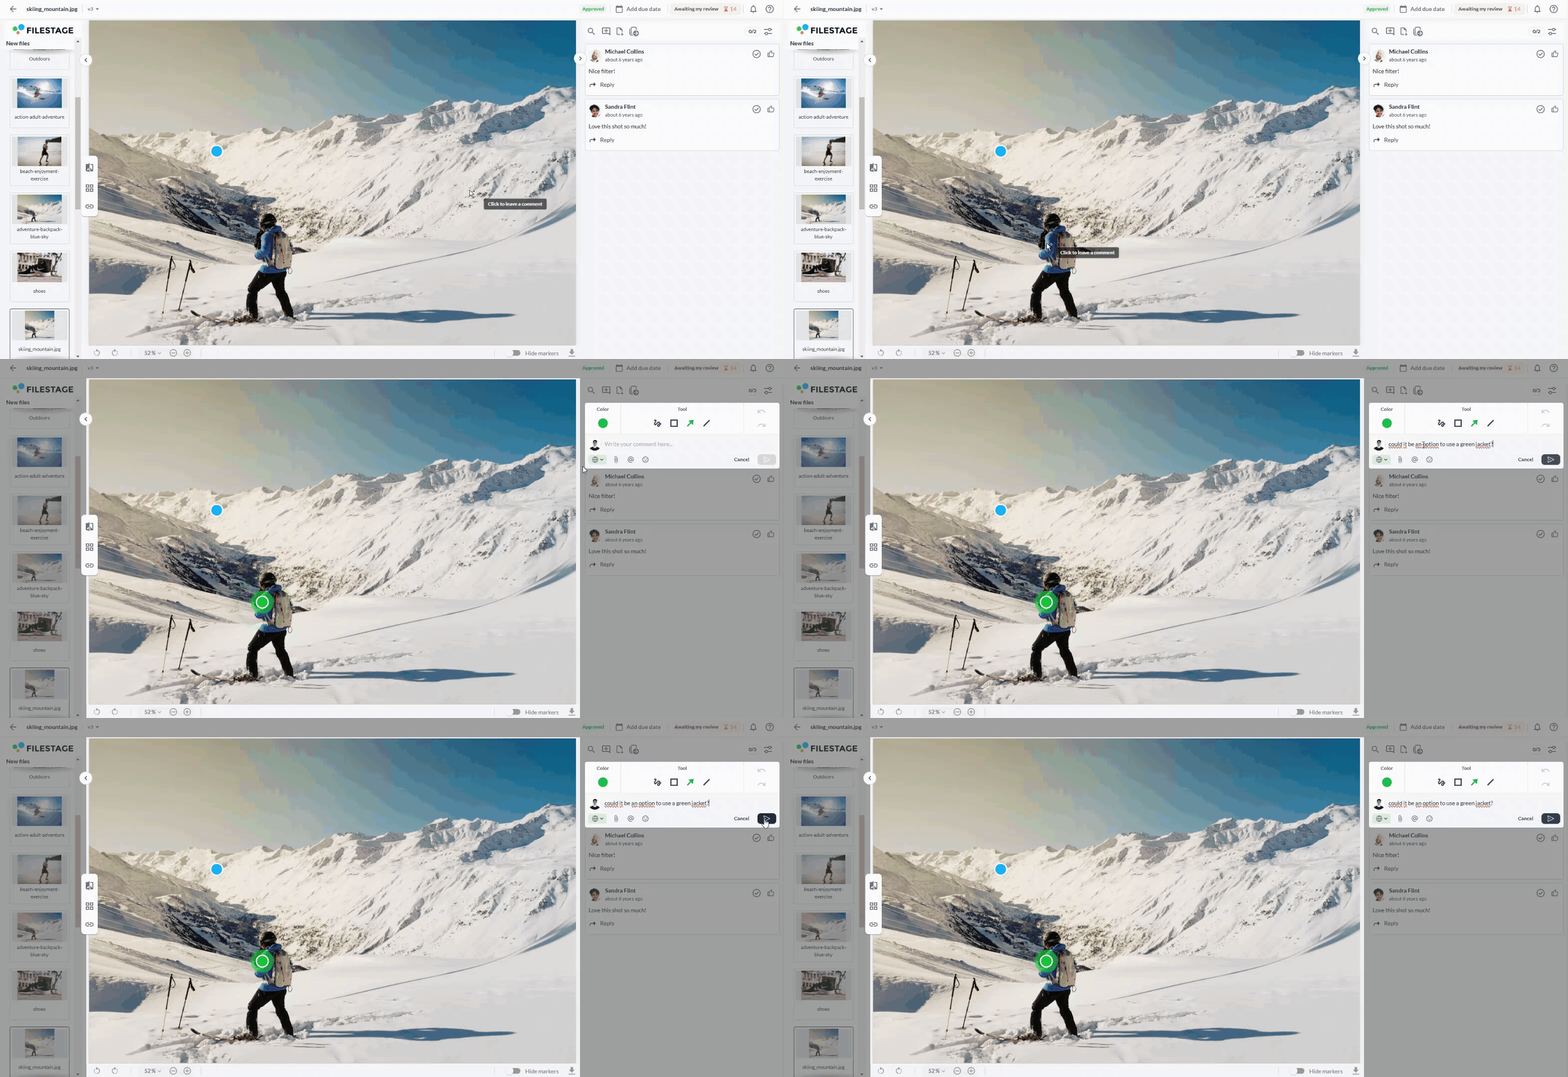
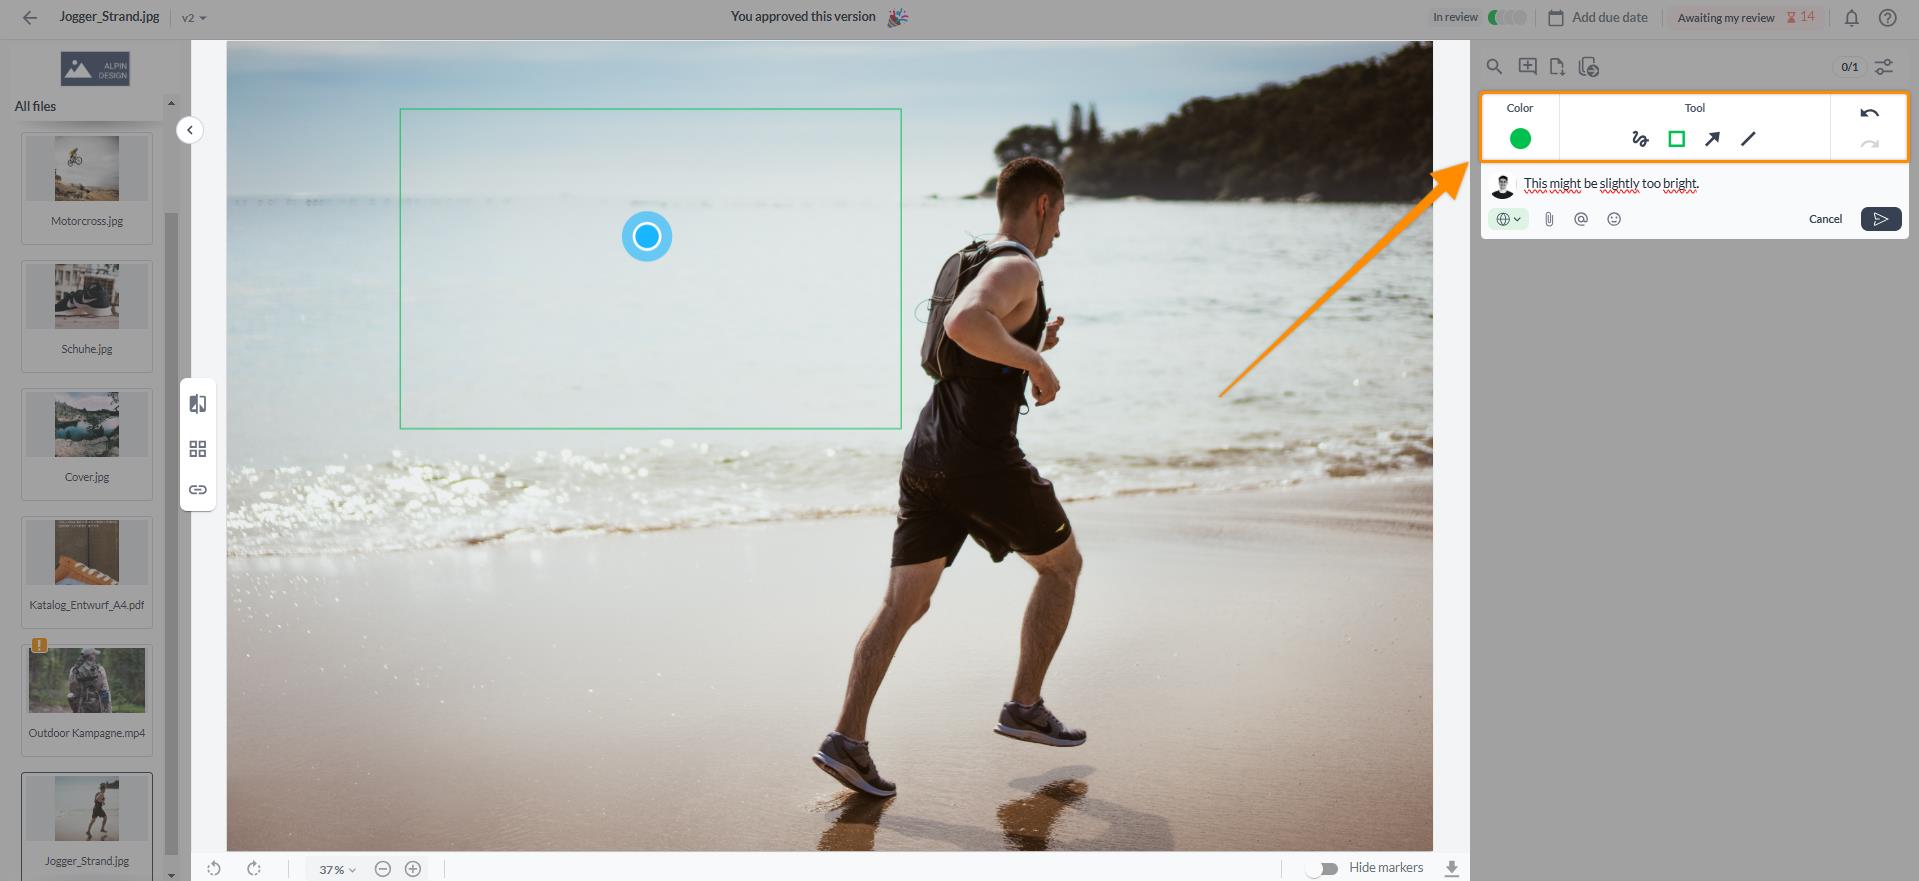
When you want to be clearer about something, you can grab your digital pen and start drawing and annotating onto the files. This works for images, videos, and PDFs, when creating comments with a marker.
You have different options including:
Freehand drawing
Creating rectangles
Drawing an arrow
Drawing a straight line
Annotation color
To annotate a file, follow these steps:
Click on the corresponding position in the file.
Choose your annotation tool from the appearing annotation box.
Leave your feedback.
Click on the Save comment button or use the keyboard shortcut Ctrl + Enter.
You can add emojis to your comments in Filestage! Simply tap the emoji face in the comment box or enter “:” and start typing to search for an emoji. So next time you’re suggesting  changes or sharing a new
  with your team, you’ll be able to give your comments that extra sprinkle of
  .
.
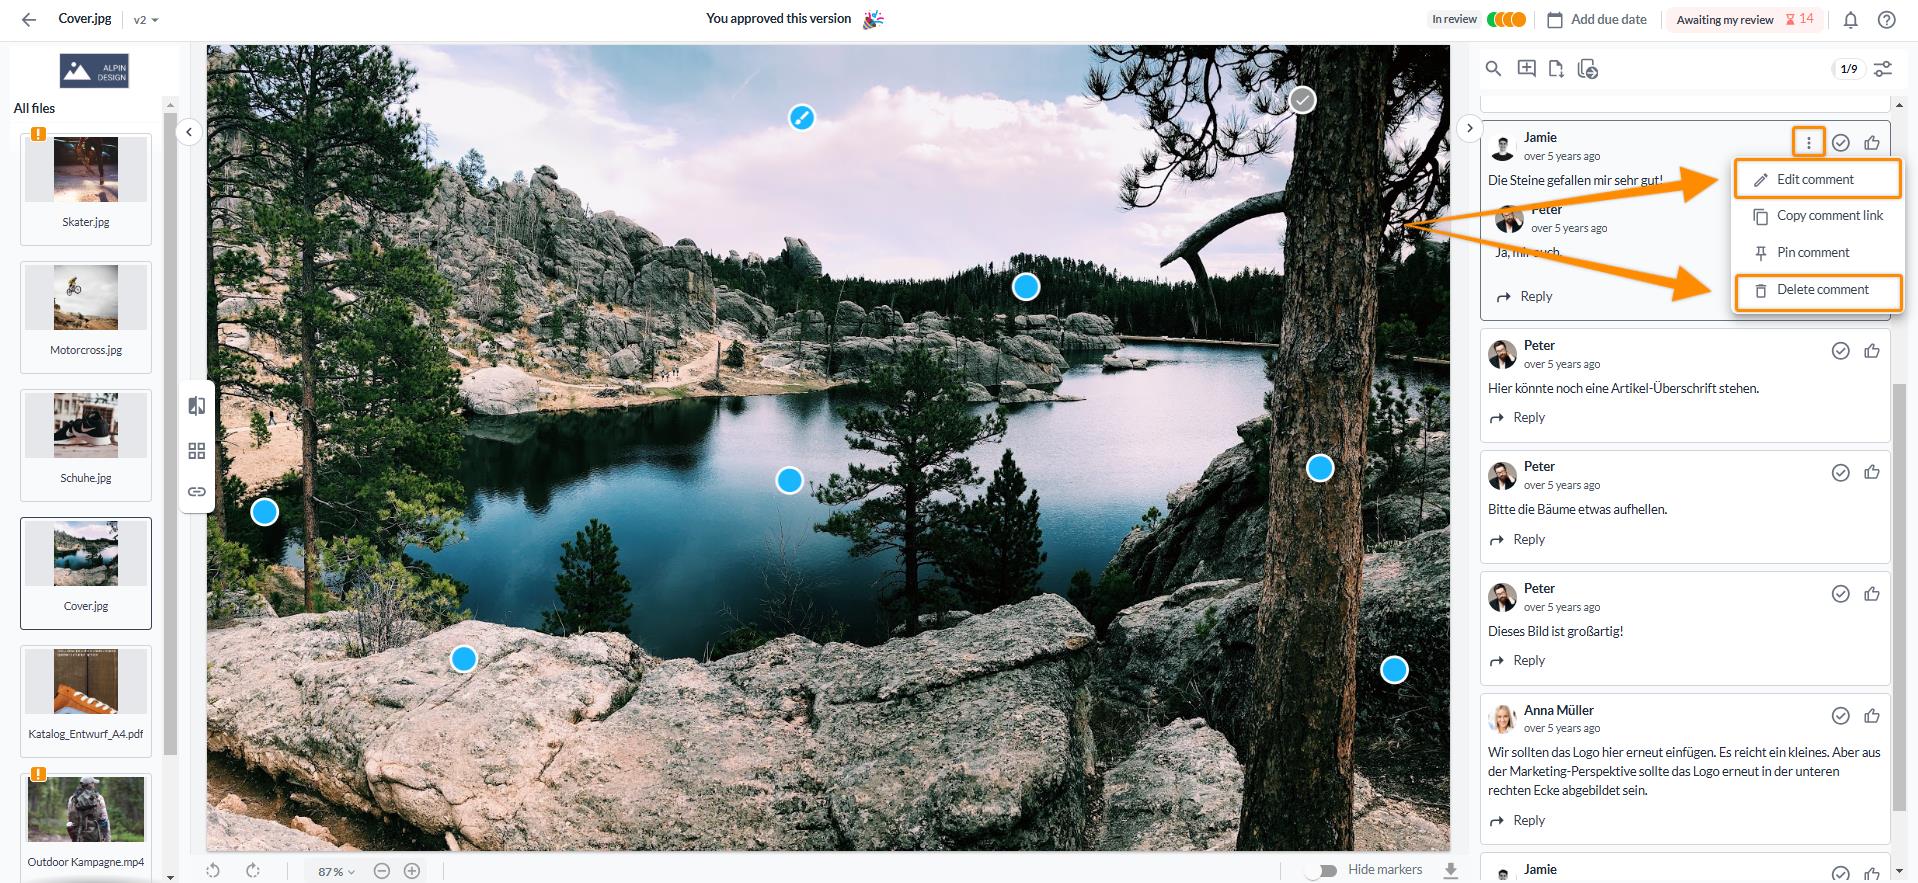
To edit or delete a comment:
Click on the three dots in the comment you would like to edit or delete
Select Edit comment, or select Delete comment
If applicable, edit the comment.
Confirm by clicking on the Save comment button or, in case you want to delete the comment, click on Delete comment.
When you would like to respond directly to feedback, you can reply directly underneath the original comment.
To do so, follow these steps:
Find the comment you wish to reply to.
Select the Reply button.
Type your reply.
Confirm by clicking on the Save comment button or use the keyboard shortcut Ctrl + Enter.
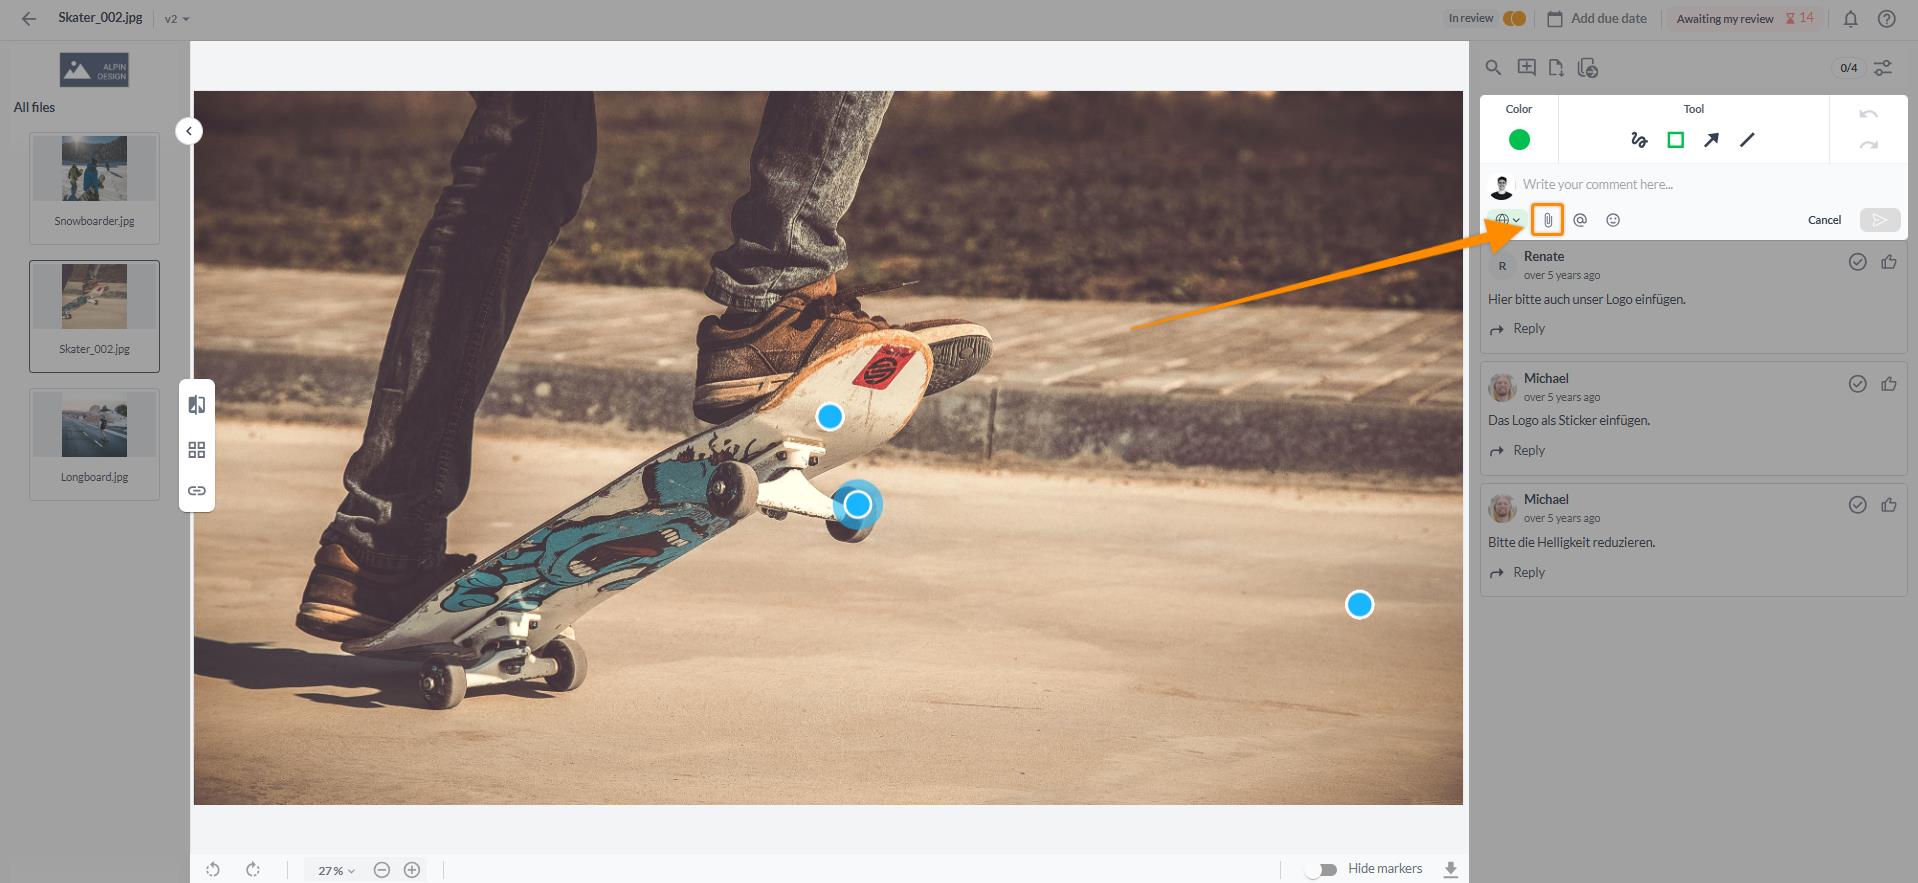
You can add attachments to your comments when you want to share extra details. To do so:
Write a comment
Click on the Upload attachment icon below the comment field.
Select the file you would like to attach.
Confirm by clicking on the Save comment button or use the keyboard shortcut Ctrl + Enter.
The file is now available for reviewers and collaborators to download. Just click on the attachment to download the original file.
Great ways to use this feature:
- Logos - Color Swatching - Adding more context - And much more!
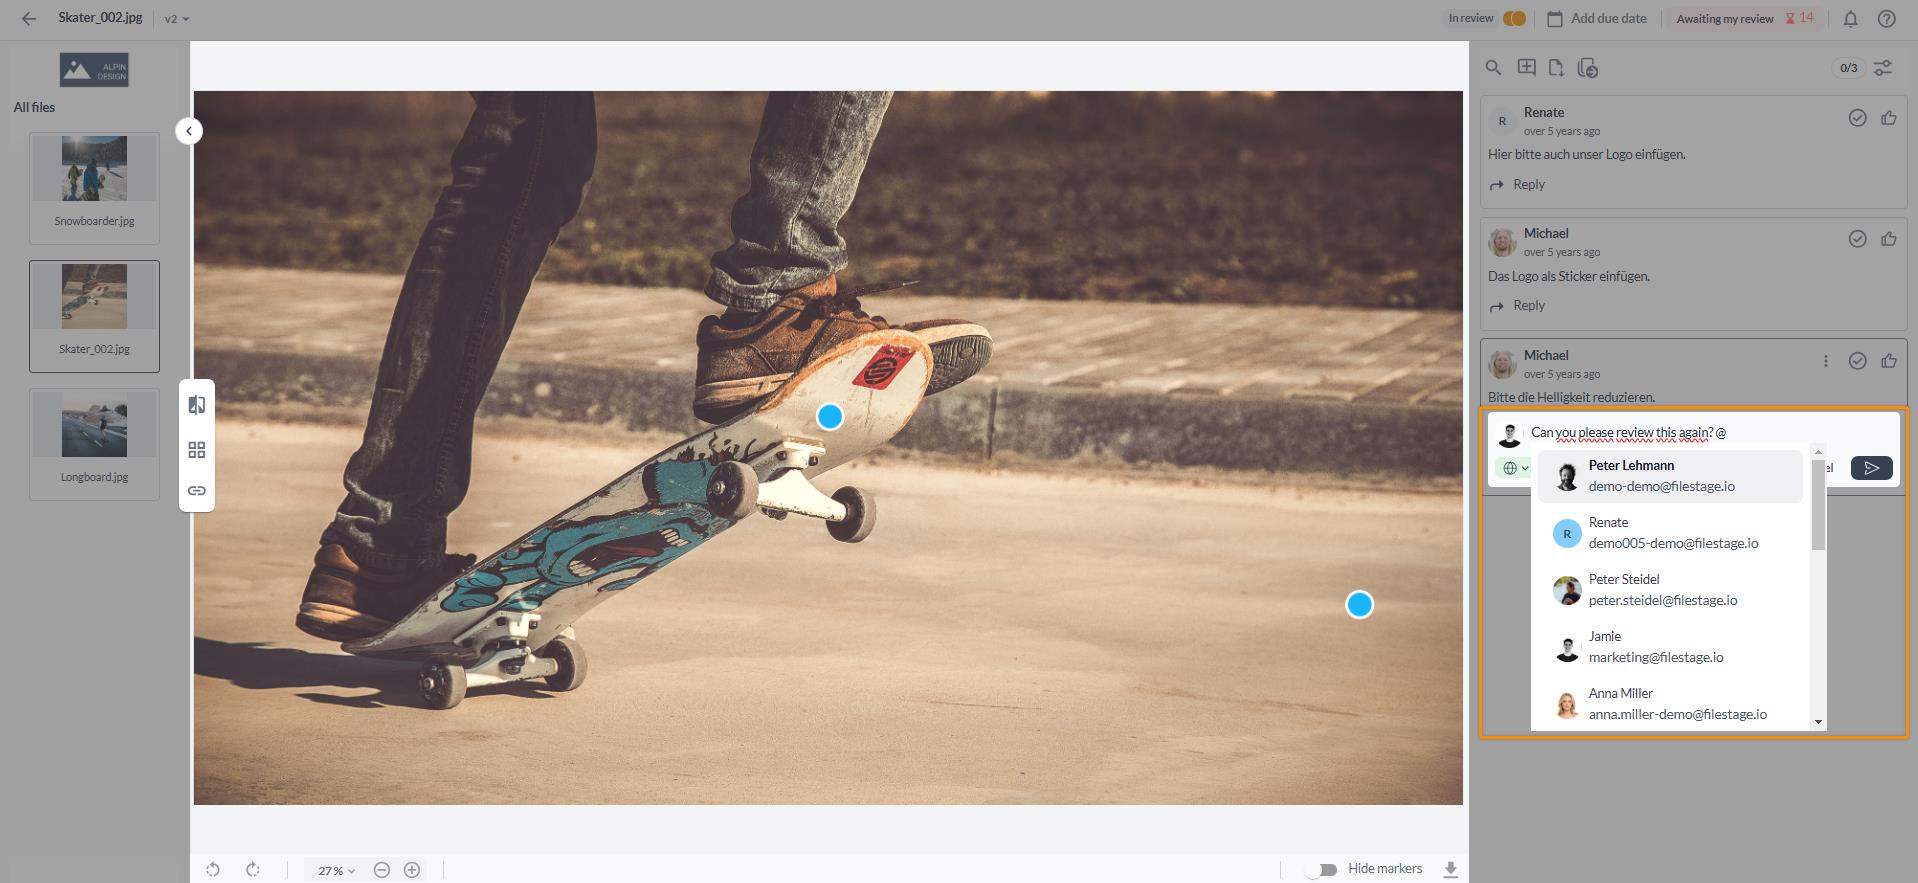
Hit + or @, and type in the email address of the person you want to mention in your comment.
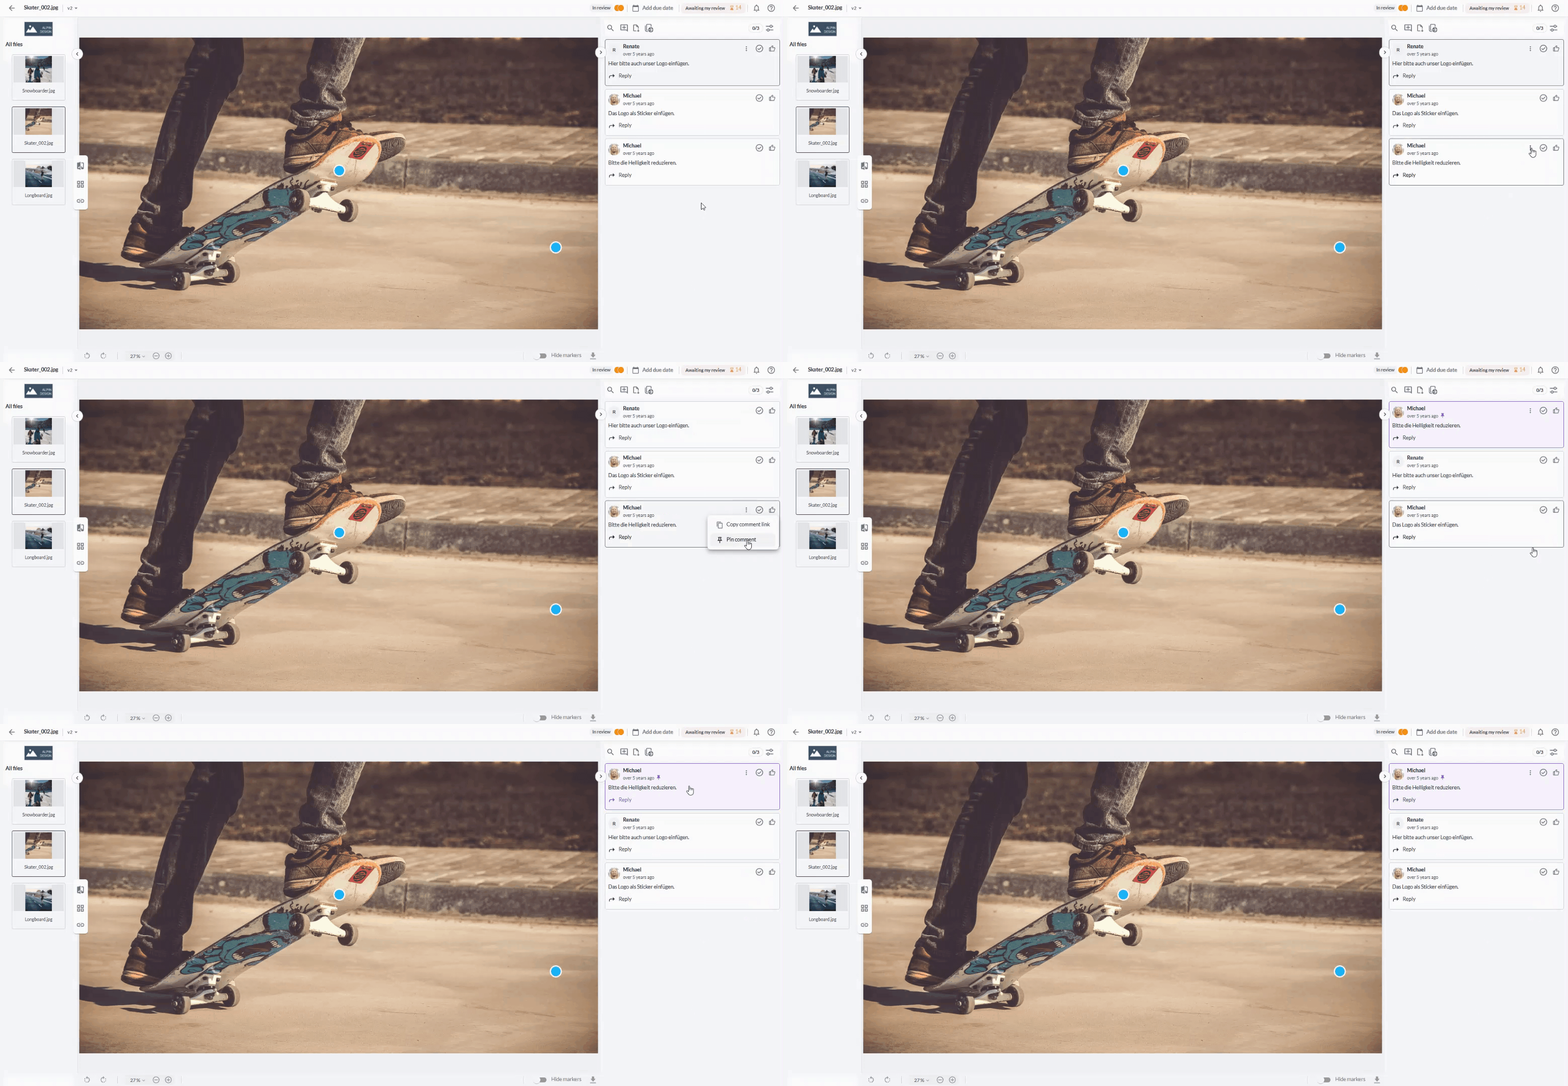
Pin comments to the top of the sidebar, perfect for reminding reviewers of the brief or pointing out where you need feedback. Anyone with permission to edit a project can pin comments.
Besides the usual commenting and annotating options available for all file types by clicking into the file, you can now create a comment in document files by selecting text, which opens the additional annotation tools.
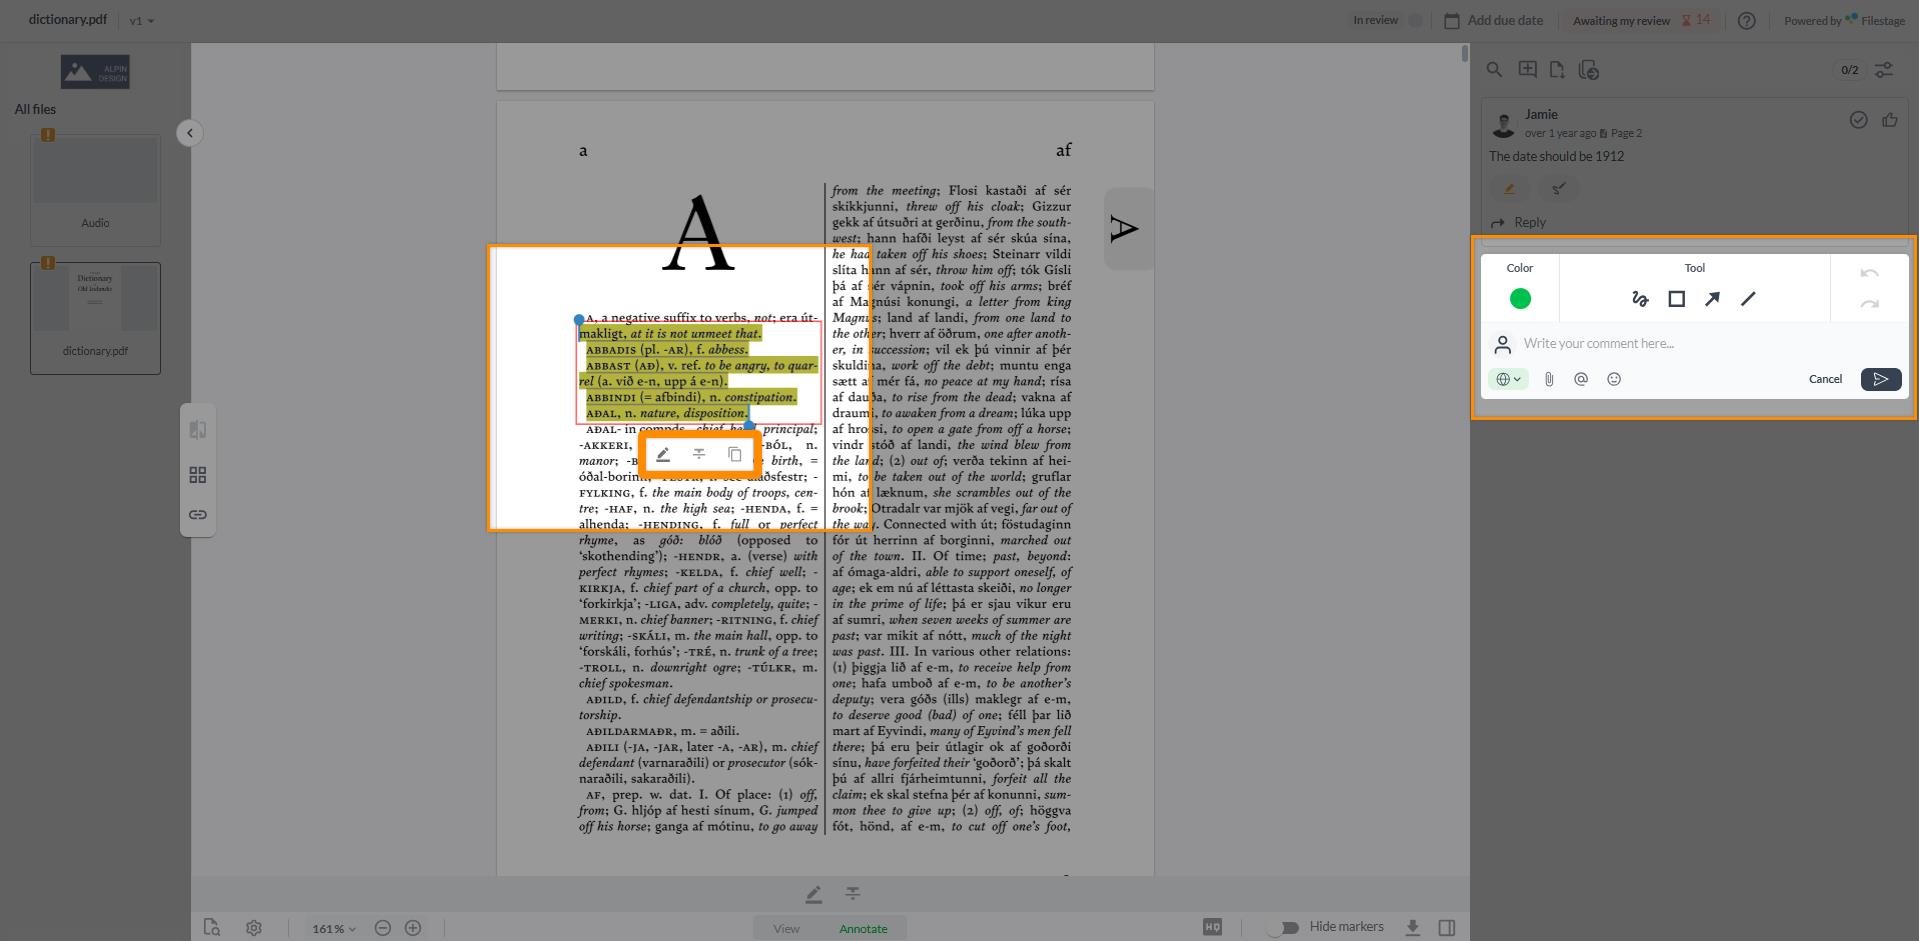
The Annotation Toolbar contains tools to highlight text, strikethrough text, and copy it to the clipboard.
After selecting text, the commenting window opens on the left side, where you can now write and add your comment by clicking on the save button.
Place your cursor at the end (or beginning) of the text you want to select.
Drag the mouse over the text you want to select.
When the selected text is highlighted yellow, you can add a new comment (on the right), and the toolbar opens (directly under the selected text).
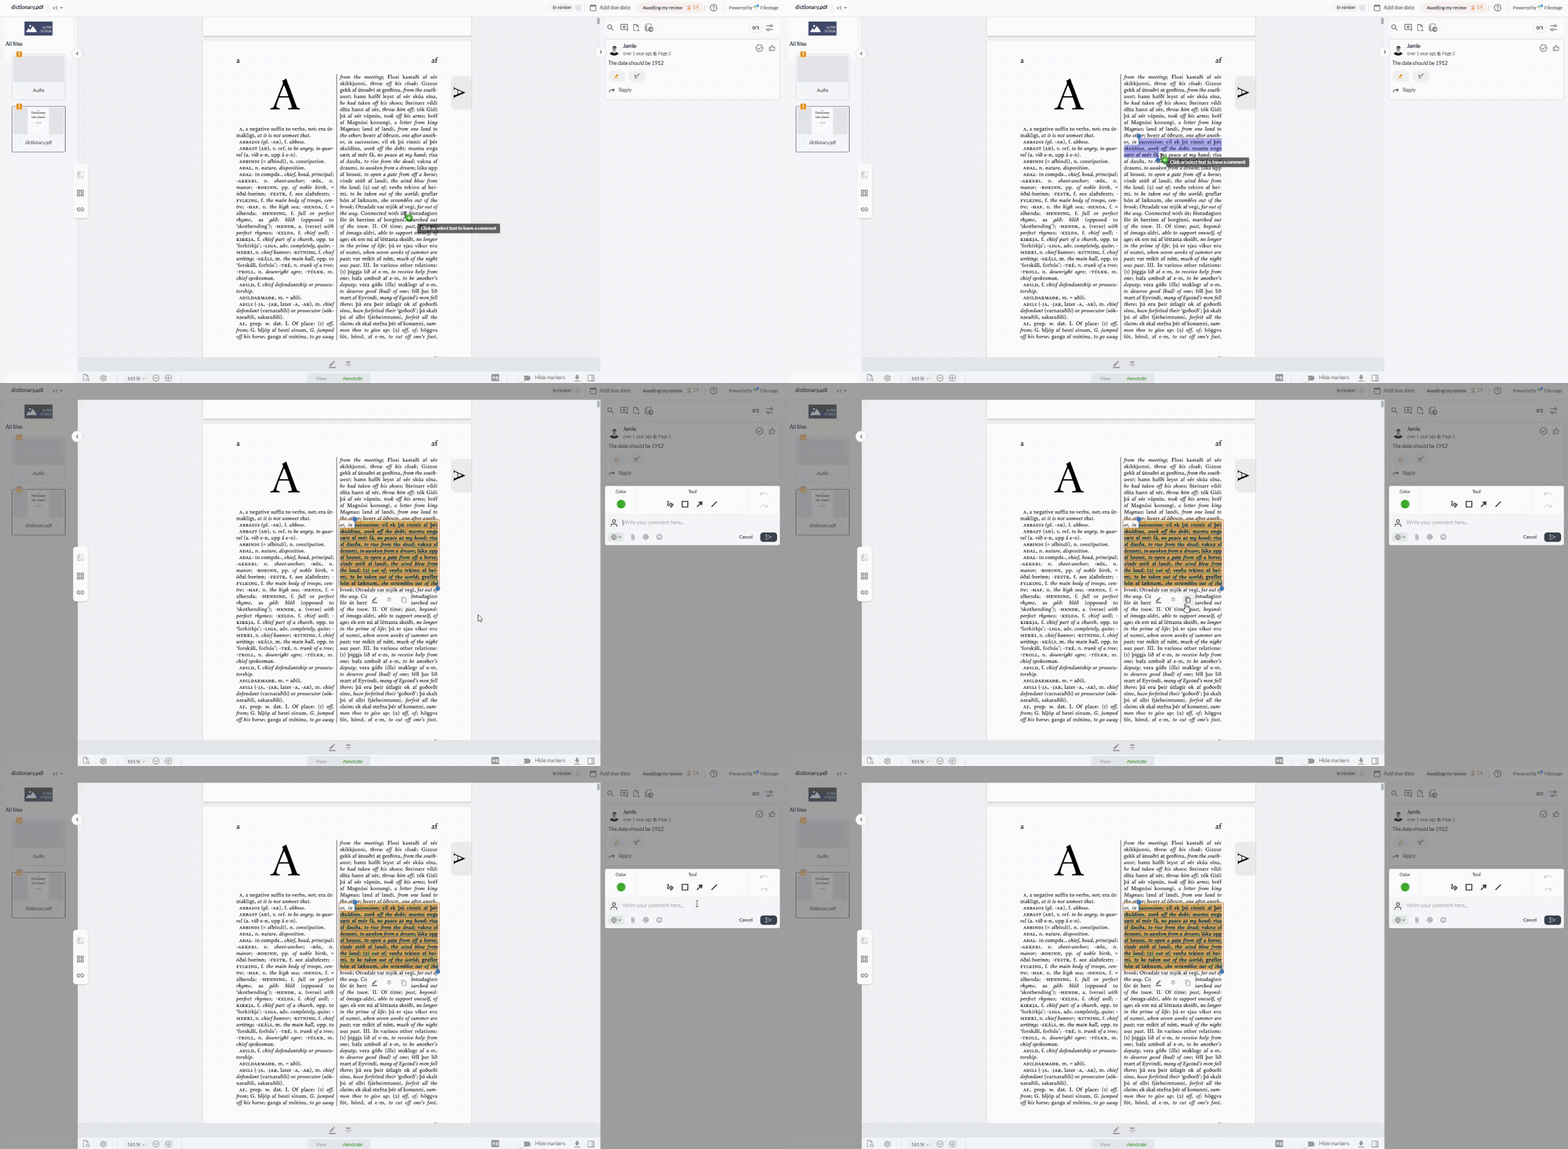
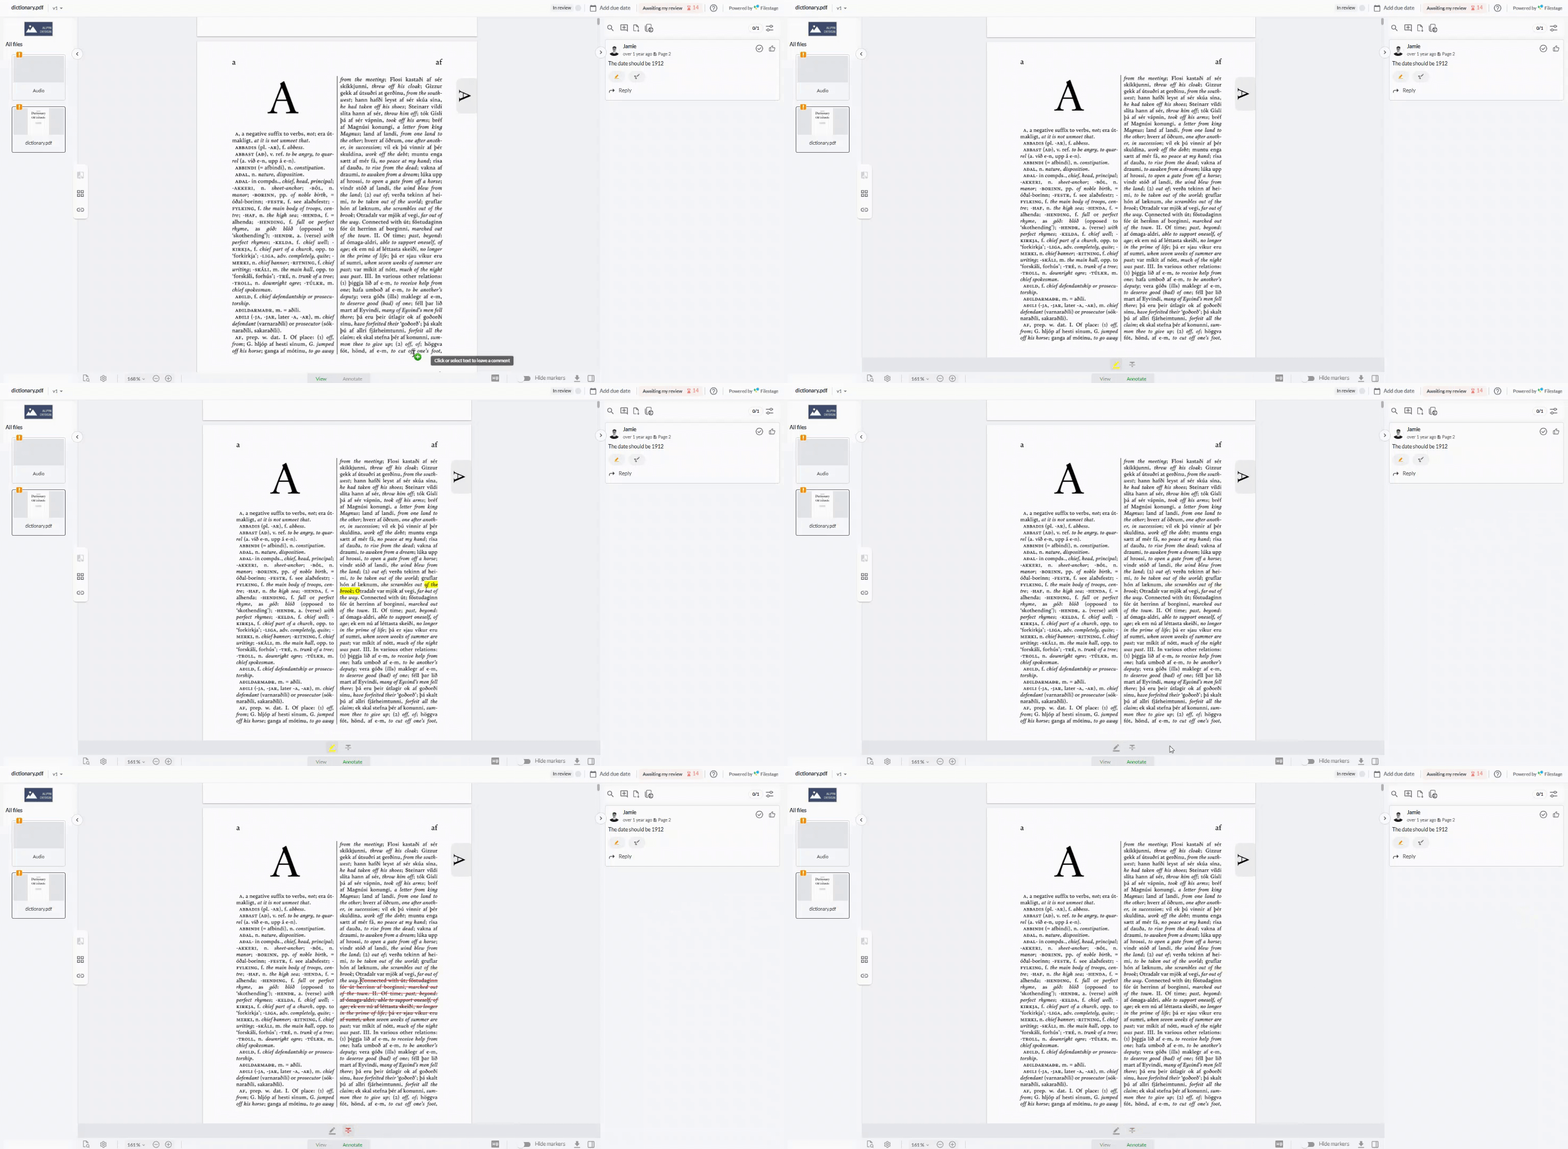
You can also select the Highlight tool and the Strikeout tool directly in the Annotate mode, allowing you to apply these tools directly to your selection.
PDF and office files have additional view and layout options to adapt to your preferences. You can zoom, rotate, change the page layout, and even toggle between thumbnail and outline view.
Under the file display, you will have different options for zooming.
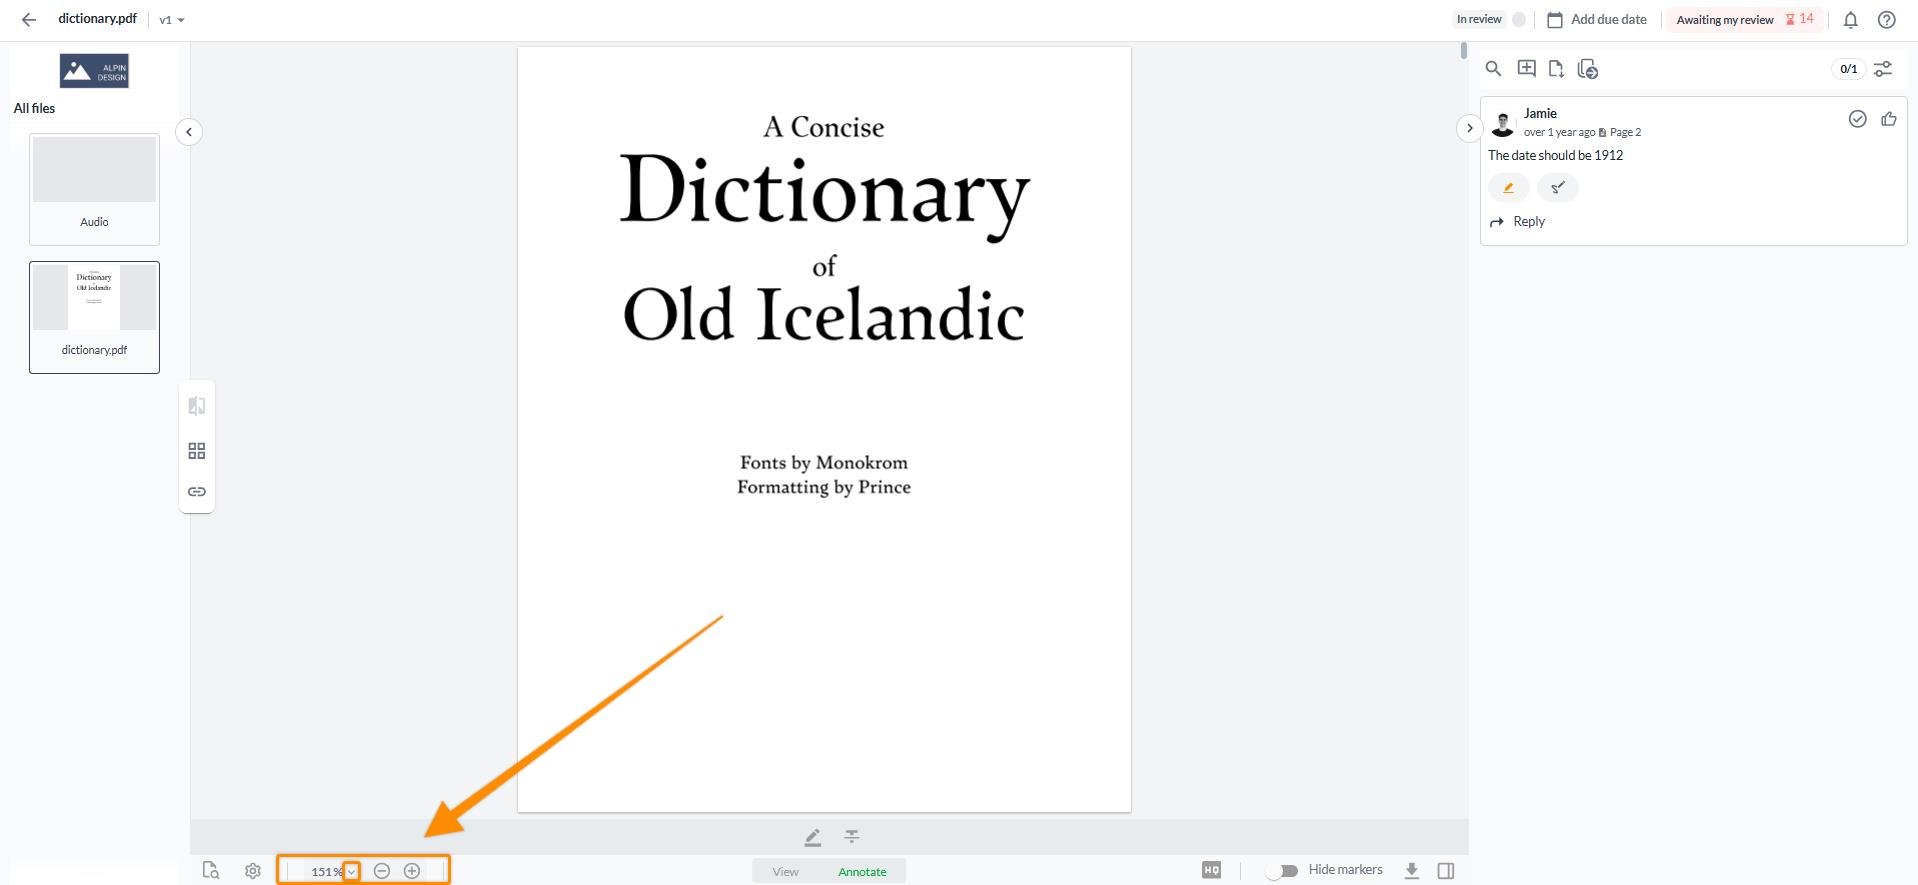
Zoom in/out: By clicking on the zoom-in and zoom-out buttons the document magnification changes by preset levels.
Zoom level: By clicking on the down arrow next to the zoom level percentage, a drop-down menu opens where you can select a fixed zoom level without having to click the +/- button several times. You can also click on the percentage to type in an individual zoom percentage.
Marquee Zoom: By selecting the marquee zoom function in the drop-down selection, you can drag a rectangle around a portion of the page that you want to inspect more closely
Fit to width/ Fit to page: You can also adjust the size of your document to the width of the document or the page size by selecting those options from the drop-down menu.
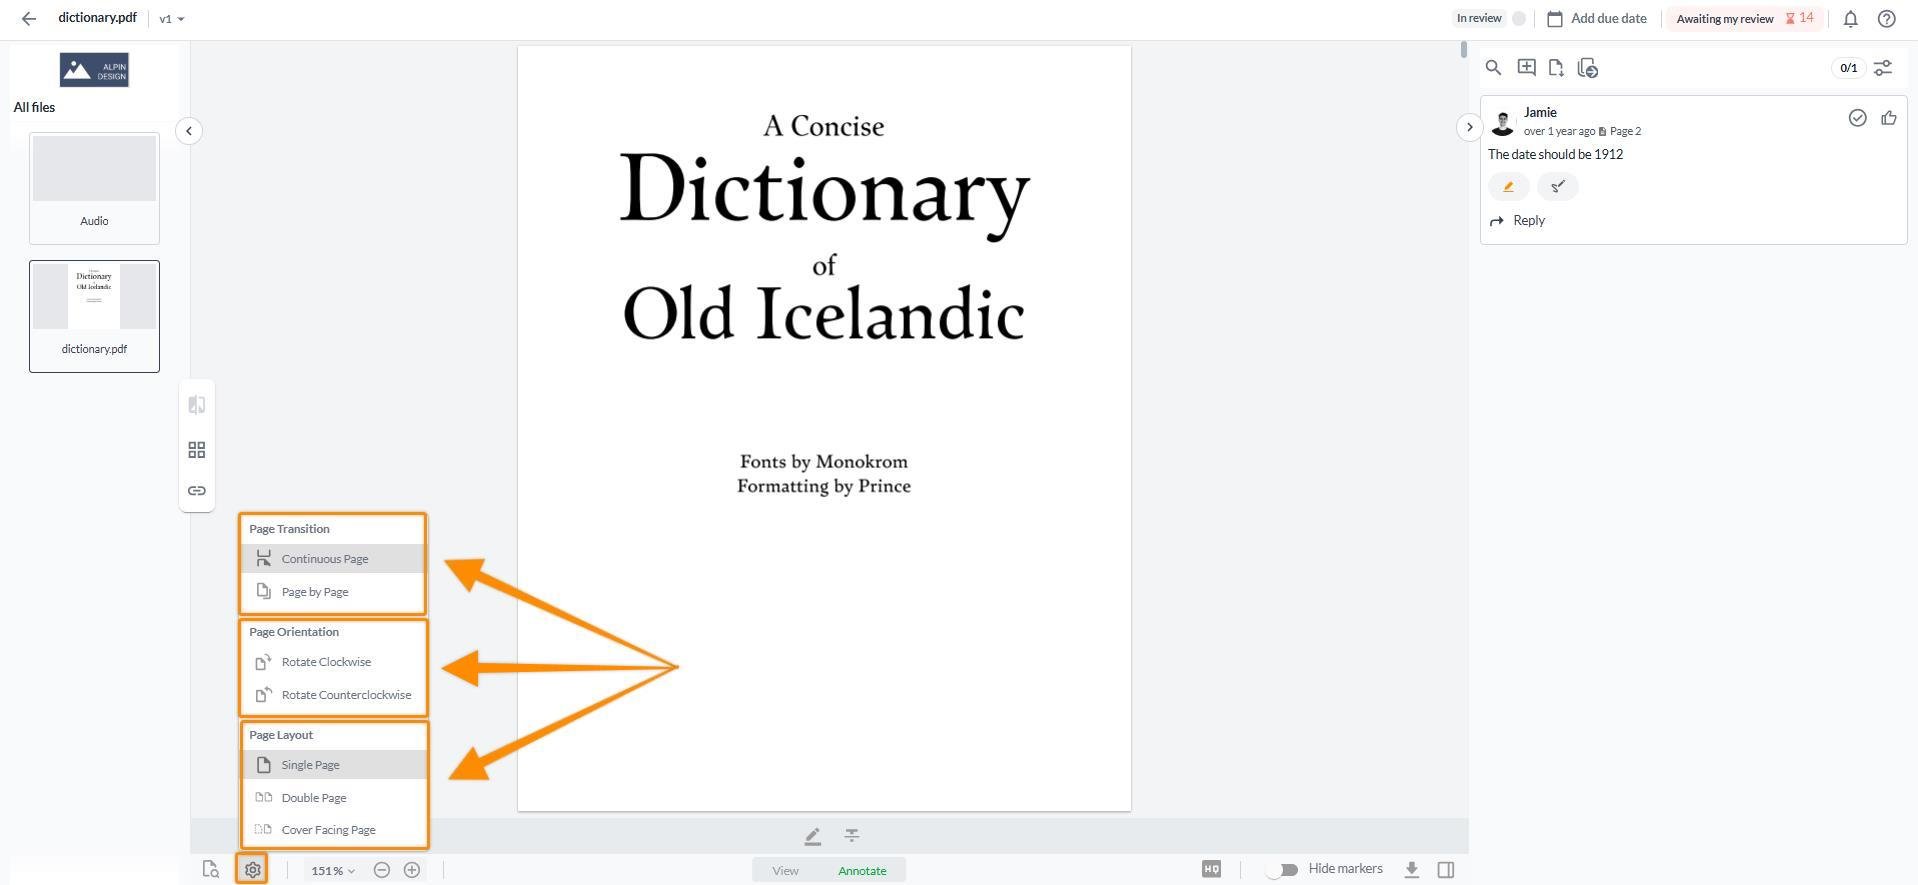
You have the option to customize your Page layout and adjust the page layout according to your wishes. To do so:
Click on the gear symbol in the lower-left corner of your file view. This opens the layout options
Click on either the Clockwise or Counterclockwise button under the page orientation section to rotate the file in the desired direction.
Choose behind the Page layout section if you want to activate the pages in Single, Double Page or Cover Facing Page
Behind the page transition option, choose whether you want to display Continuous Page or Page by Page option
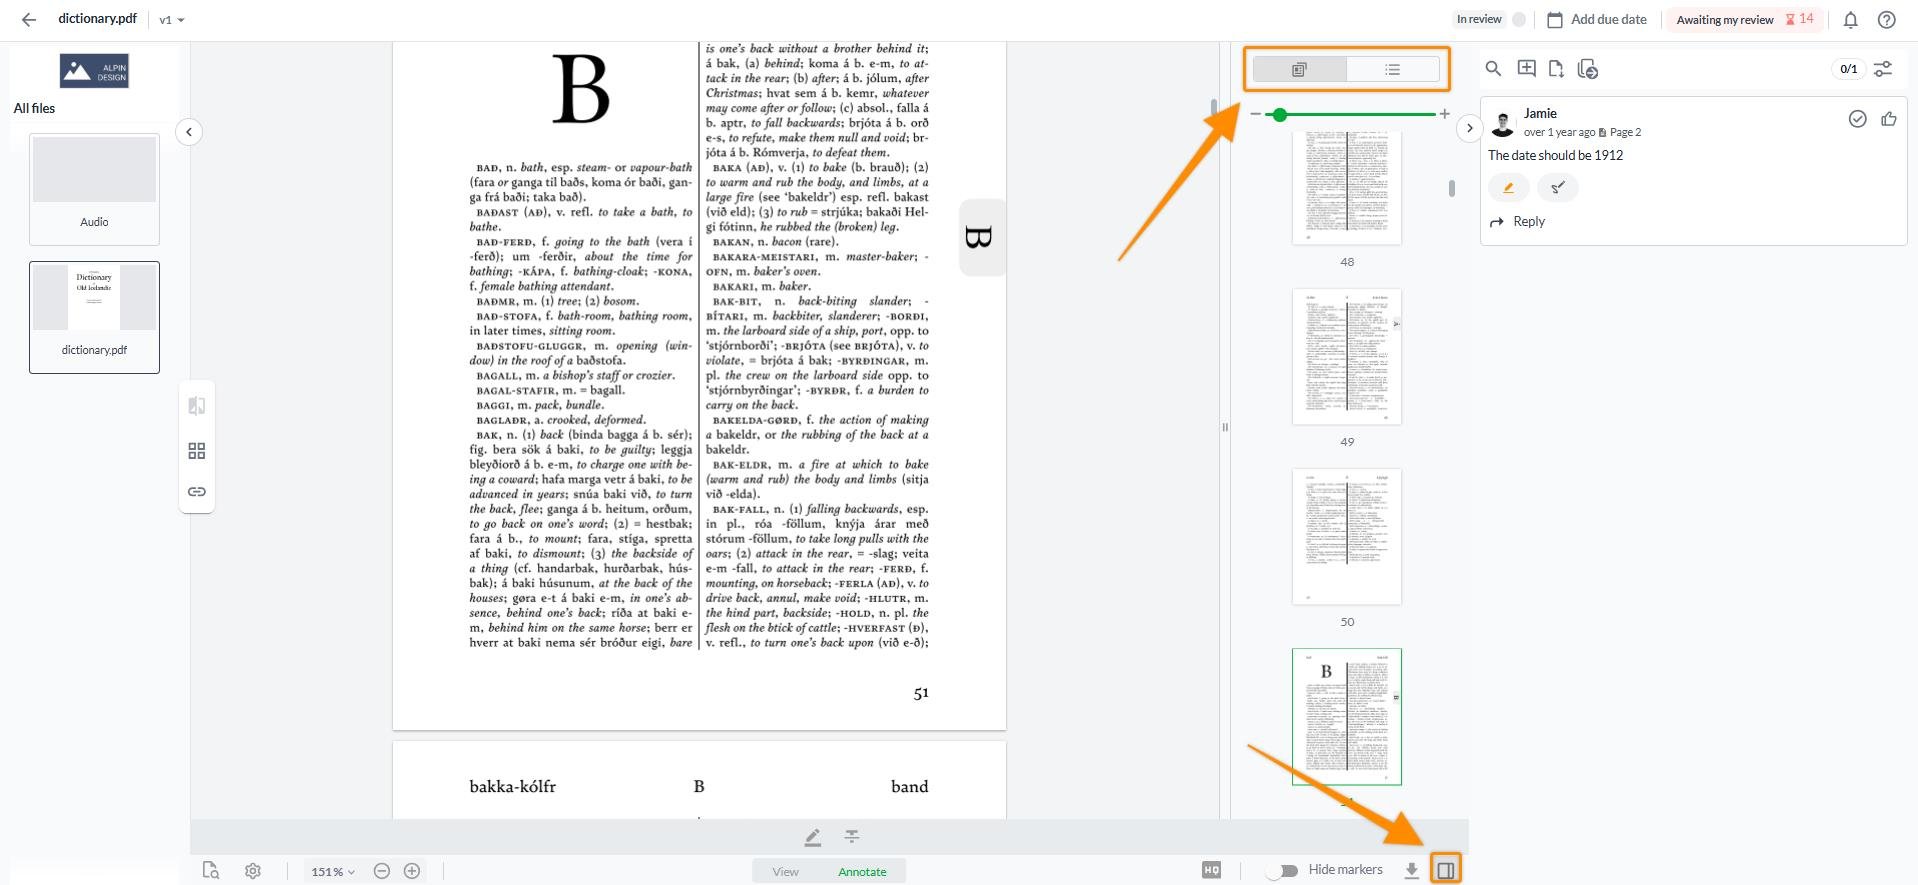
As you might be used to with PDF tools, you can now switch the page overview on the right side of your file view between the regular thumbnail view and the document outline view.
The Outline and thumbnail view can be opened by clicking the bottom panel icon.
You can switch between the two options by clicking on the selection above the overview.
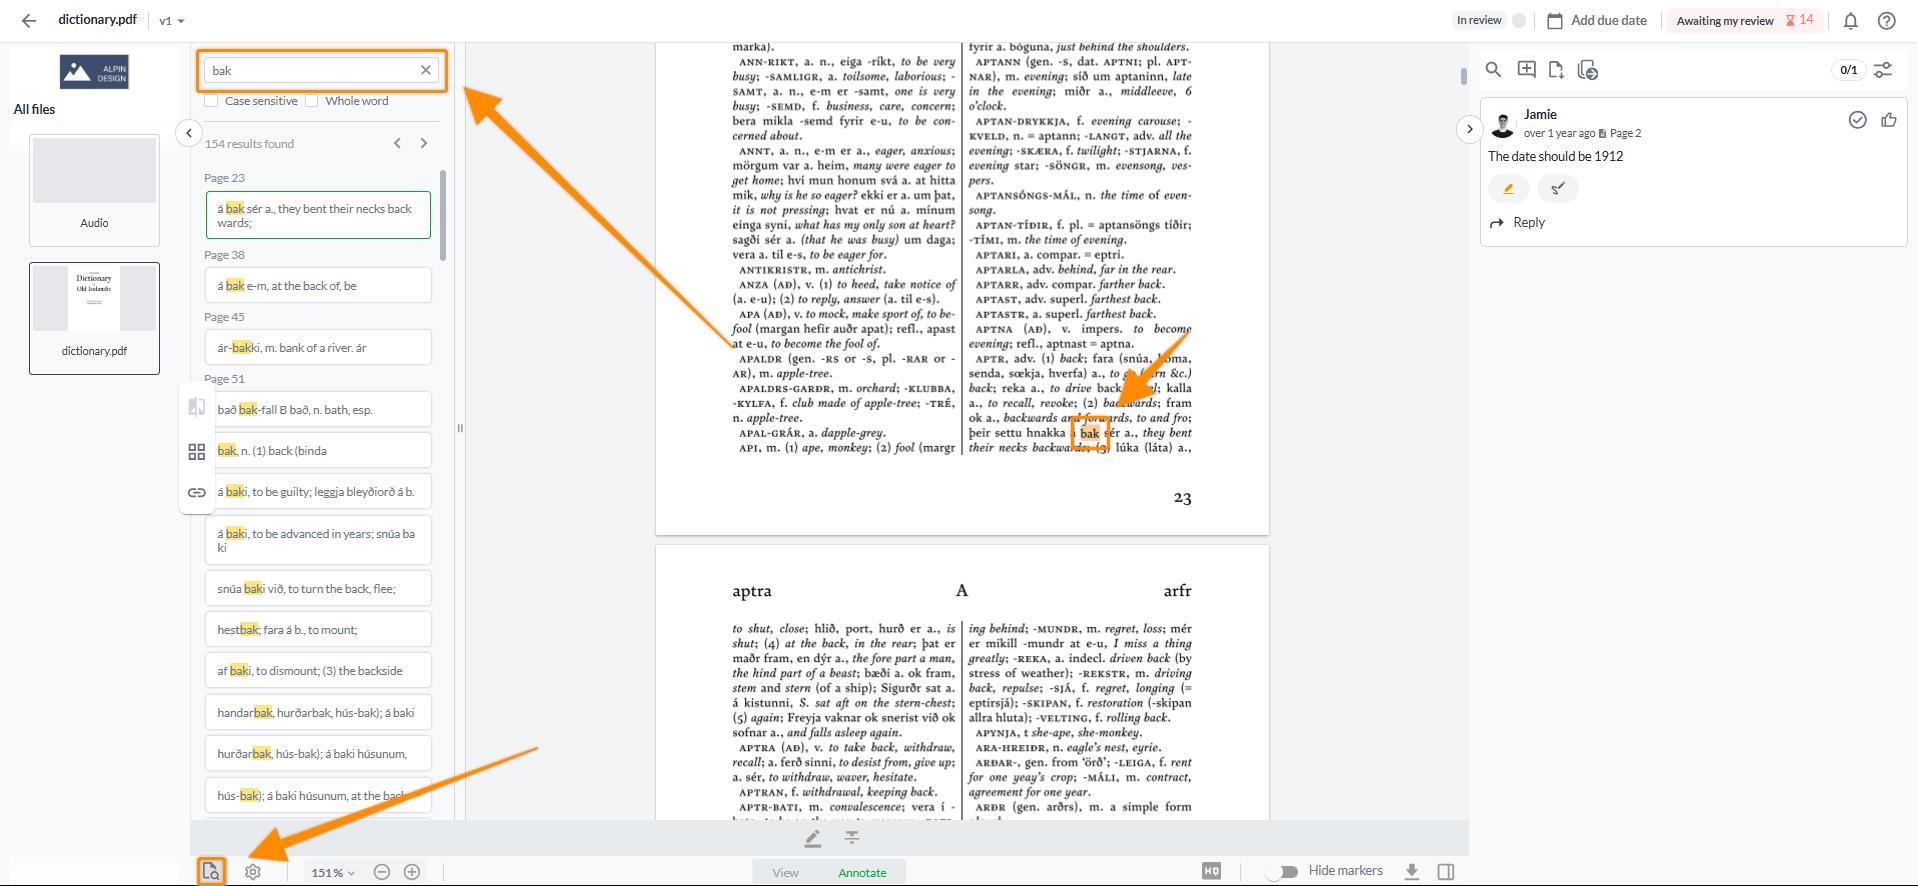
You can now search and display text within your document to find desired text segments faster.
Click on the magnifying glass icon in the lower-left corner of your file view to open the search bar.
Enter your search term and see all matching words in the document with their related page number.
If you click on one of the search results, the file view will jump to the corresponding position in the document.
You can also adjust the width of the sidebars by dragging them outward.
When you upload documents, some elements in the original file are converted to look pixelated when you zoom in. These elements can be text or images. We do this to speed up the experience. If this is the case for you, you can switch to High Quality, which provides the original resolution, including zooming capability.

As usual, you can export a review report that shows you the general document information, the submitted reviews of your reviewers, and their comments. The difference to the export of other uploaded file types (video-, image-, audio files) is that embedded PDF comments are displayed, and you can only download the review report of the version you are currently viewing.
 What´s next? After understanding how to use comments, learn how to review several files at once.
If you have any questions or comments, please contact us through chat or email at support@filestage.io.