Microsoft Power Automate is a cloud-based service that allows users to create automated workflows between various apps and services, streamlining repetitive business processes and integrating applications without the need for extensive coding knowledge.
Power Automate offers a wide variety of ready-made connectors. Currently, Filestage doesn't have one. To connect with Filestage, we'll need to send a request to our API. Thankfully, due to our comprehensive API documentation, there are many potential integration possibilities between Power Automate and Filestage.
_________
1 - Create a new flow
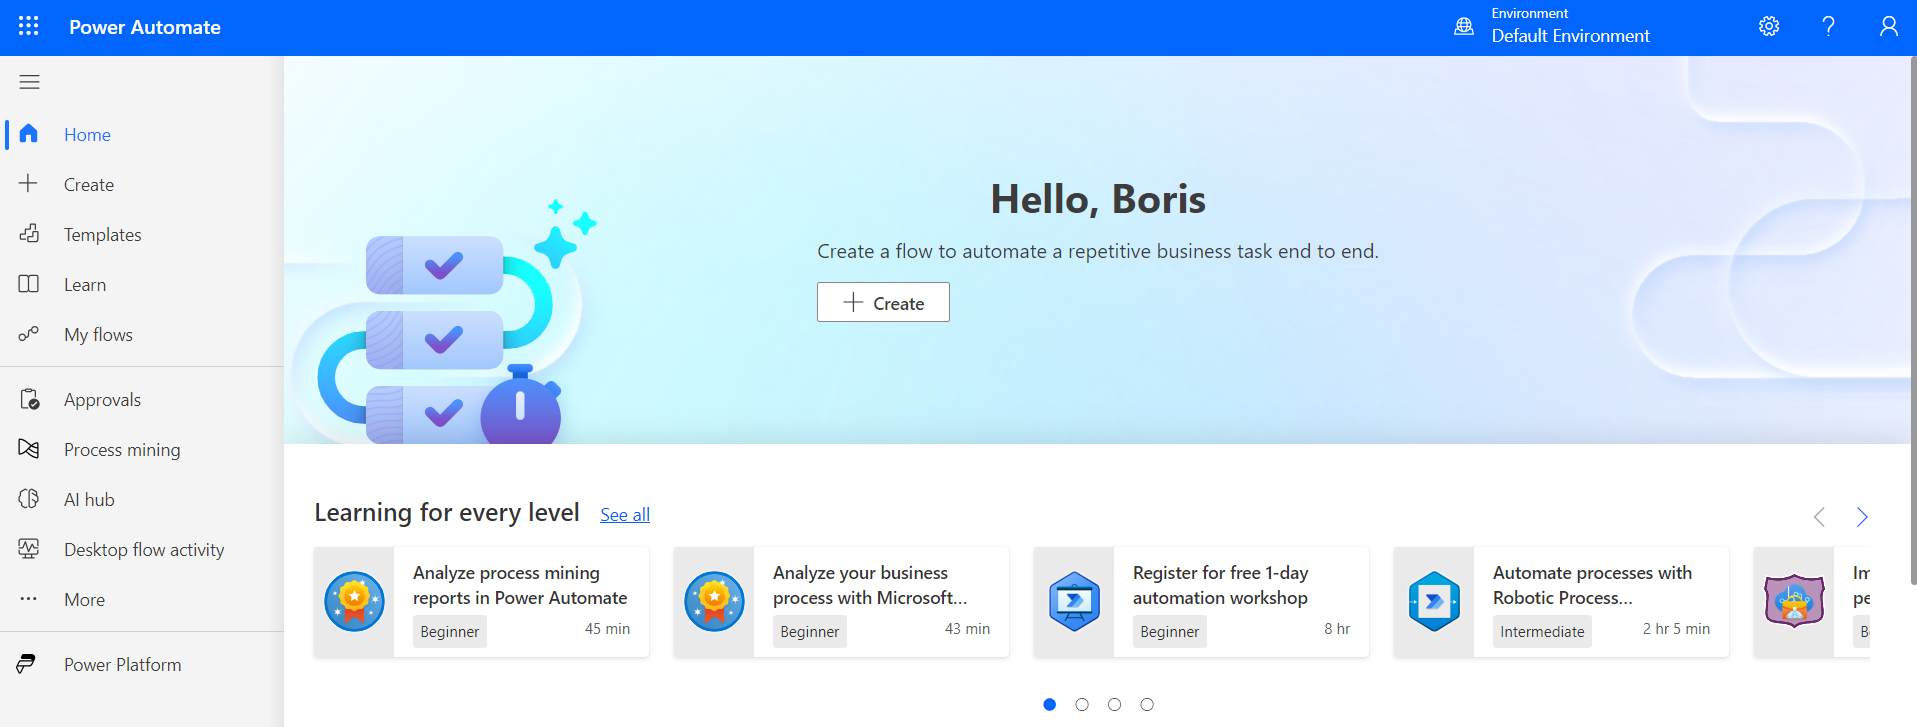
Click the Create button in the left sidebar of the home page.
_________
2 - Choose how to make a workflow
There are three ways to create new workflows: starting from blank, from a template and from a connector.

The trigger is the event that starts the automation. Triggers can be started instantly or manually, on a schedule, or automatically when an external event occurs. In this example, we will create an instant trigger that activates whenever a file review status changes to "approved" by setting up a webhook.
_________
1 - Setup a webhook
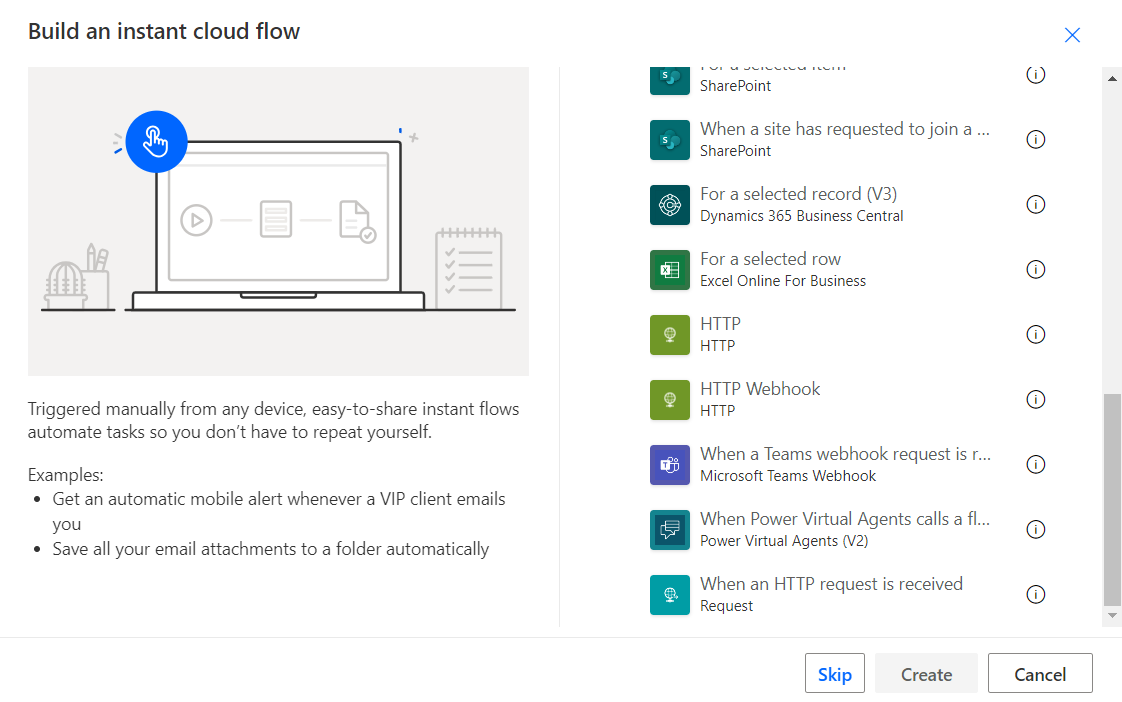
Click on Instant cloud flow
When choosing the trigger, scroll down and click on When a HTTP request is received
_________
2 - Add an action step
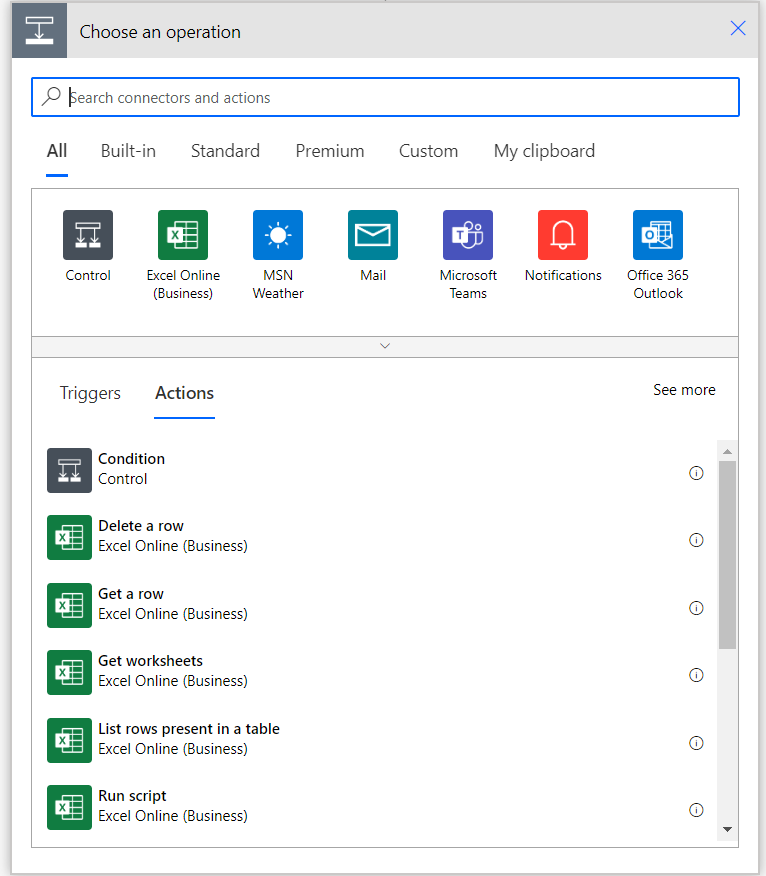
You can add a new action by clicking on New step. Here you can choose from a list of already existing actions and connectors, or set up an HTTP request yourself (like you will be shown later).

_________
3 - Save the workflow
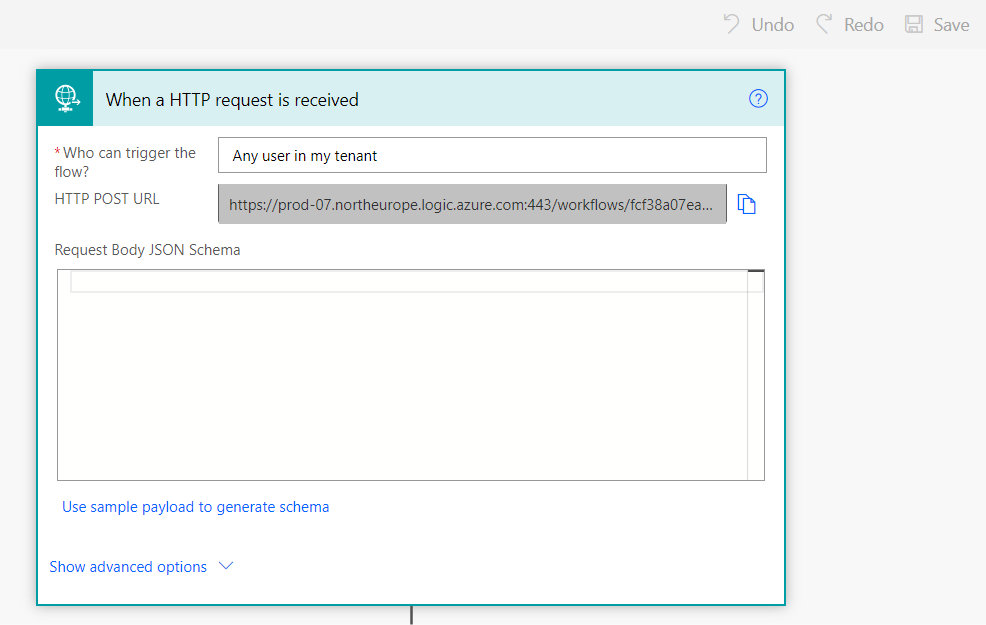
Once you have added at least one action step, you'll be able to save your workflow. This will generate a URL for your webhook.
_________
4 - Add the webhook to your Filestage team
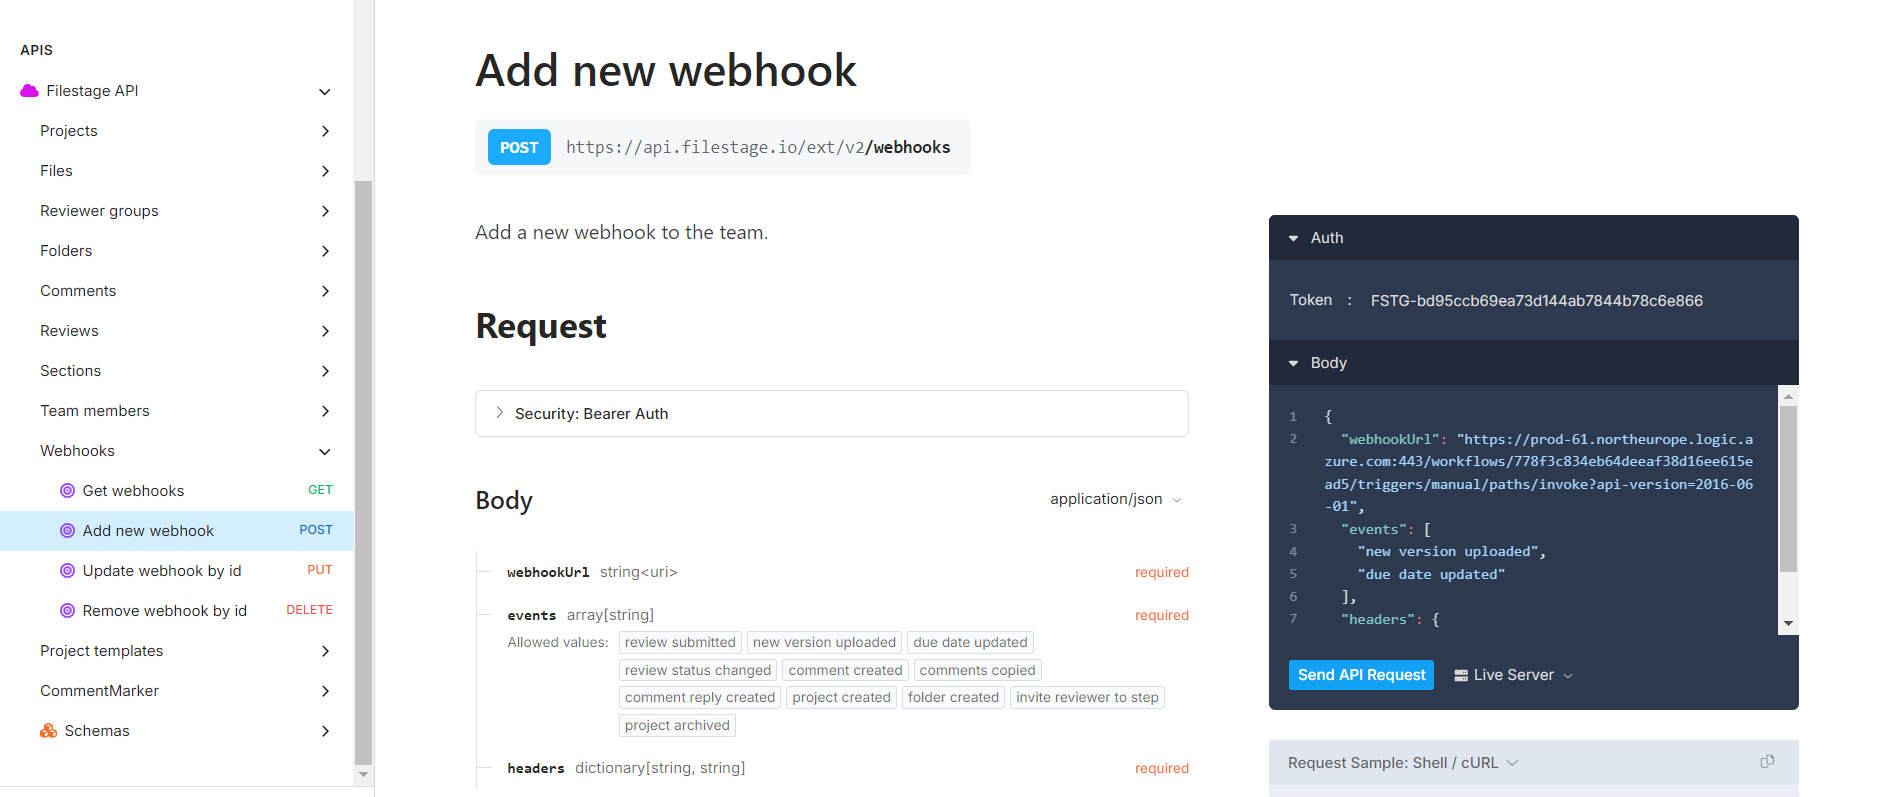
After creating a new webhook, go to our API documentation, scroll down to the Webhooks section, and click on Add a new webhook.
Paste your Filestage API key into the Token: field.
Paste your webhook URL after webhookUrl.
Specify the events that you want to trigger the webhook.
Click on Send API request.
If the response says 201 Created, your webhook has been added successfully.
_________
5 - Test your webhook
Once you have setup your workflow, click Test in the top left corner of the Power Automate editor
Actions are tasks performed when a trigger runs. Once you have chosen your trigger event, you need to choose what action you want to be performed in Filestage from our available API endpoints.
_________
1 - Choose your trigger event
Click on Instant cloud flow
Click Skip
Type in the name of the app you want to use as the starting point of your workflow, and select the trigger event.

_________
2 - Setup a HTTP request
To add a new action, click on New step. Since Filestage currently does not have a connector in Power Automate, you’ll need to set up an HTTP request manually.
In this example, we want every new file uploaded in the Test folder of OneDrive to be transferred to the Incoming folder of Filestage. For this, we will use the Upload File endpoint.
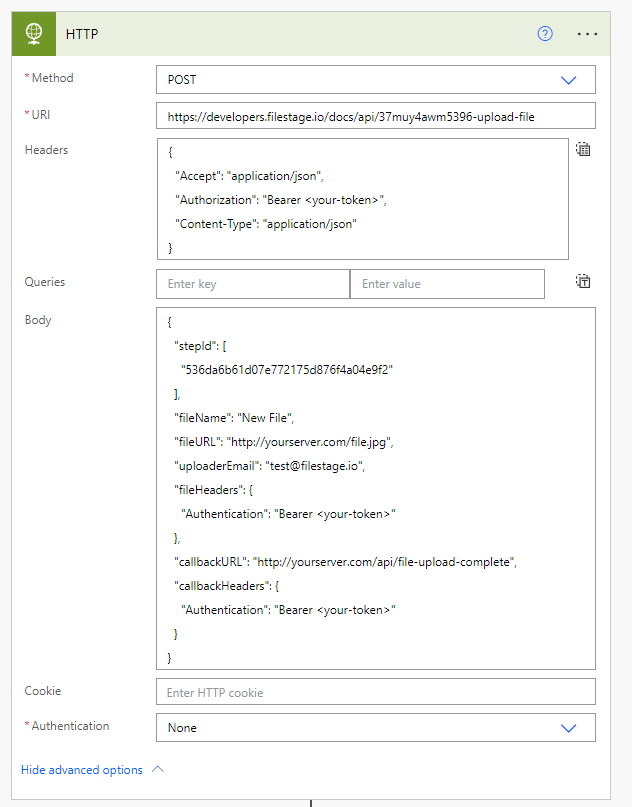
Select the HTTP module.
Choose the API request type; in this case, it's a POST request.
Copy the endpoint URL in the URI field.
Add a header containing the accepted media types and your Filestage API key, which is necessary for the authentication. Additional parameters may be needed depending on the endpoint. You can add the header either manually or by entering it in JSON format.
If your request needs it, add a body filling it out with your parameters. In this case, since we want the file from OneDrive to be uploaded in Filestage, we want to specify the stepID, fileName, fileURL and uploaderEmail.
Save your workflow.
_________
3 - Test your action
Once you have setup your workflow, click Test in the top left corner of the Power Automate editor.
 What's next? Once you integrated Filestage with another tool, see how you can integrate Filestage with Slack.
If you have any questions or comments, please contact us via our chat or email at support@filestage.io.