⚠️ Please note: To use this plugin, you need an Adobe Creative Cloud subscription and an installed version of Adobe Premiere Pro.
With the Filestage plugin for Adobe Premiere Pro, you can upload sequences directly from Premiere Pro to Filestage. This allows you to skip the manual process and start the review instantly.
Furthermore, the feedback received on sequences can be reviewed directly in Premiere Pro without going back to Filestage.
Locate the plugin in Adobe Creative Cloud
You can access the plugin via the following link: Filestage plugin for Premiere Pro
Or search for Filestage plugin in the Creative Clouds marketplace and open it
Install the plugin
Click on Get in the upper right corner of the screen and accept the Third-Party information.
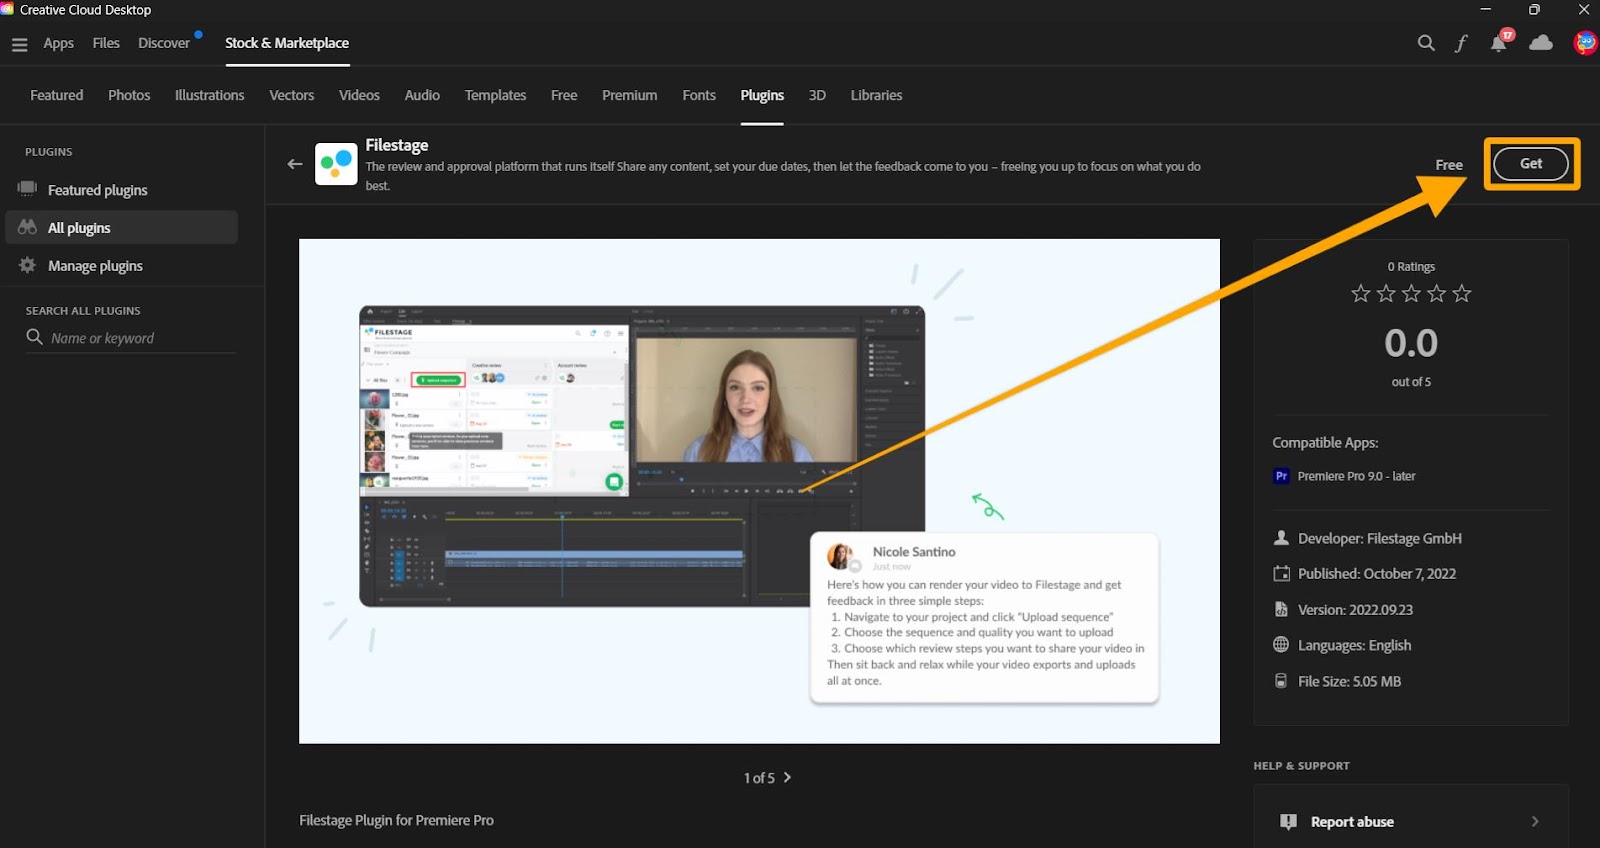
Filestages Plugin for Premiere Pro will be installed
Activate the plugin inside your Premiere Pro project
Open the desired Premiere project you want to integrate with Filestage.
Click on Windows in the top bar and go to Extensions in the dropdown menu. Now select Filestage.
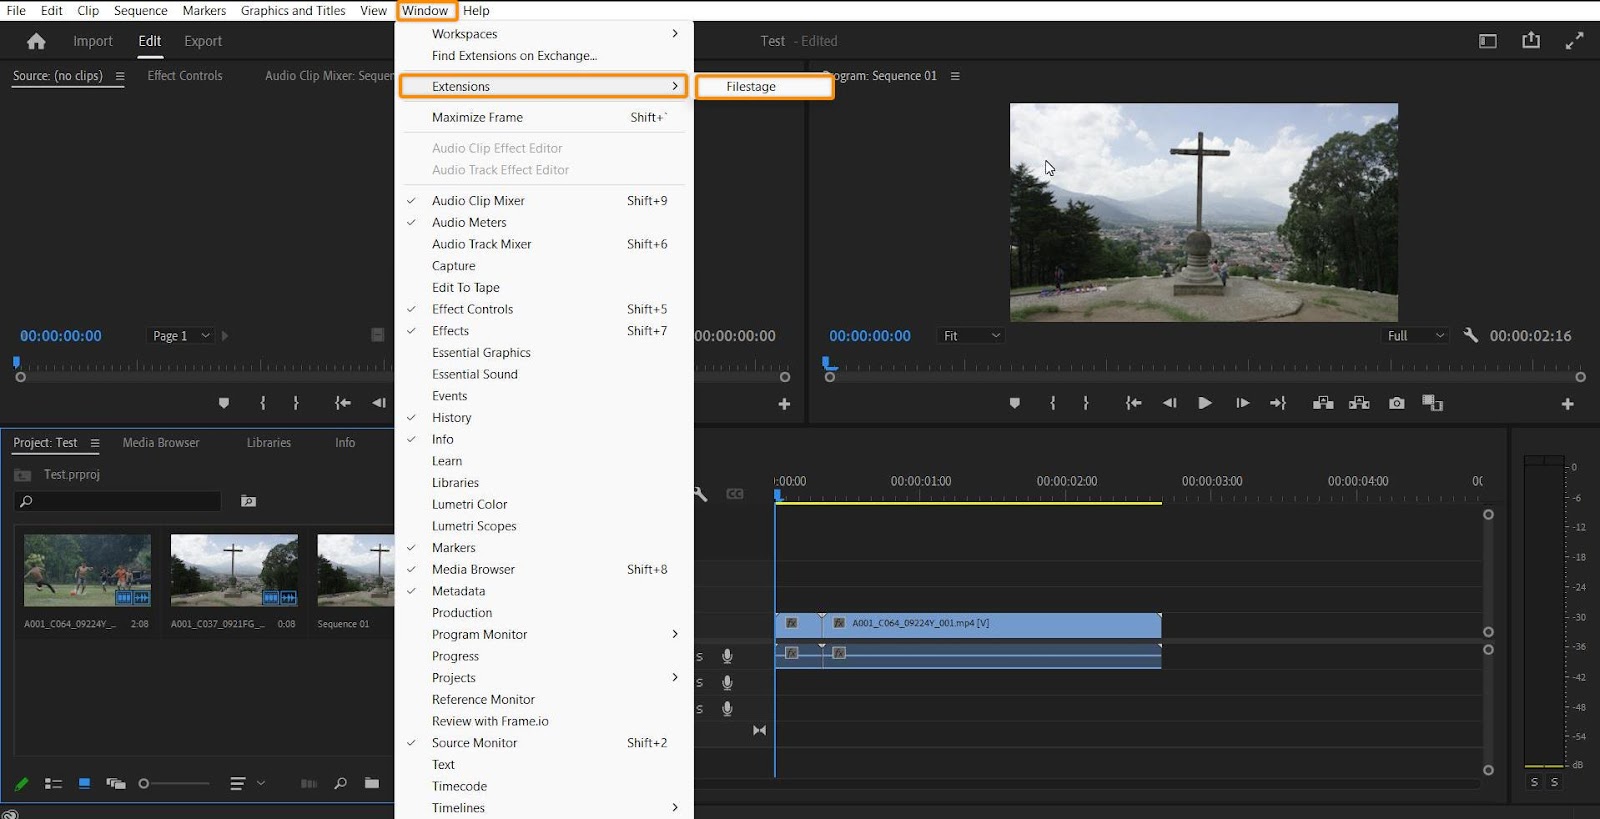
You will now see the Filestage plugin window in your project.
To disable the plugin again, you need to go through the previous steps again and click on the Filestage extension.
You can see if the plugin is enabled or disabled by the checkmark next to the plugin.
Could not display content
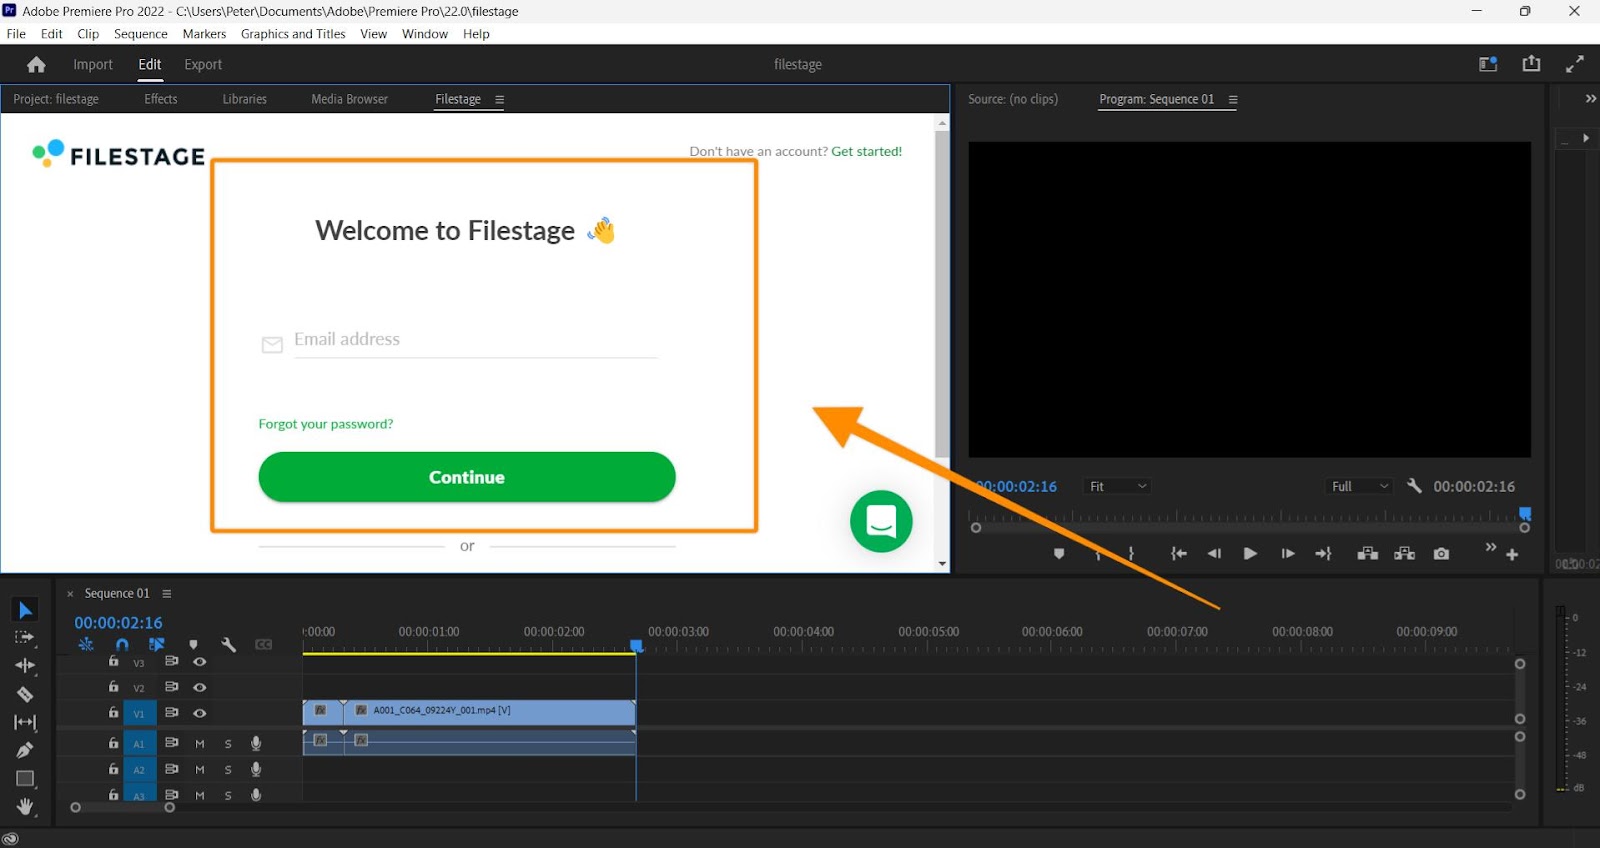
Log in to your Filestage account
Fill in your login information and enter your Filestage account.
You can now navigate through Filestage just like you would in a browser.
Select the project in Filestage to which you want to upload a sequence
In the project list, select the project where you want to upload the sequence for review.
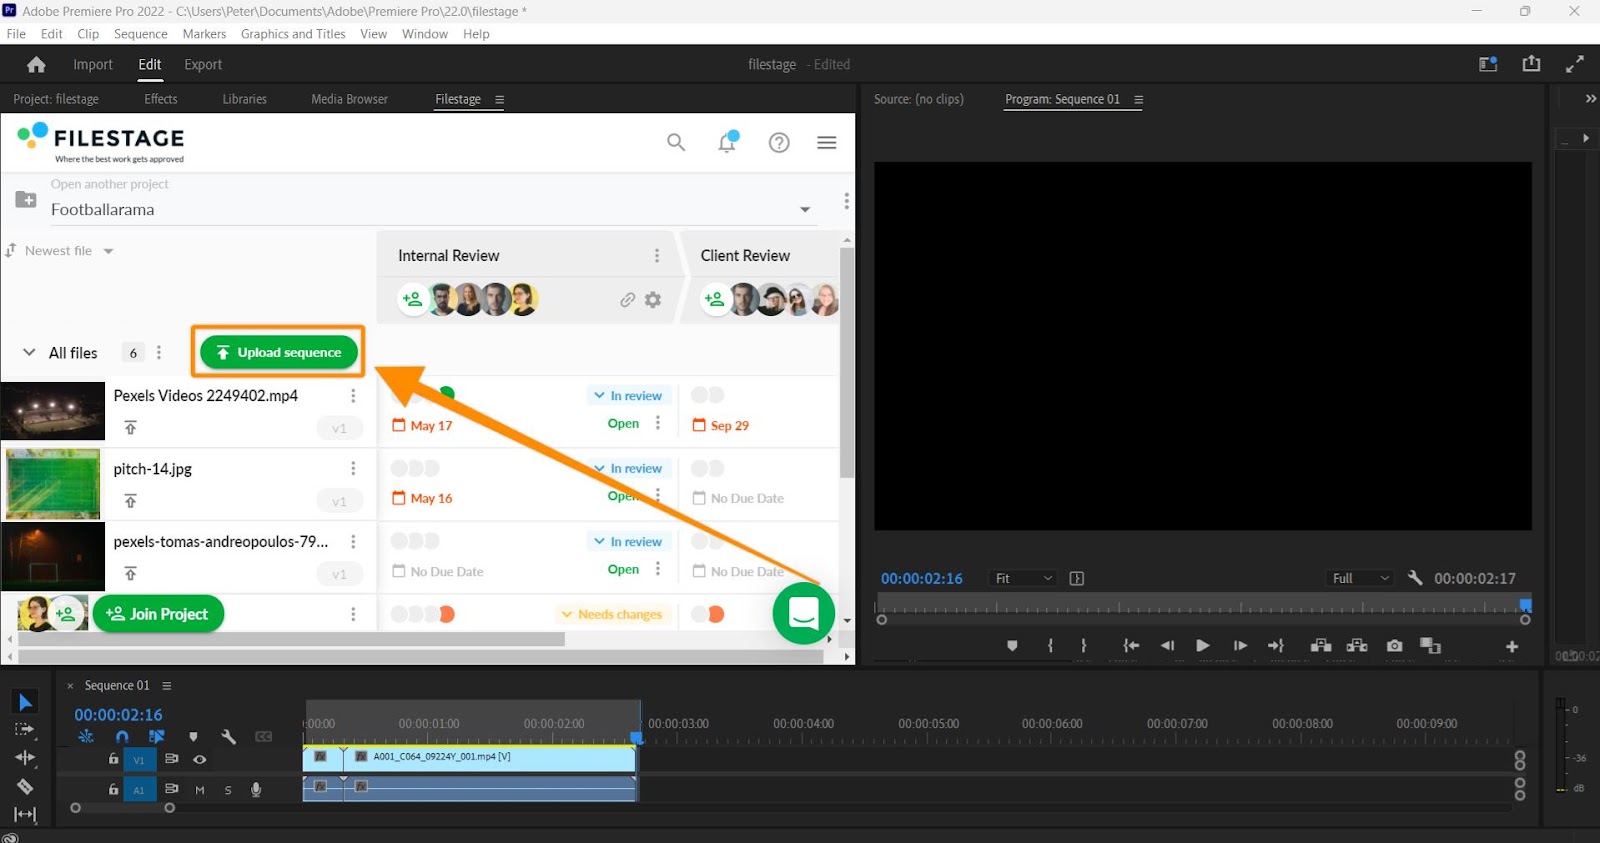
Upload the sequence
Click Upload sequence in the selected project.
Select the sequence from the Premiere Pro project you want to upload and its resolution. Then click on upload.
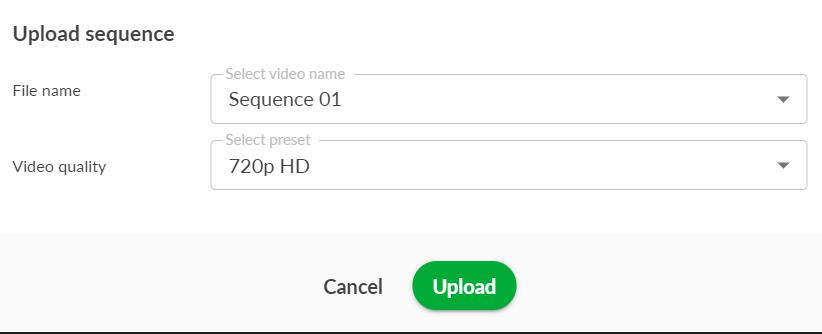
The sequence is now uploaded and can be reviewed as usual.
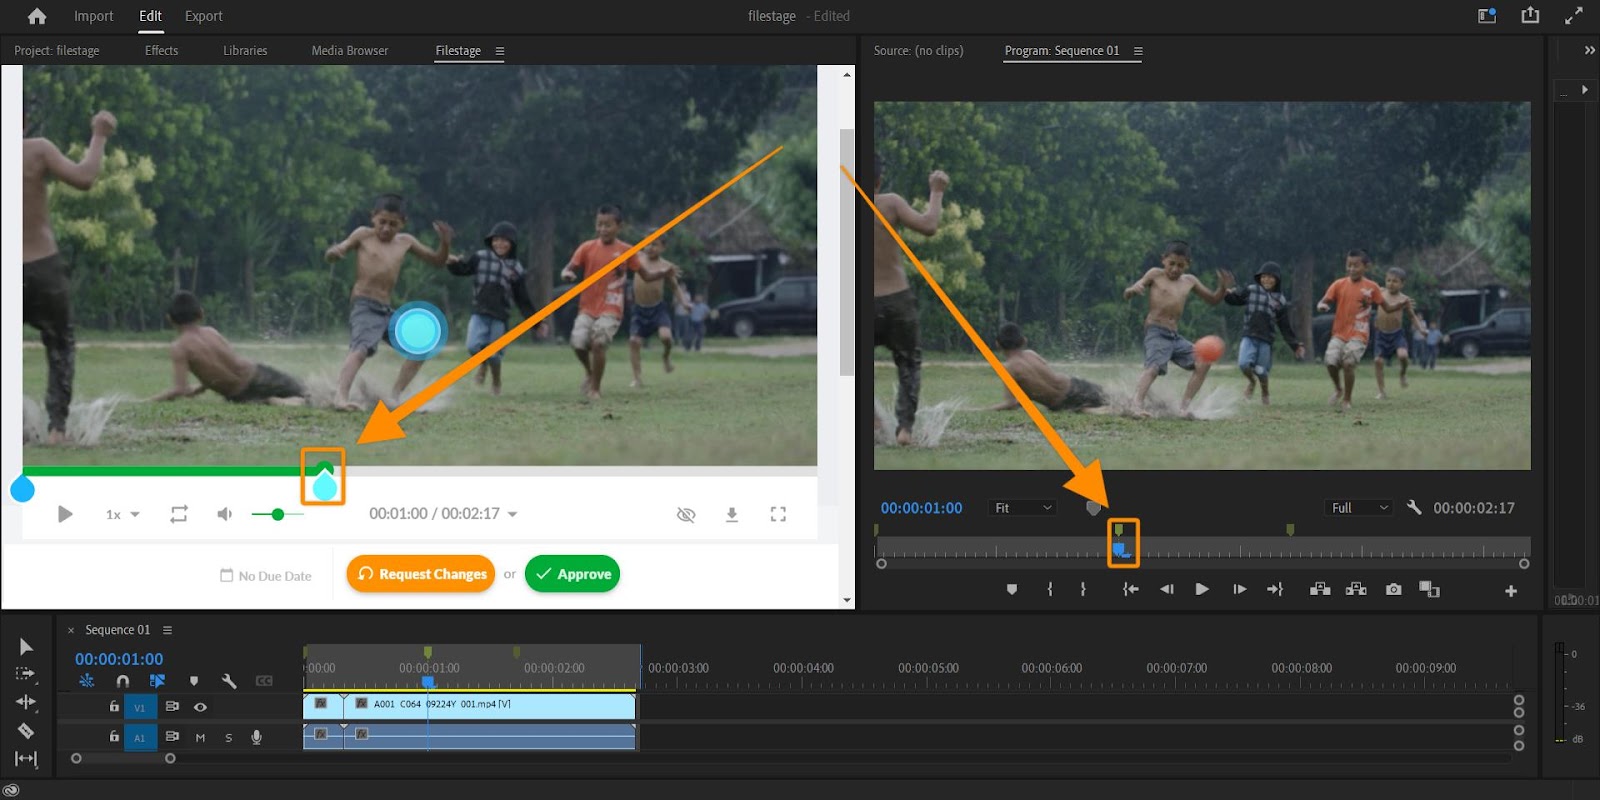
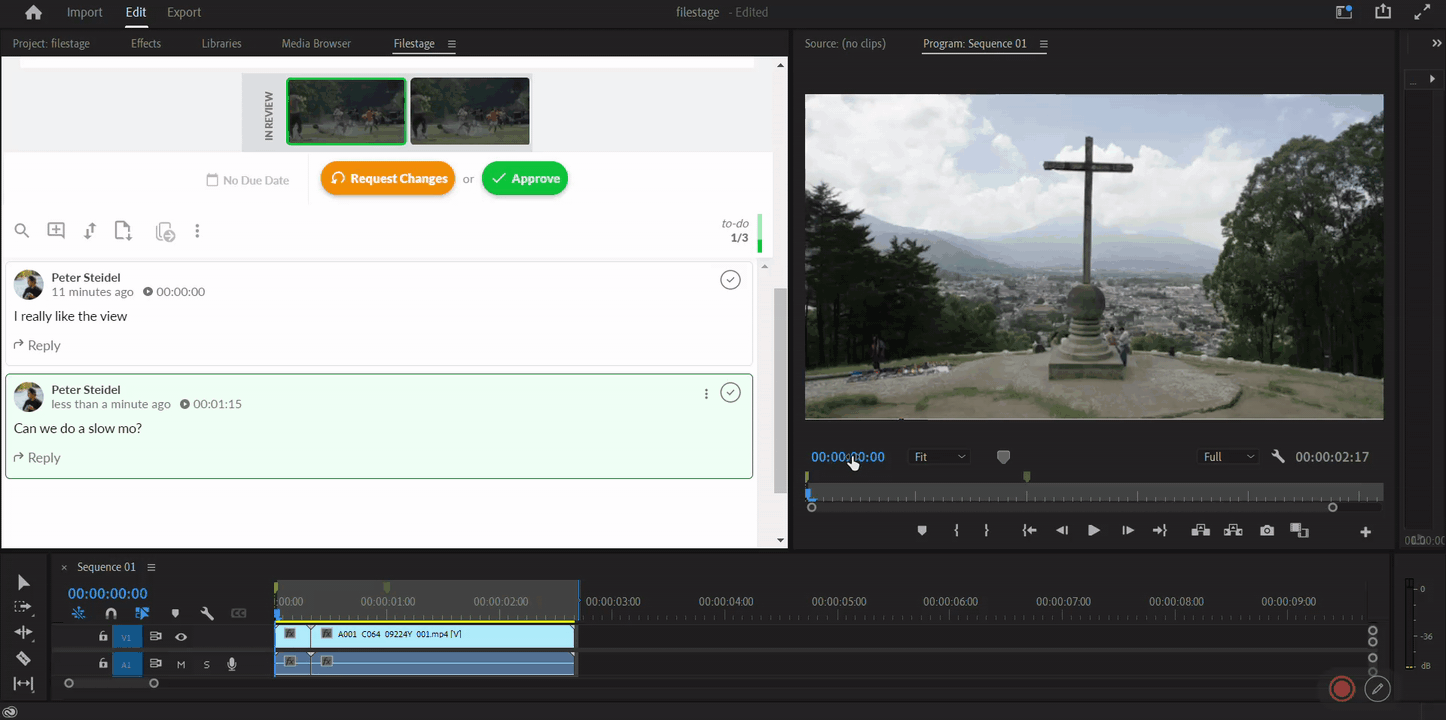
After your reviewers have given their feedback on the file. The comments are automatically synced with the sequence in Premiere Pro.
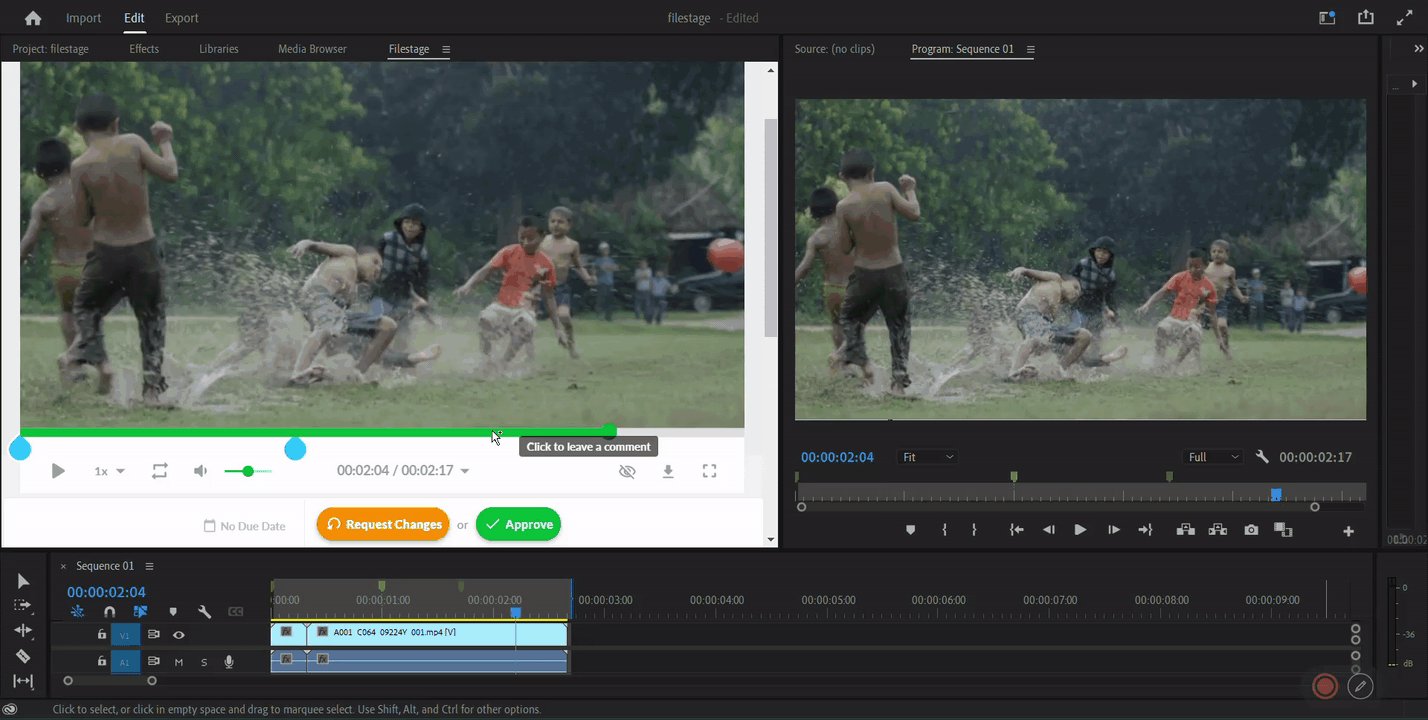
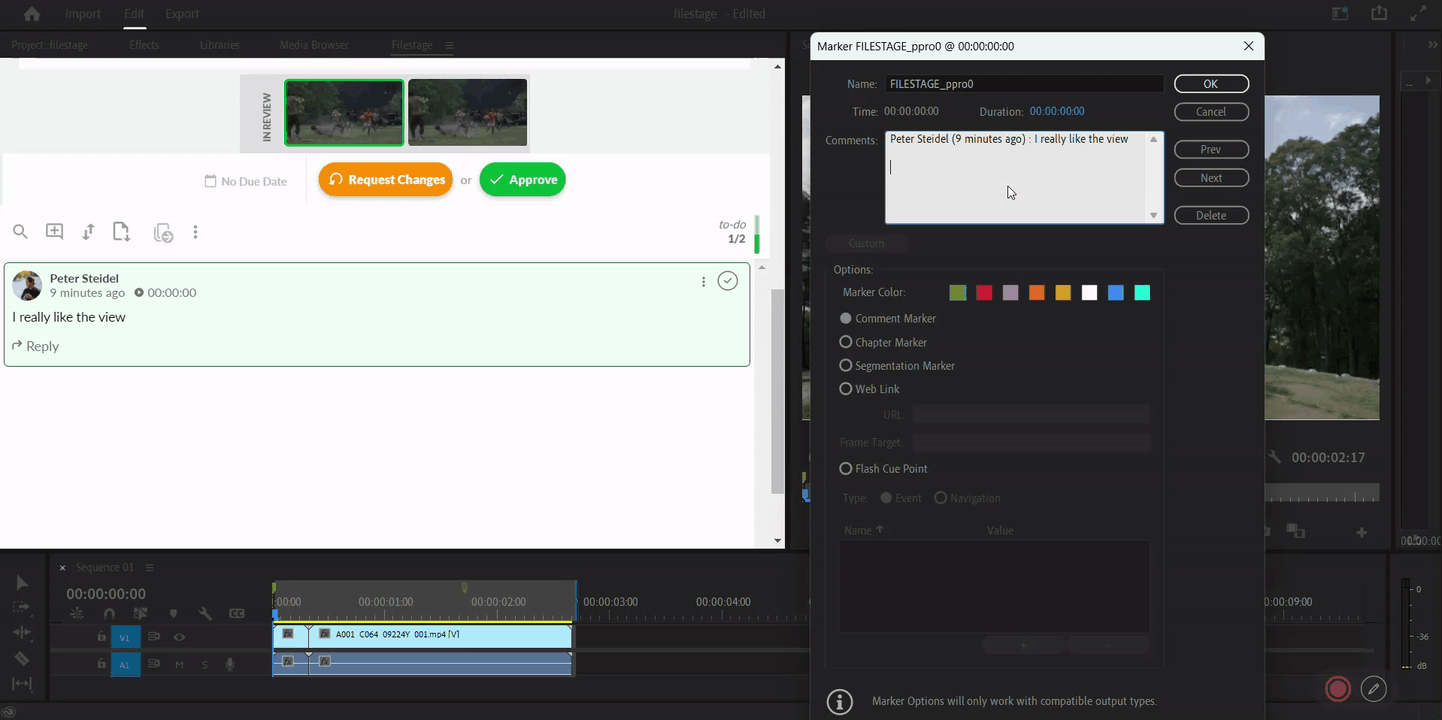
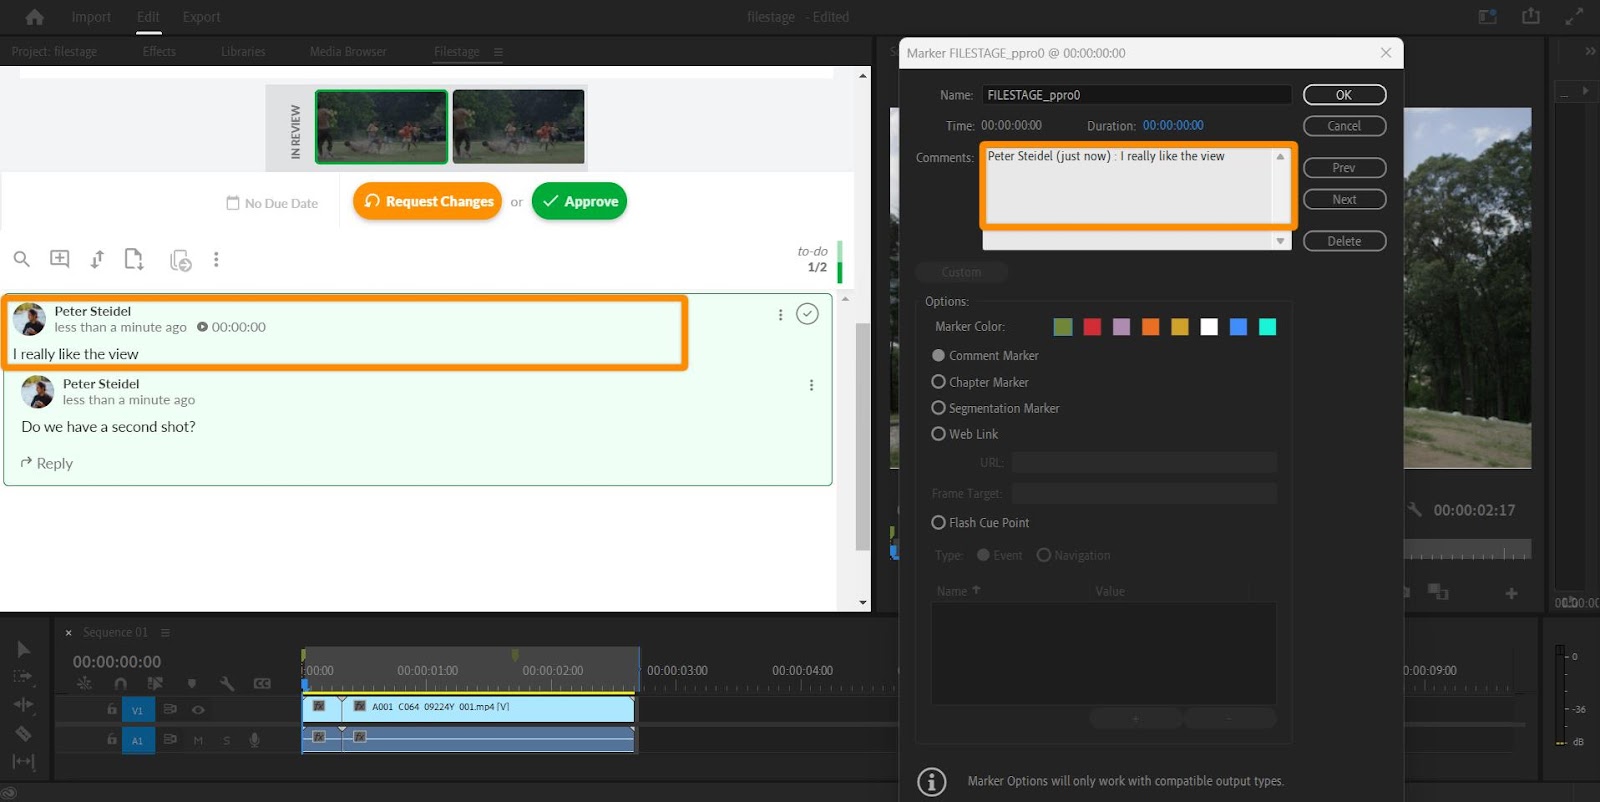
Every comment left at a certain point in the video in Filestage is transferred to Premiere Pro as a marker at the same frame.
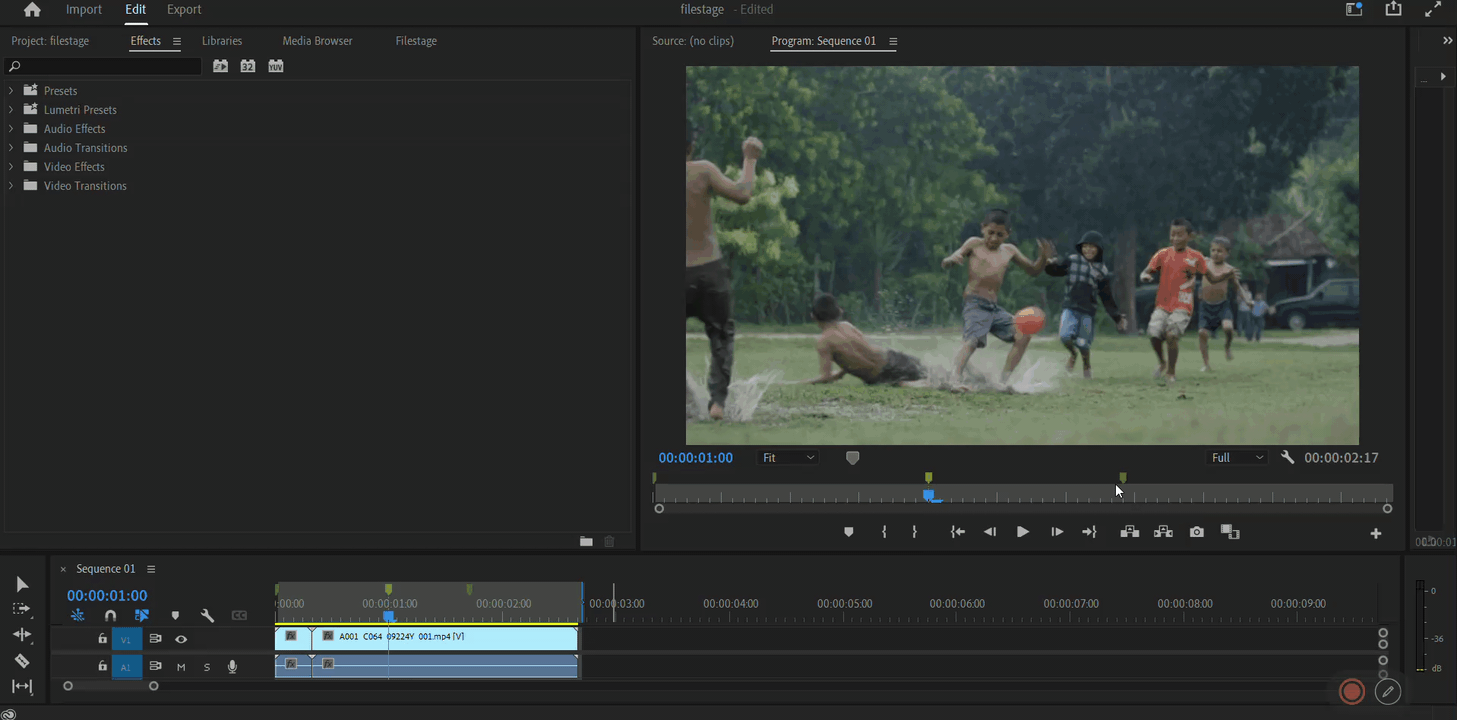
Double-clicking on the markers in Premiere Pro allows you to open the comments in the marker description without having the Filestage window active.
The playhead in Filestage is synchronized with the playhead of the sequence in Premiere Pro. When you move the playhead in Filestage, both are affected.
You can work in Filestage as usual. But please remember that the plugin works for synchronization from Filestage to Premiere Pro. Any Premiere Pro changes will not affect the uploaded sequence in Filestage.
You can set comments in Filestage. However, placing a marker in the Premiere Pro timeline will not create a comment in Filestage.
You can reply directly to comments in Filestage if something is unclear. Replies to comments will not appear in the Premiere Pro markers.
When you delete comments in Filestage, the associated markers are removed from the Premiere Pro timeline. Deleting markers directly in the timeline does not affect the comments in Filestage.
Annotations in comments are not displayed on the Premiere Pro viewer but only in the Filestage window.
💡 What's next? Once you're done uploading a sequence, see how to Manage different versions of a file.
Let us know if you have any questions by reaching out to us on chat or emailing us [email protected]! We're always happy to help!
