Article overview:
✅ How to ensure the best video quality in Filestage?
✅ Using the Rec. 709 color profile in Premiere Pro
✅ How to deinterlace a video in Premiere Pro?
When files are uploaded to Filestage the system transcodes them so they can be viewed on all platforms, from desktop to mobile devices.
With video files, you have many file types and export variations. In general, Filestage will present all of these accurately even after transcoding. However, to ensure the highest quality, we recommend exporting the video file in the Rec. 709 color space and converting your video into a progressive scan
To achieve optimal video display, it is important to consider both the color spectrum and resolution. To guarantee the highest color precision, we advise producing videos using the widely used Rec. 709 color space.
Right-click on the media in the project panel
Choose Interpret Footage > Main
The Interpret Footage window will open. Click on the Color Management tab
Open the Assign Profile dropdown menu
Find Rec. 709 Gamma 2.4
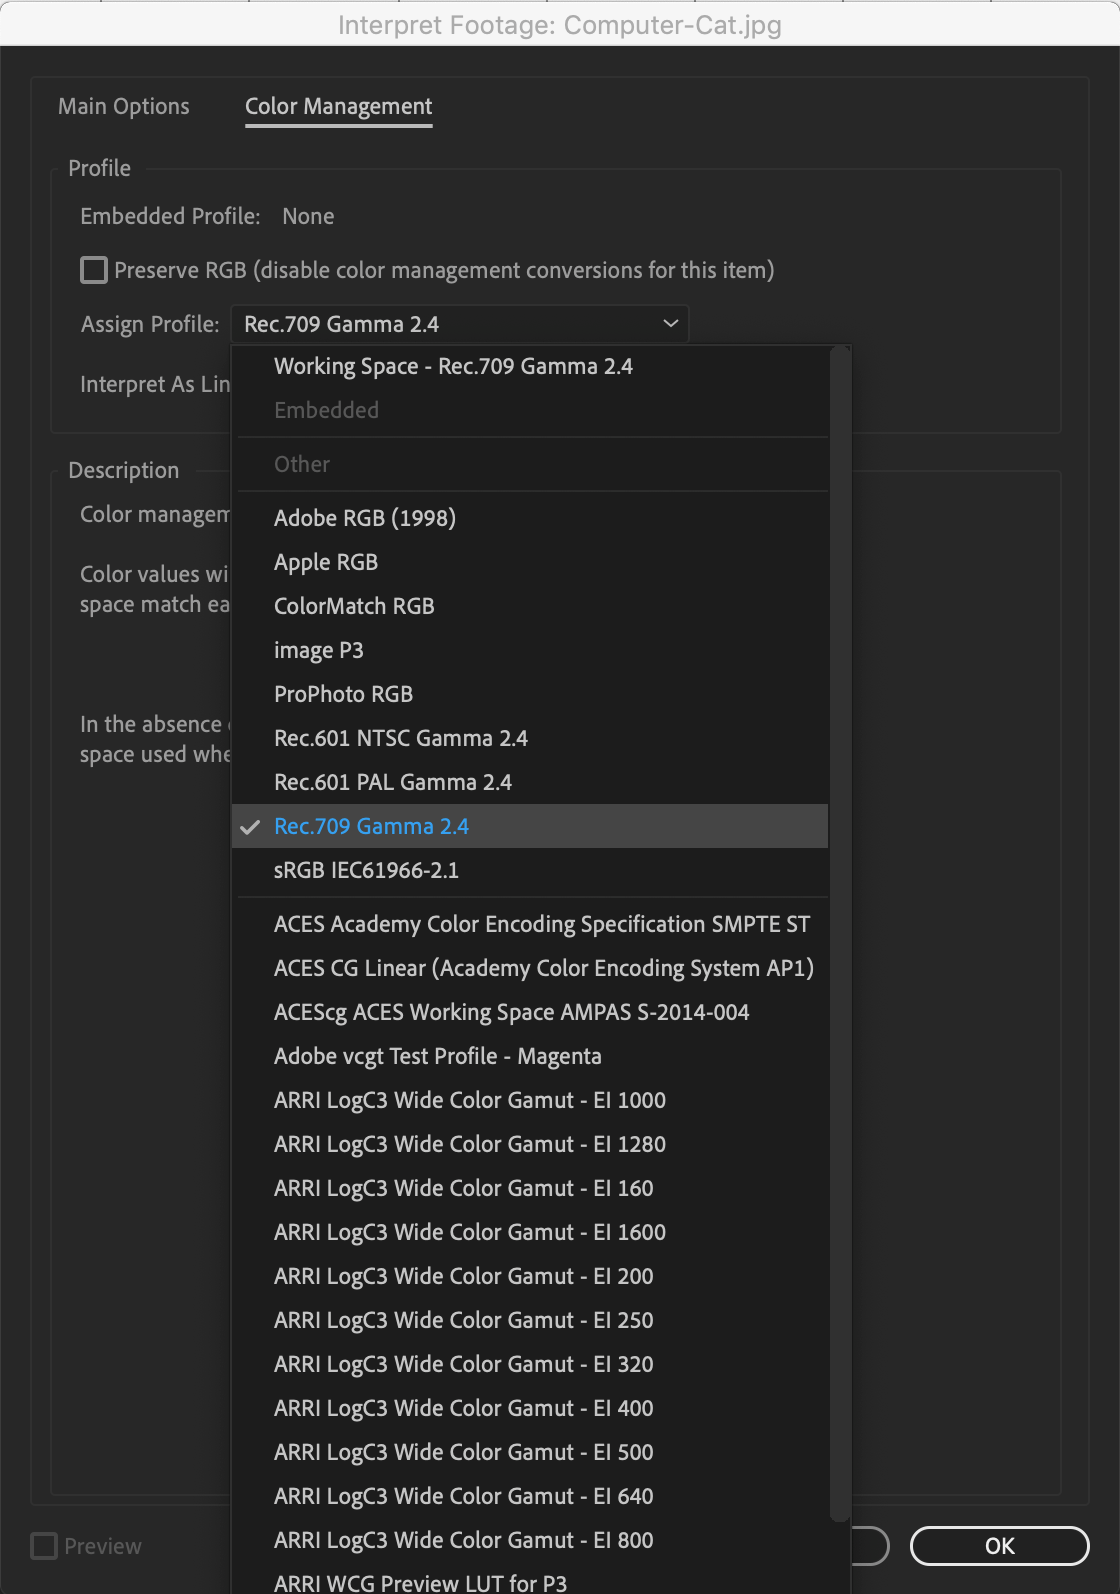
⚠️Please note: Changing the assigned profile will change the appearance of color in the media everywhere it is used in your project and will result in colors being rendered differently in your exports. Only do this if you really know that you need to.
Both 1080p and 1080i have a resolution of 1920 x 1080 pixels. The difference is in how the images are composed. "P" in 1080p stands for Progressive Scan meaning each image is a complete frame. "I" in 1080i stands for Interlaced meaning the images are sent as separate fields.
Sometimes, you may notice unsteadiness in a video when you pause the frame or slow it down. This may not be noticeable while playing at full speed, but pausing or slowing it down will reveal some shaky frames. To fix this, you can deinterlace the video to a progressive format.
Drag the footage that you want to deinterlace into your timeline
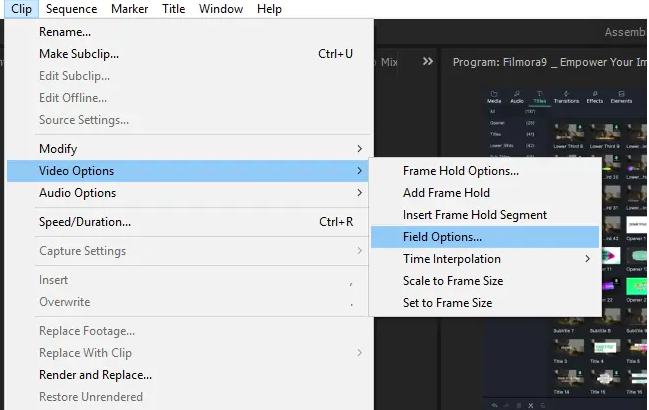
Select in the menu Clip > Video Options > Field Options
Now select the Flicker Removal option in the Field Option window
Or
3. Select Always Deinterlace, which will scan and deinterlace all footage in the timeline
⚠️ Please note: Deinterlacing footage may take a significant amount of time to complete.
💡 What's next? Once you're done with the above checklist, see how to upload your video to a project: Upload new files to projects
If you have any questions or comments, feel free to start a chat or email us at [email protected]. We’re always happy to help.
