
This feature is available on our Enterprise plan, or as a paid add-on on our Business plan. Should you have any additional questions, please reach out to our customer support via
[email protected] or via our chat.
Single sign-on (SSO) lets your team log in to Filestage with the Okta account they already use every day. No extra passwords, tighter security, and full control over who can access your projects - and connecting Okta via SAML 2.0 only takes a few minutes.
How single sign-on via SAML 2.0 can help you
Connecting Filestage to Okta makes logging in easier for your team and gives your admins central control over access:
No extra passwords - everyone signs in to Filestage with their existing Okta account.
Central access control - decide in Okta who can access Filestage and remove access in one place when someone leaves your organization.
Enterprise-grade security - your authentication policies, like multi-factor authentication, automatically apply to every Filestage login.
How to set up SSO with SAML 2.0 (via Okta)
Step 1: Get your SAML details from Filestage
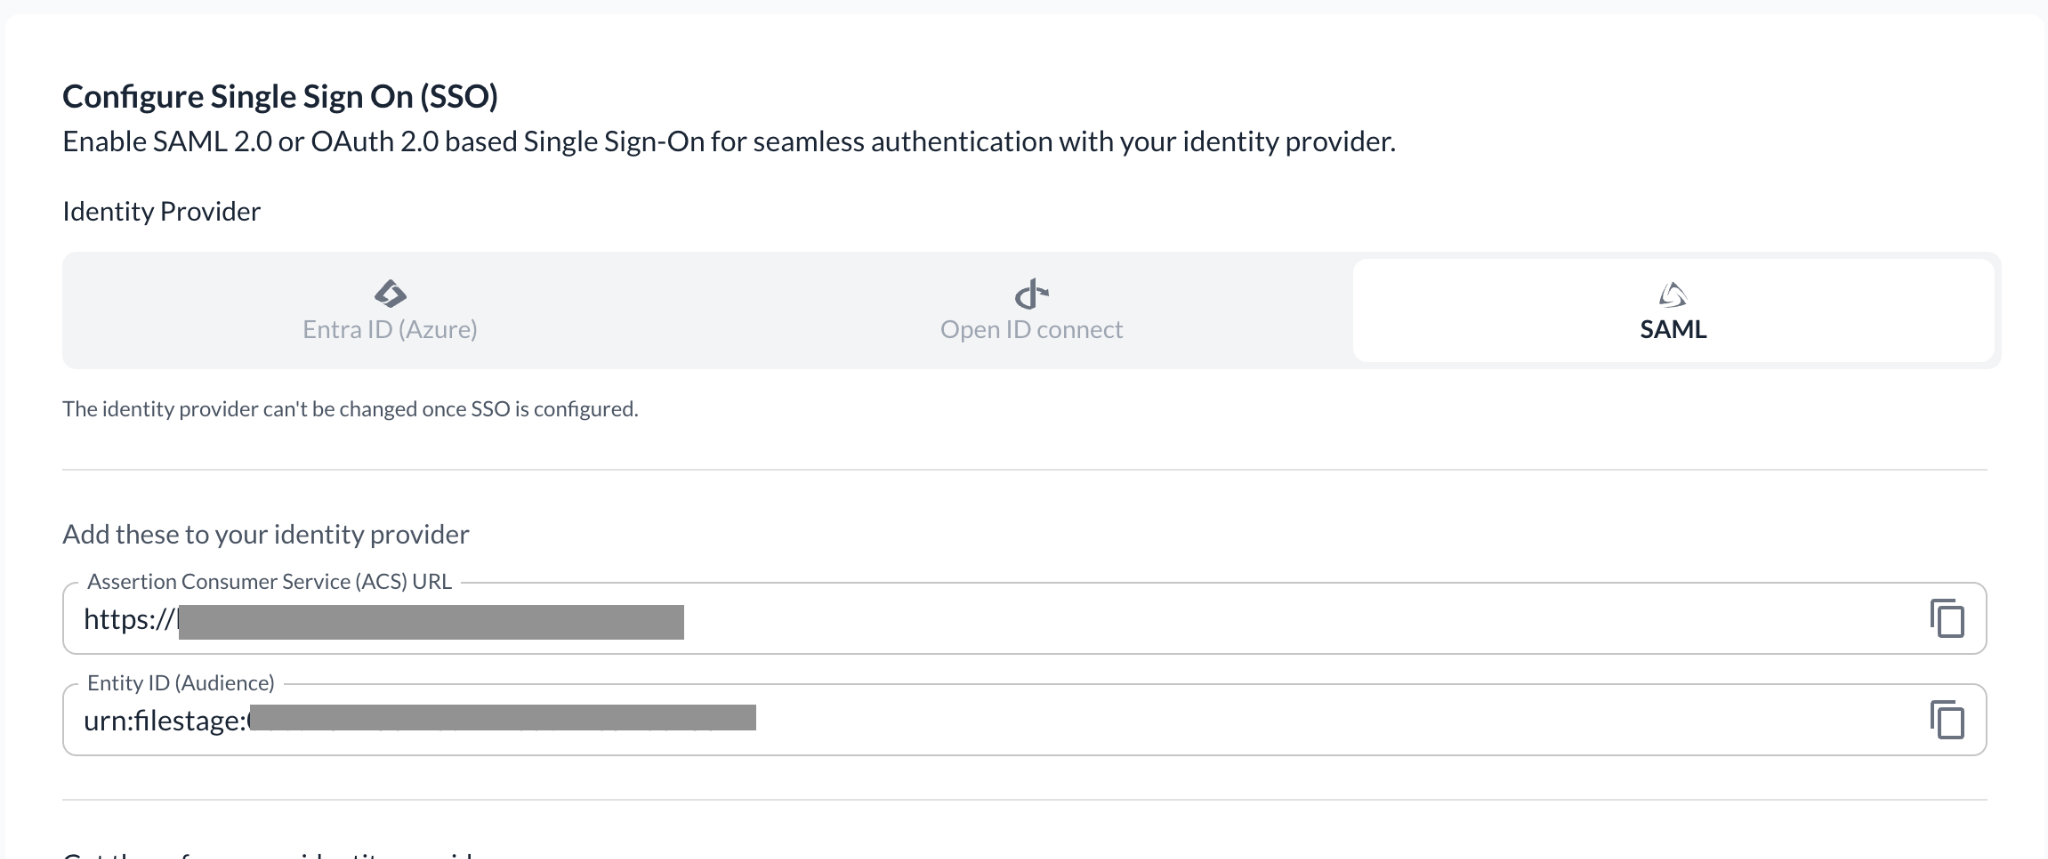
In Filestage, go to app.filestage.io/teams/security-and-privacy - this opens the security and privacy settings of your last selected team. Scroll down to the Identity and Access Management (IAM) section and click Configure SSO. Select the SAML tab. Copy the two values shown under Add these to your identity provider: the Assertion Consumer Service (ACS) URL and the Entity ID (Audience) - you'll need both in Okta.
 |
Step 2: Create the SAML app in Okta
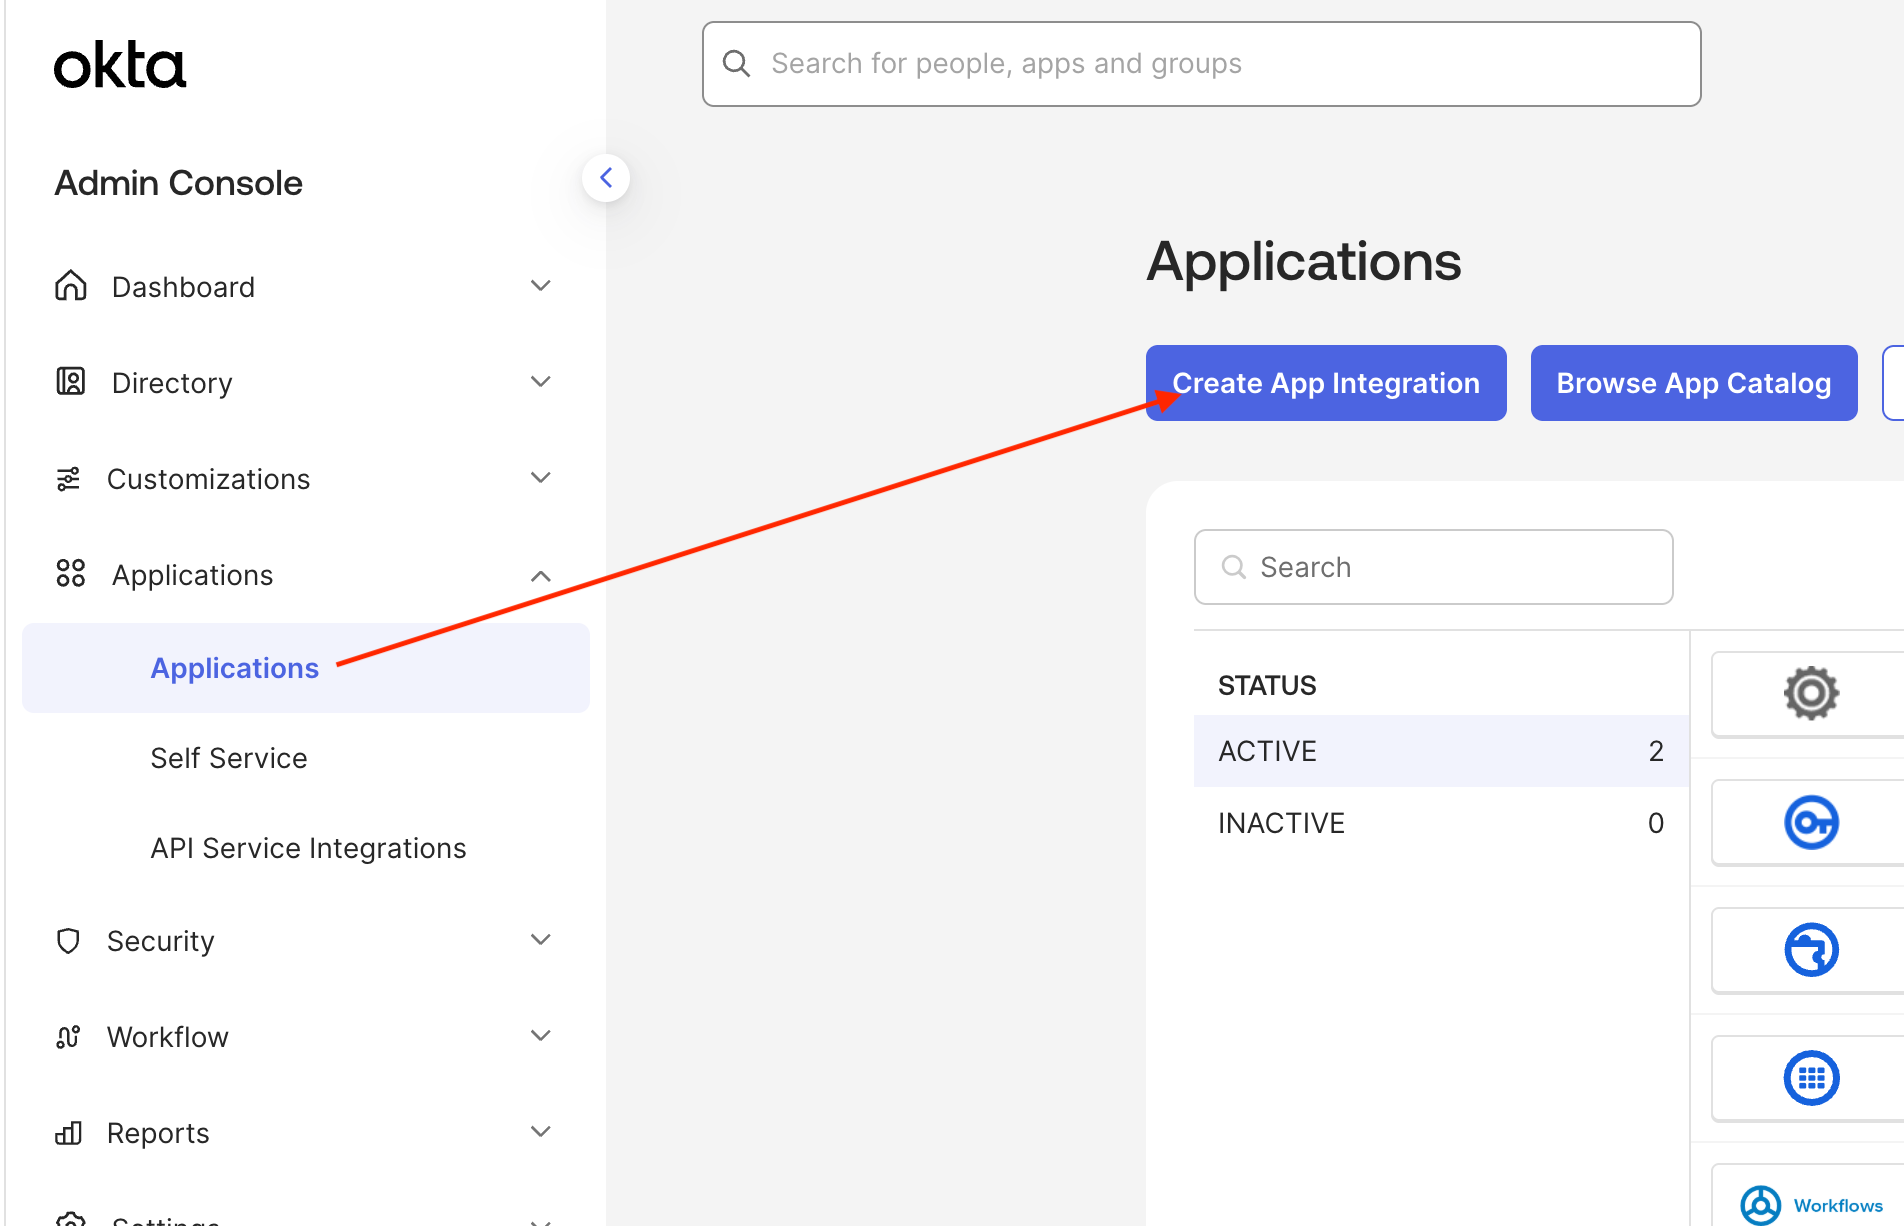
Log in to your Okta Admin Dashboard. Navigate to Applications > Applications and click Create App Integration.
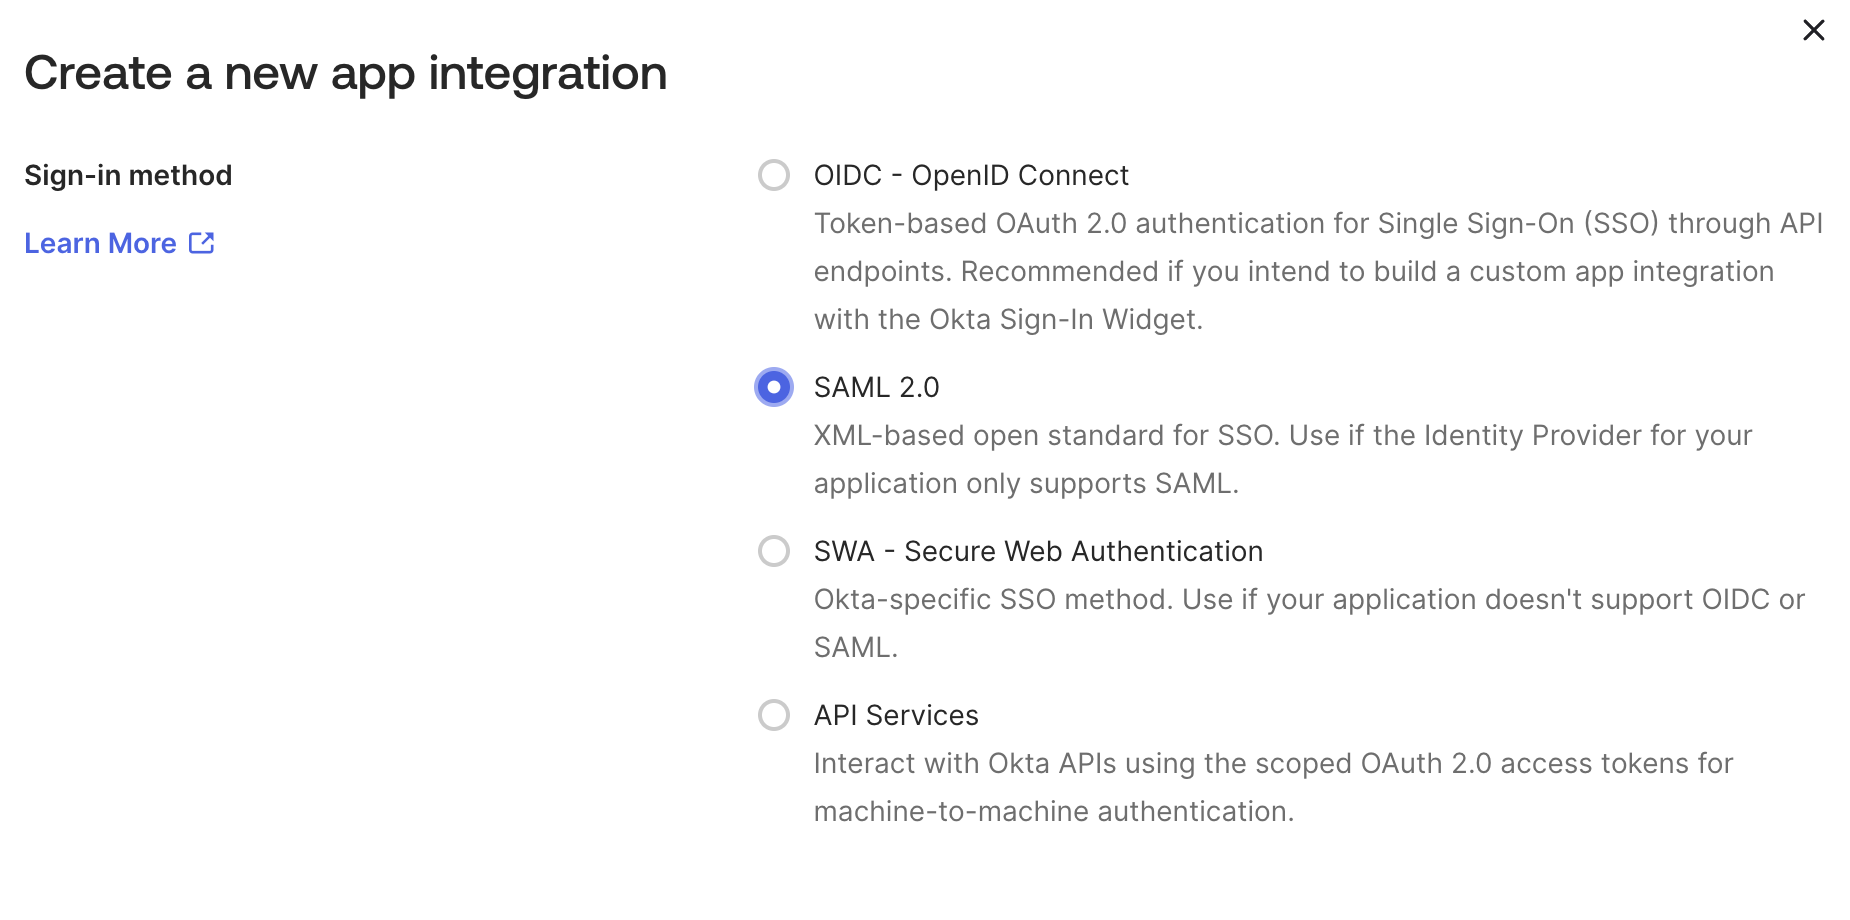
 Select SAML 2.0 as the sign-in method, then click Next.
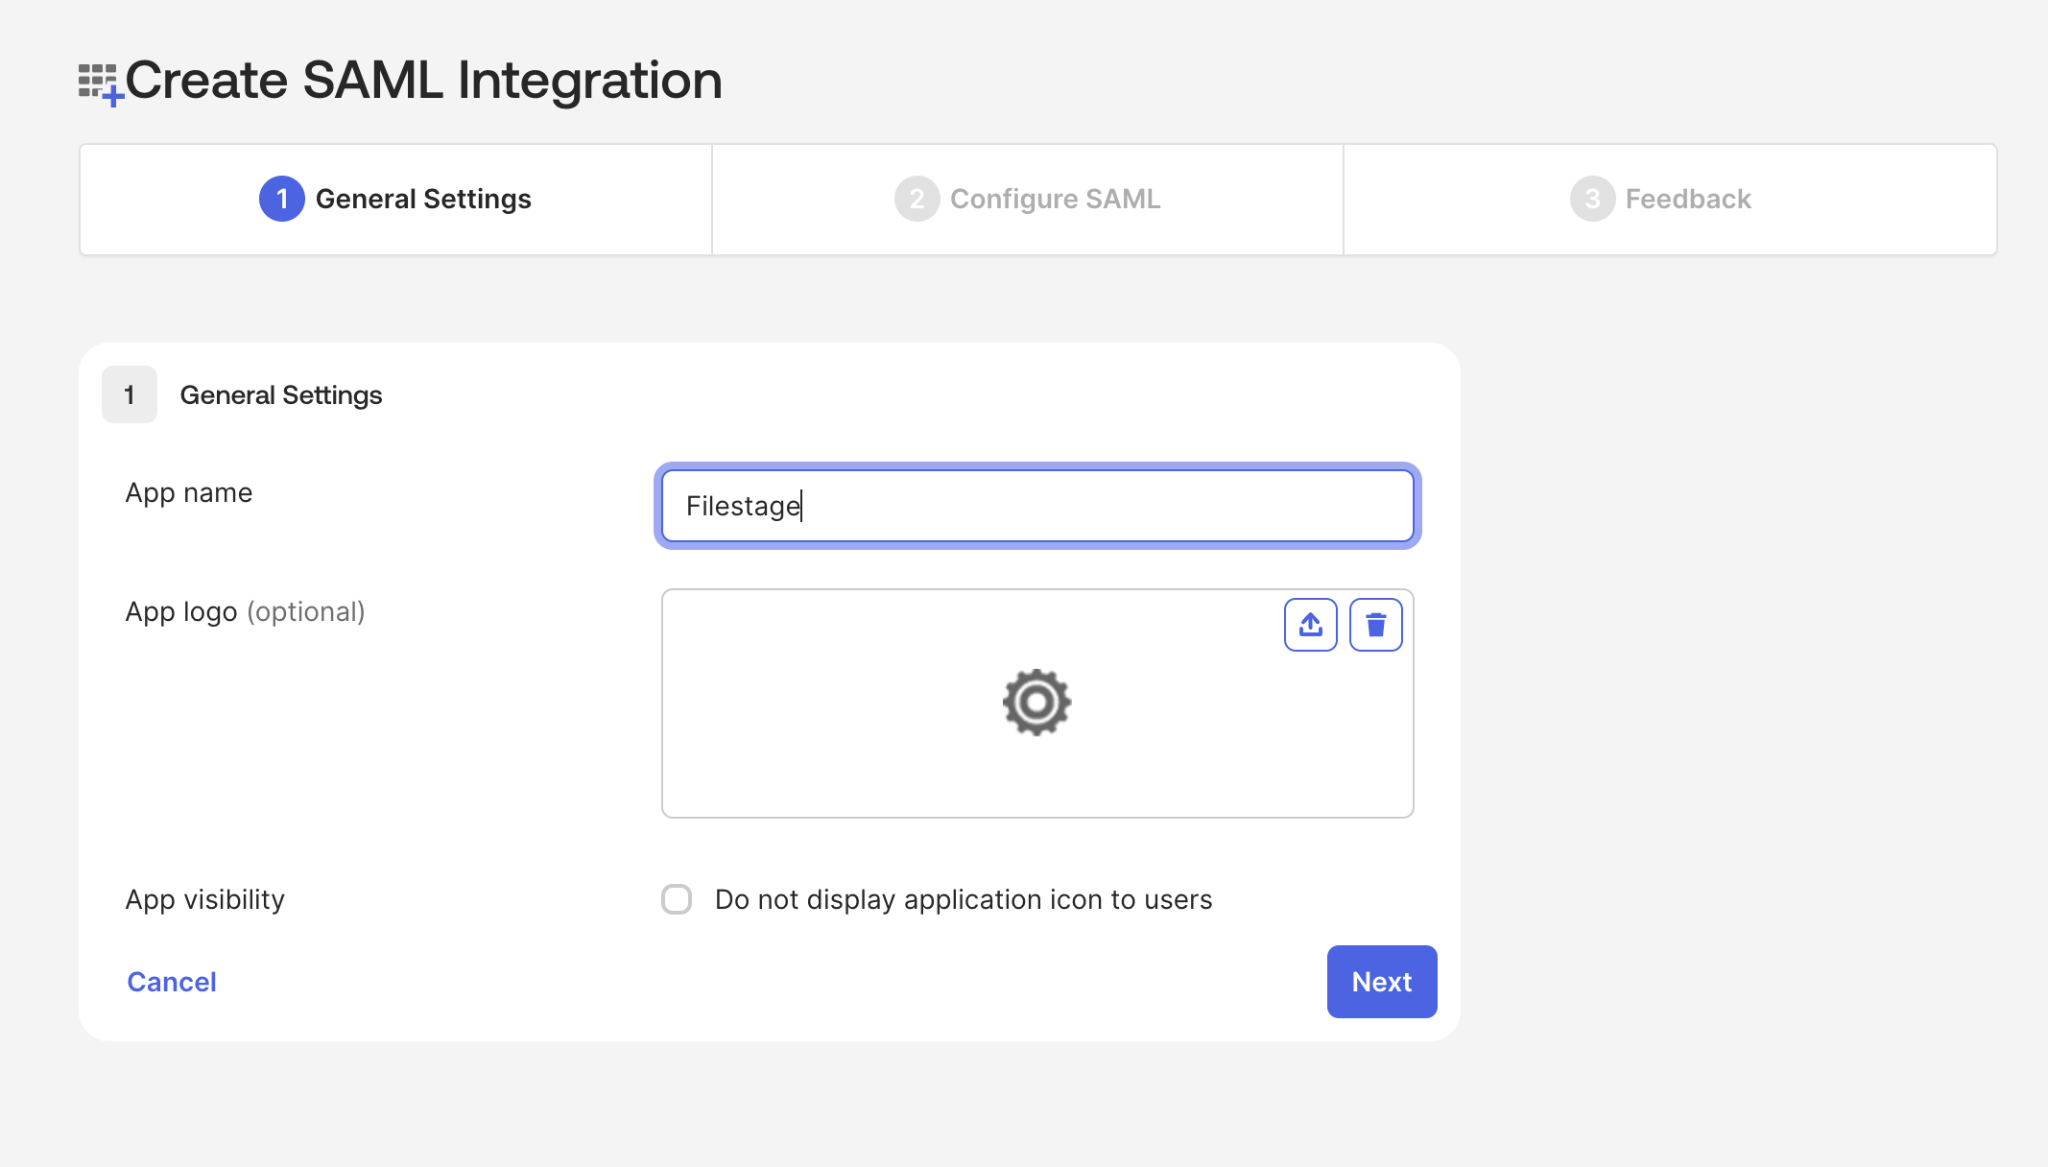
 Enter an App name that helps you identify the app (e.g. Filestage) and click Next.
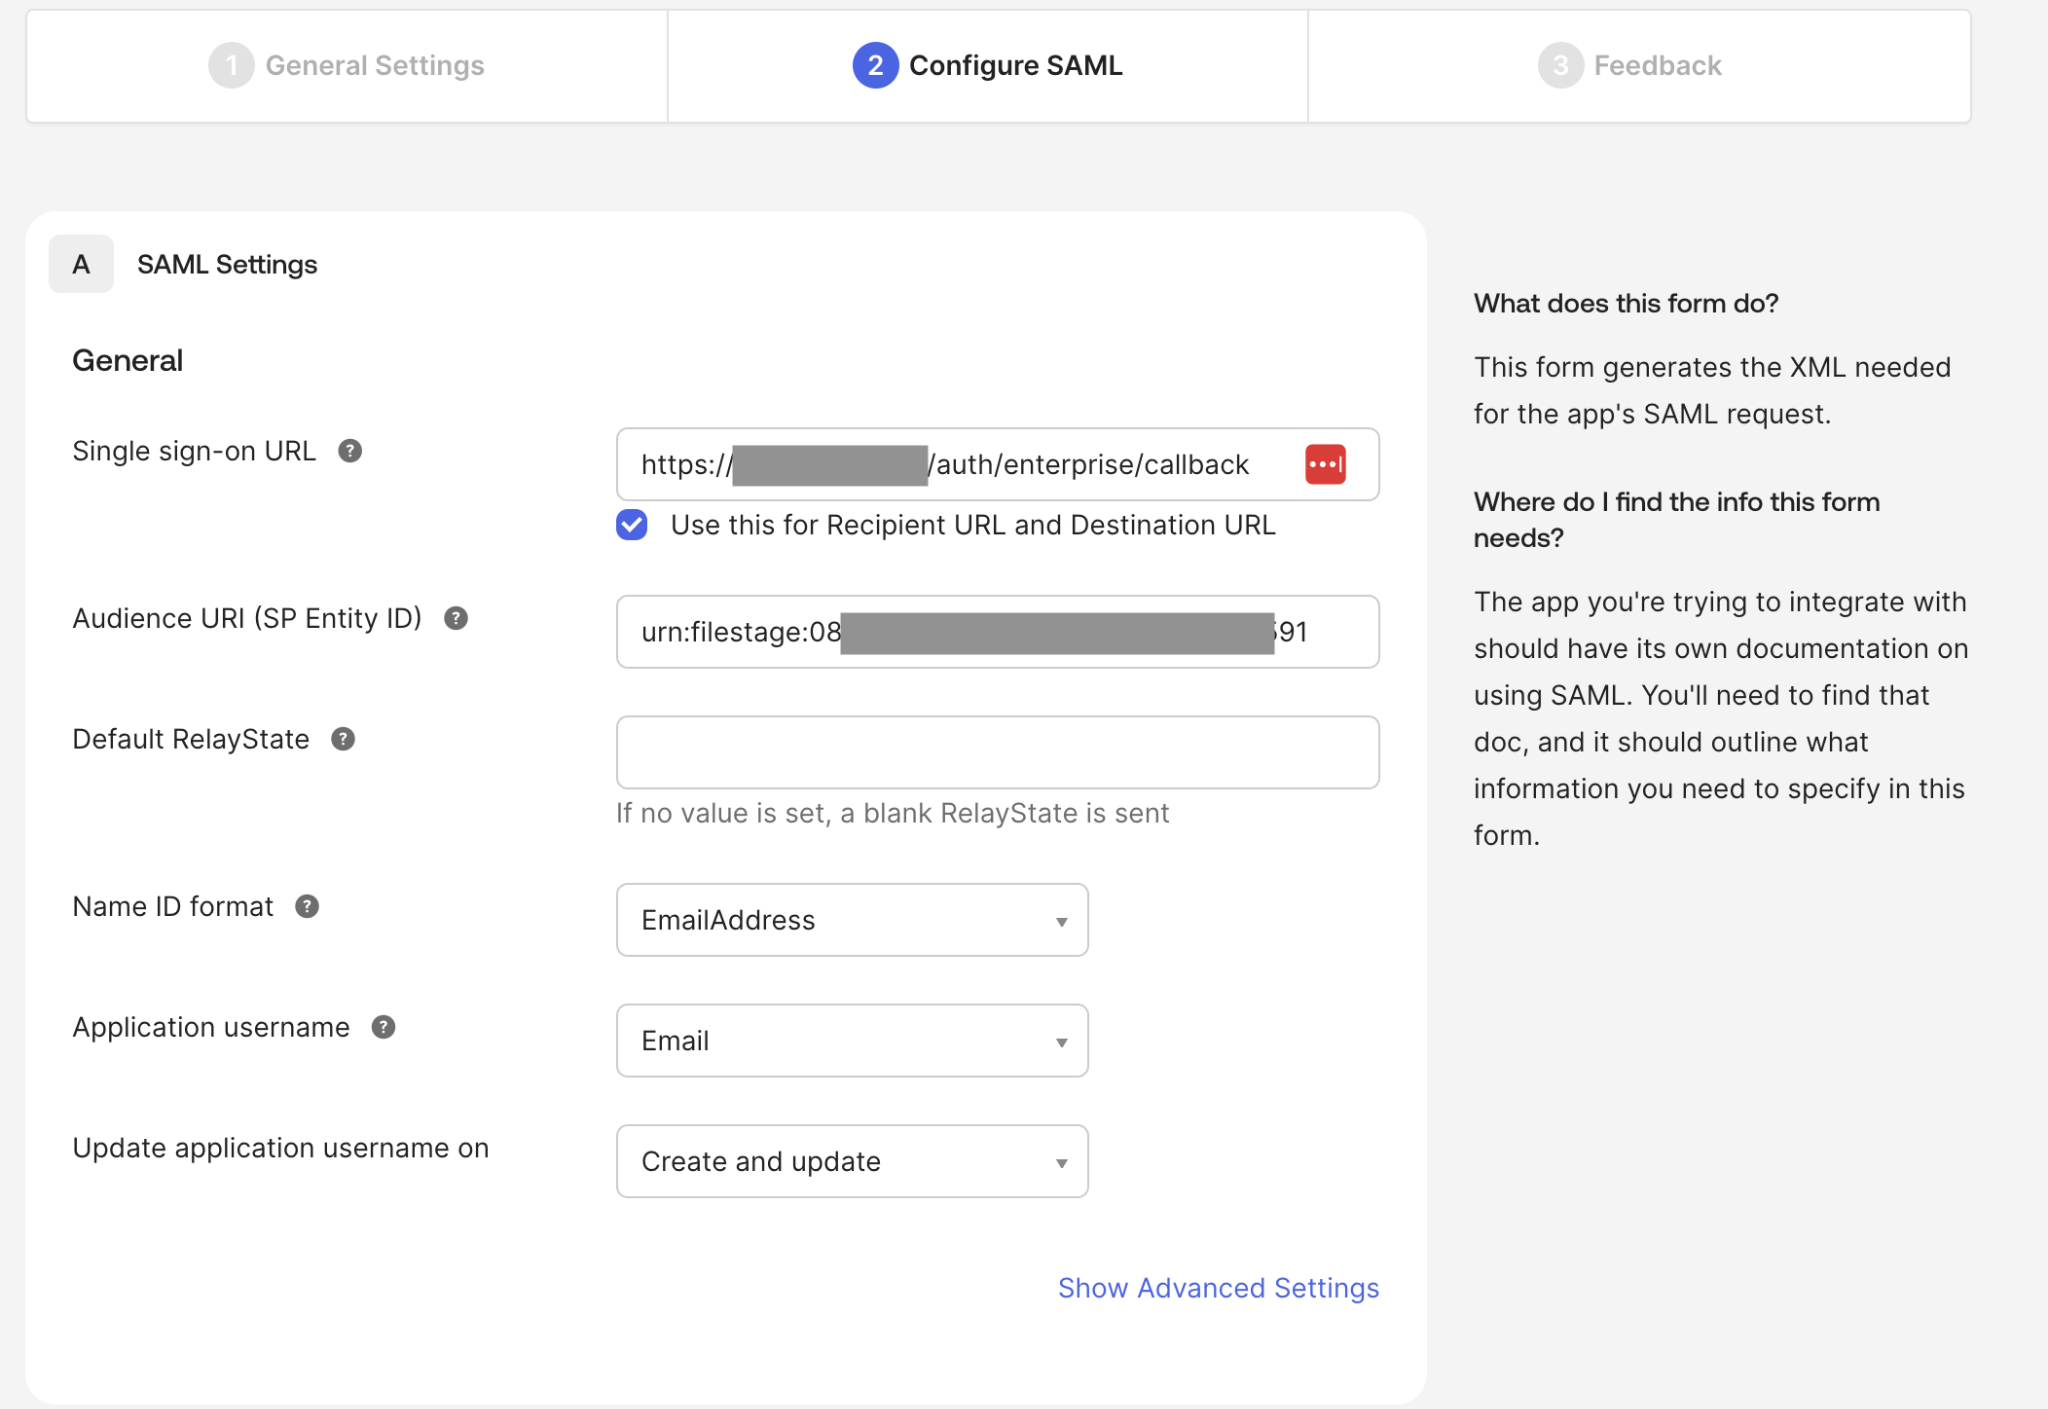
 In the Configure SAML step, set Single sign-on URL to the Assertion Consumer Service (ACS) URL you copied from Filestage. Set Audience URI (SP Entity ID) to the Entity ID (Audience) you copied from Filestage. Set Name ID format to EmailAddress and Application username to Email, then click Next.
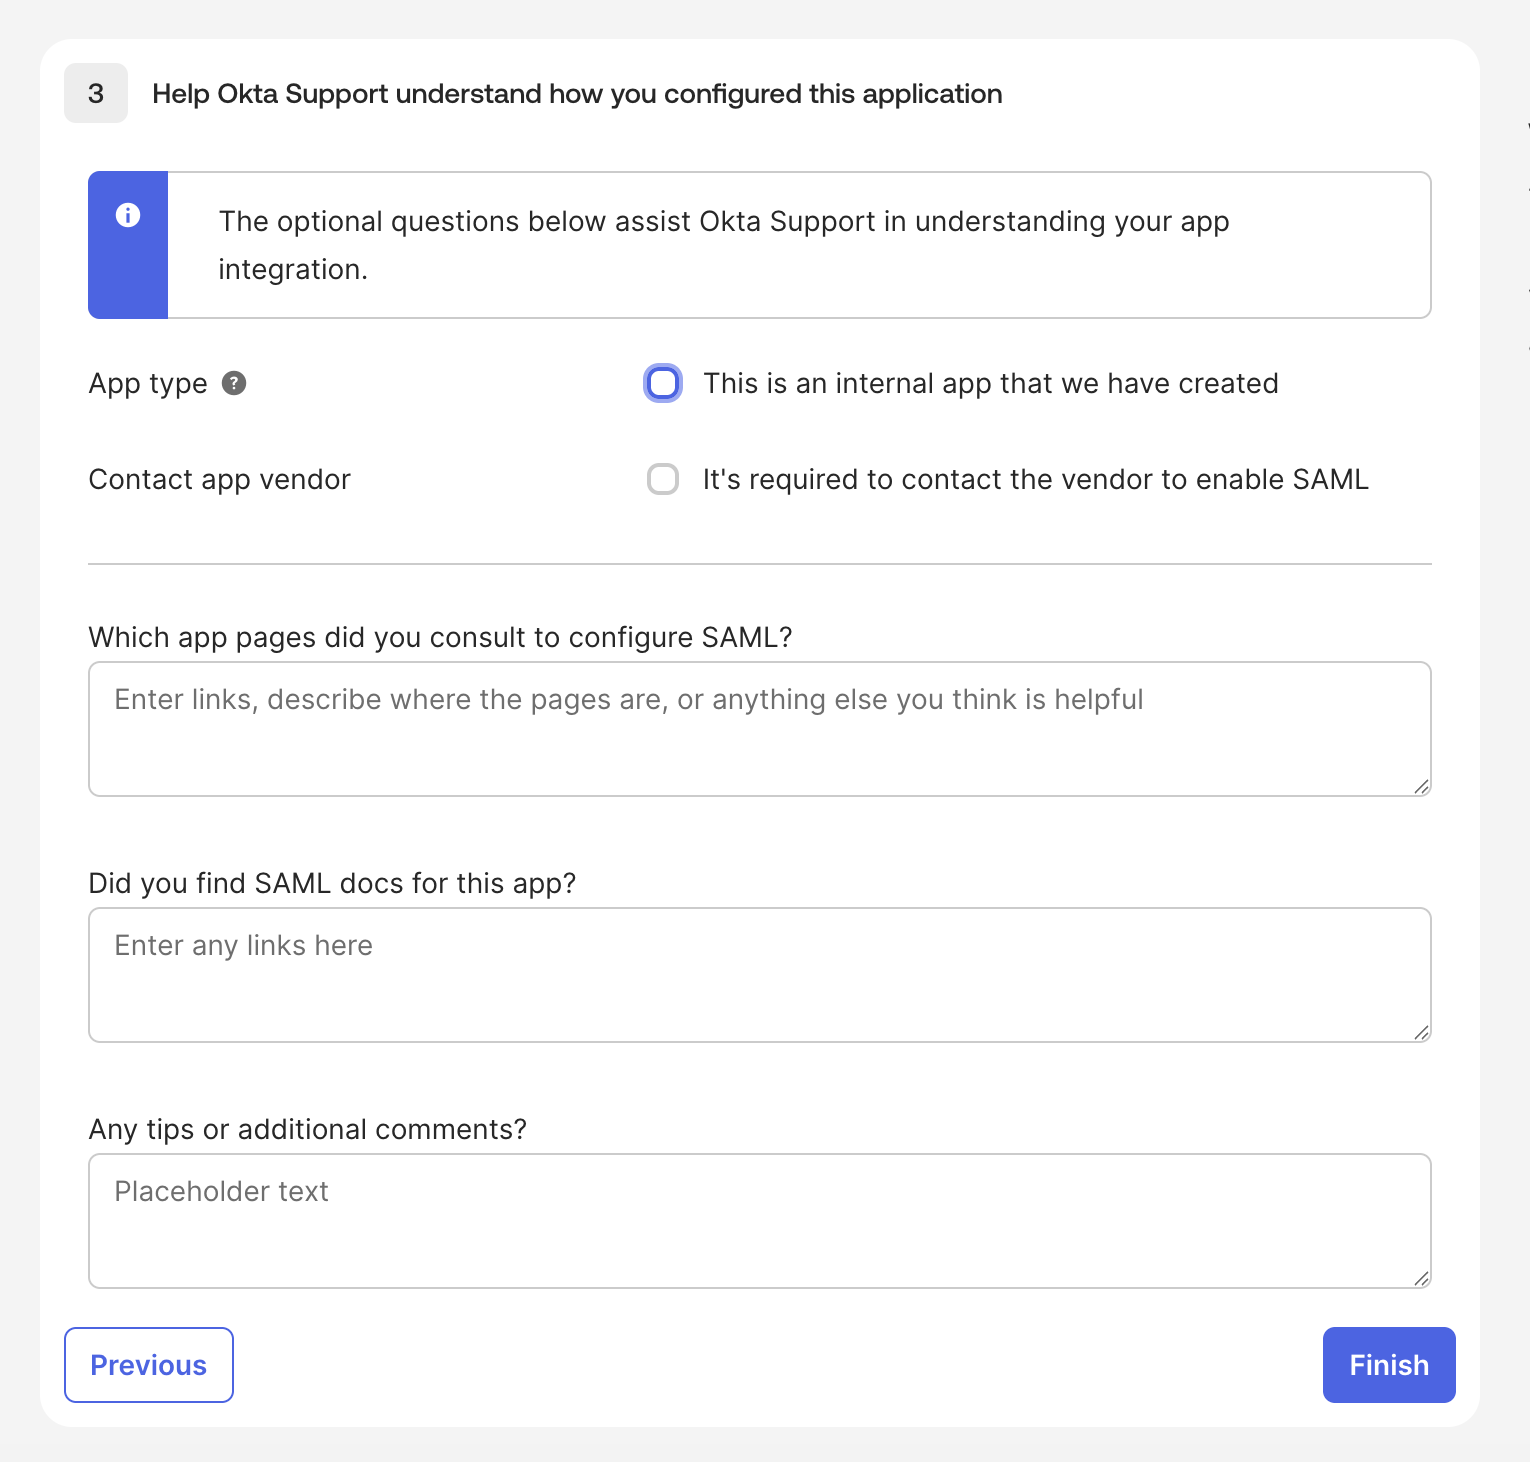
 In the Feedback step, all fields are optional - click Finish.
 Open the app you just created, go to the Sign On tab and click More details.
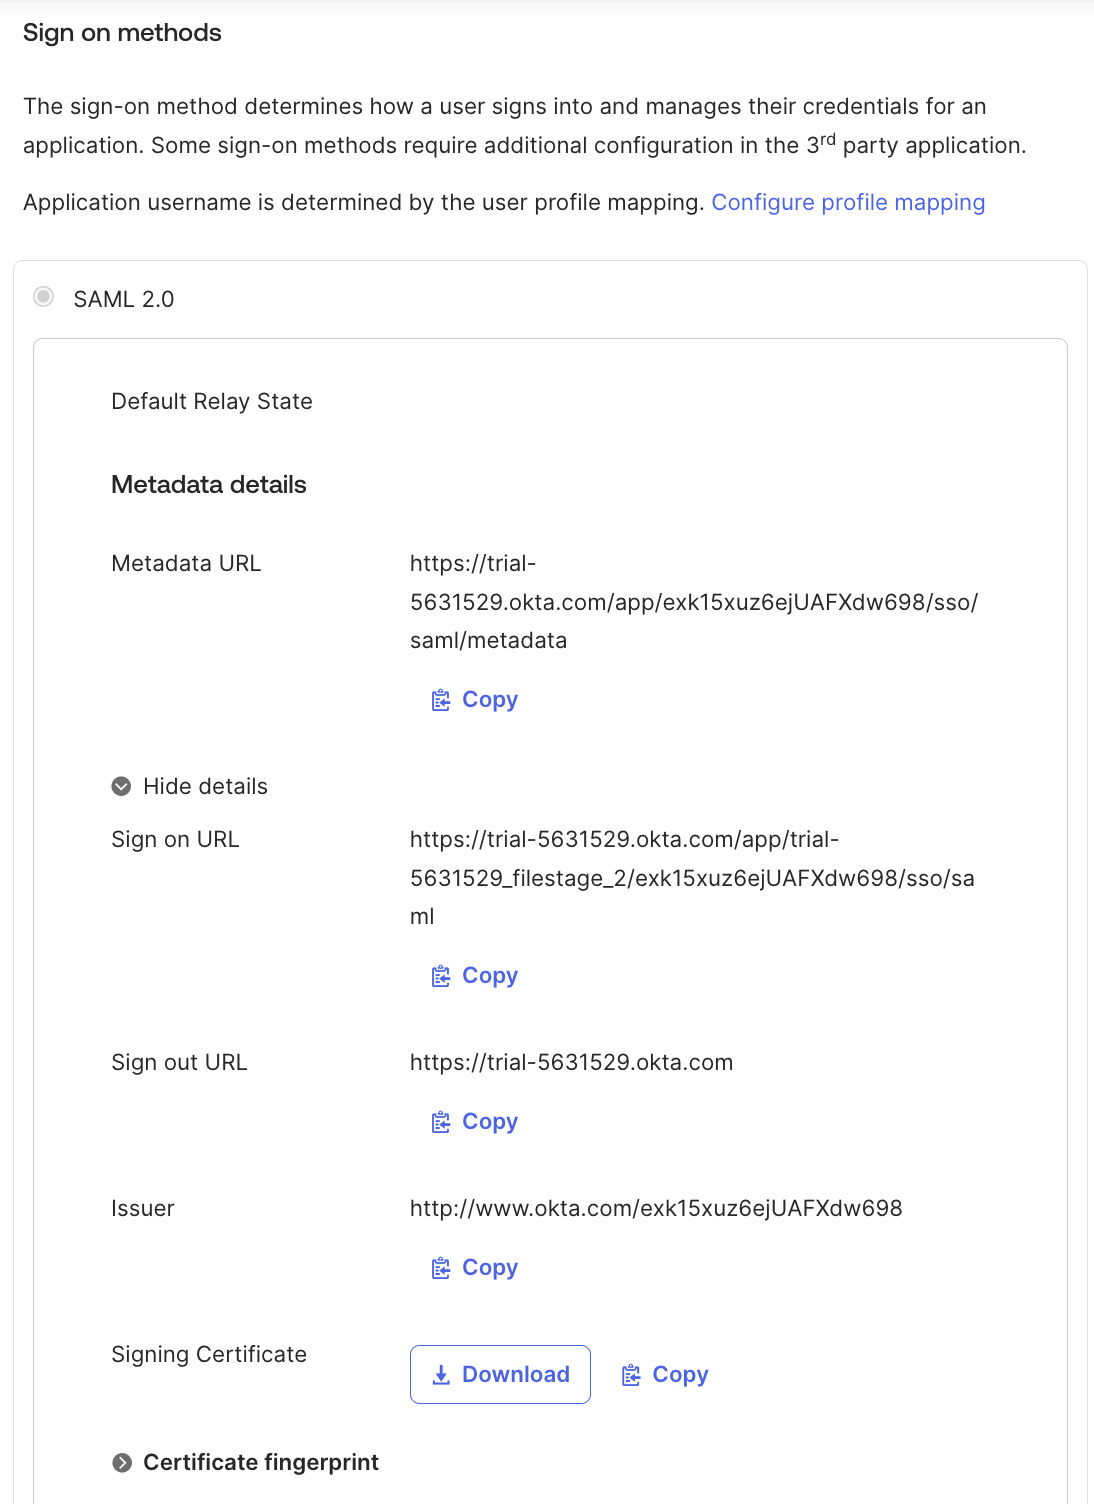 Note the Sign on URL and the Issuer, and download the Signing Certificate - you'll need them in Filestage.
|
Step 3: Configure SSO in Filestage
In Filestage, go to app.filestage.io/teams/security-and-privacy - this opens the security and privacy settings of your last selected team. Scroll down to the Identity and Access Management (IAM) section and click Configure SSO.
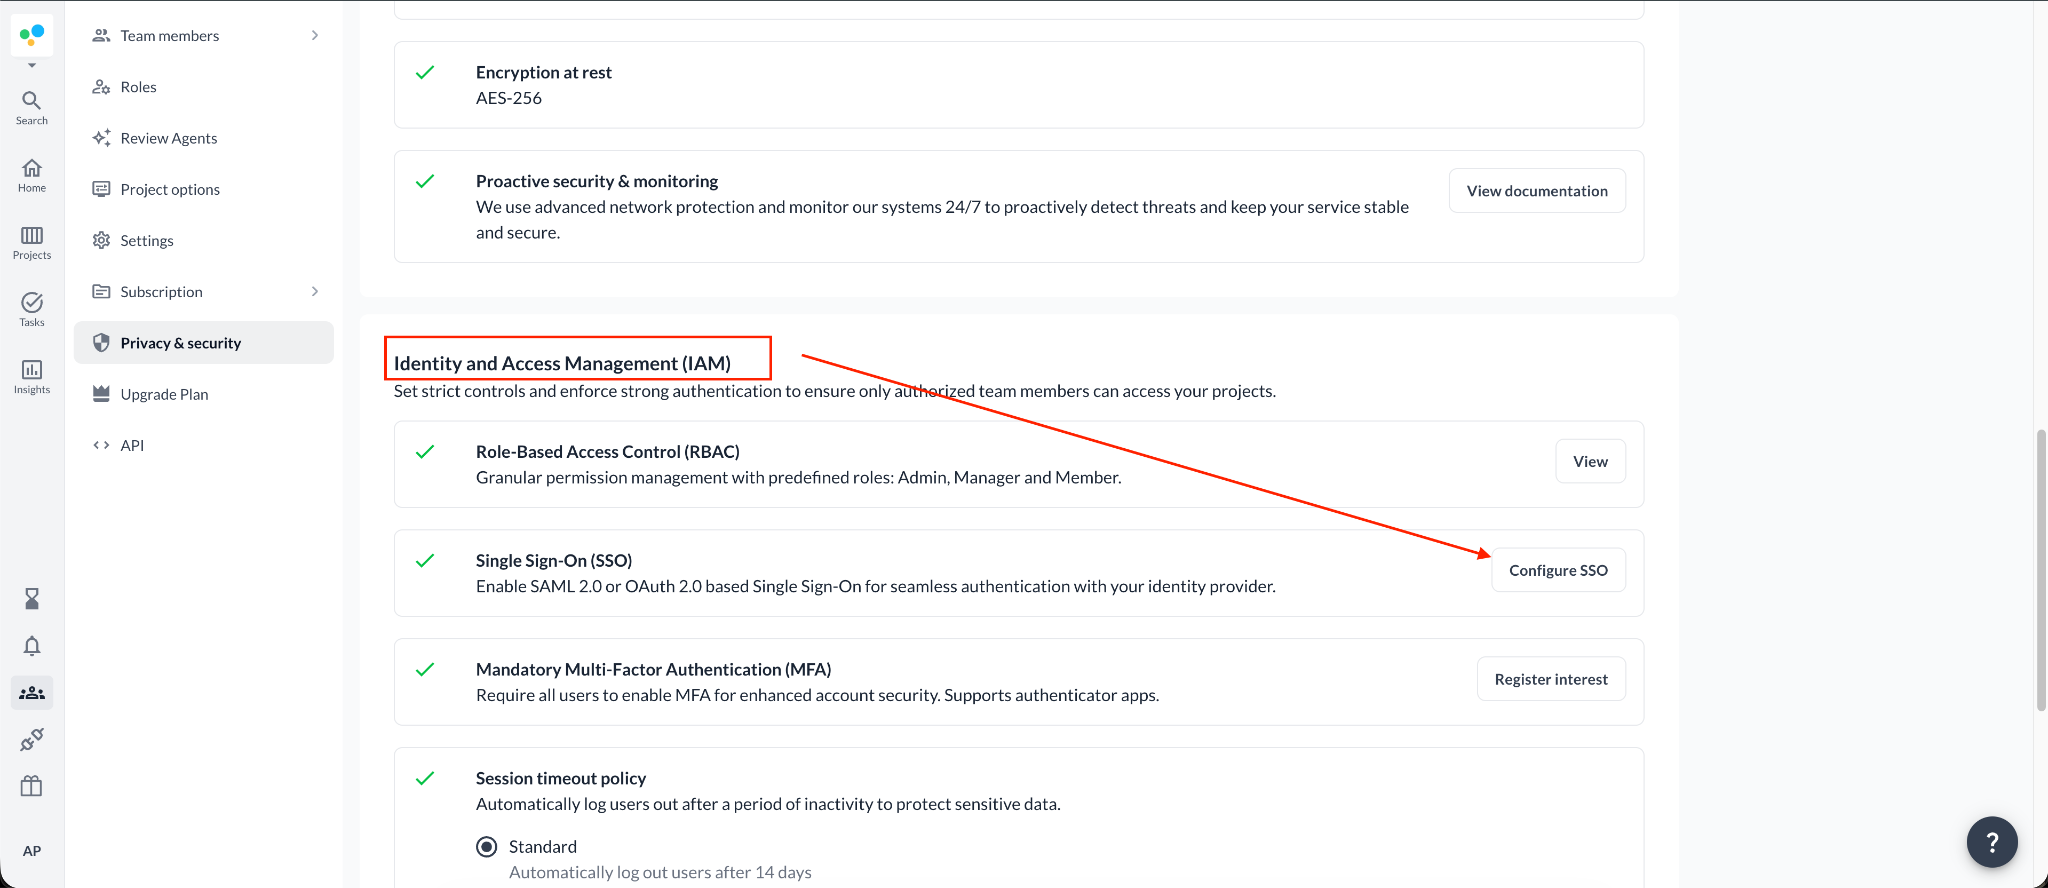 Select the SAML option. Fill in the details you copied from Okta: paste the Sign on URL into SSO URL (login URL), the Issuer into Issuer (Entity ID), and upload the Signing certificate file.
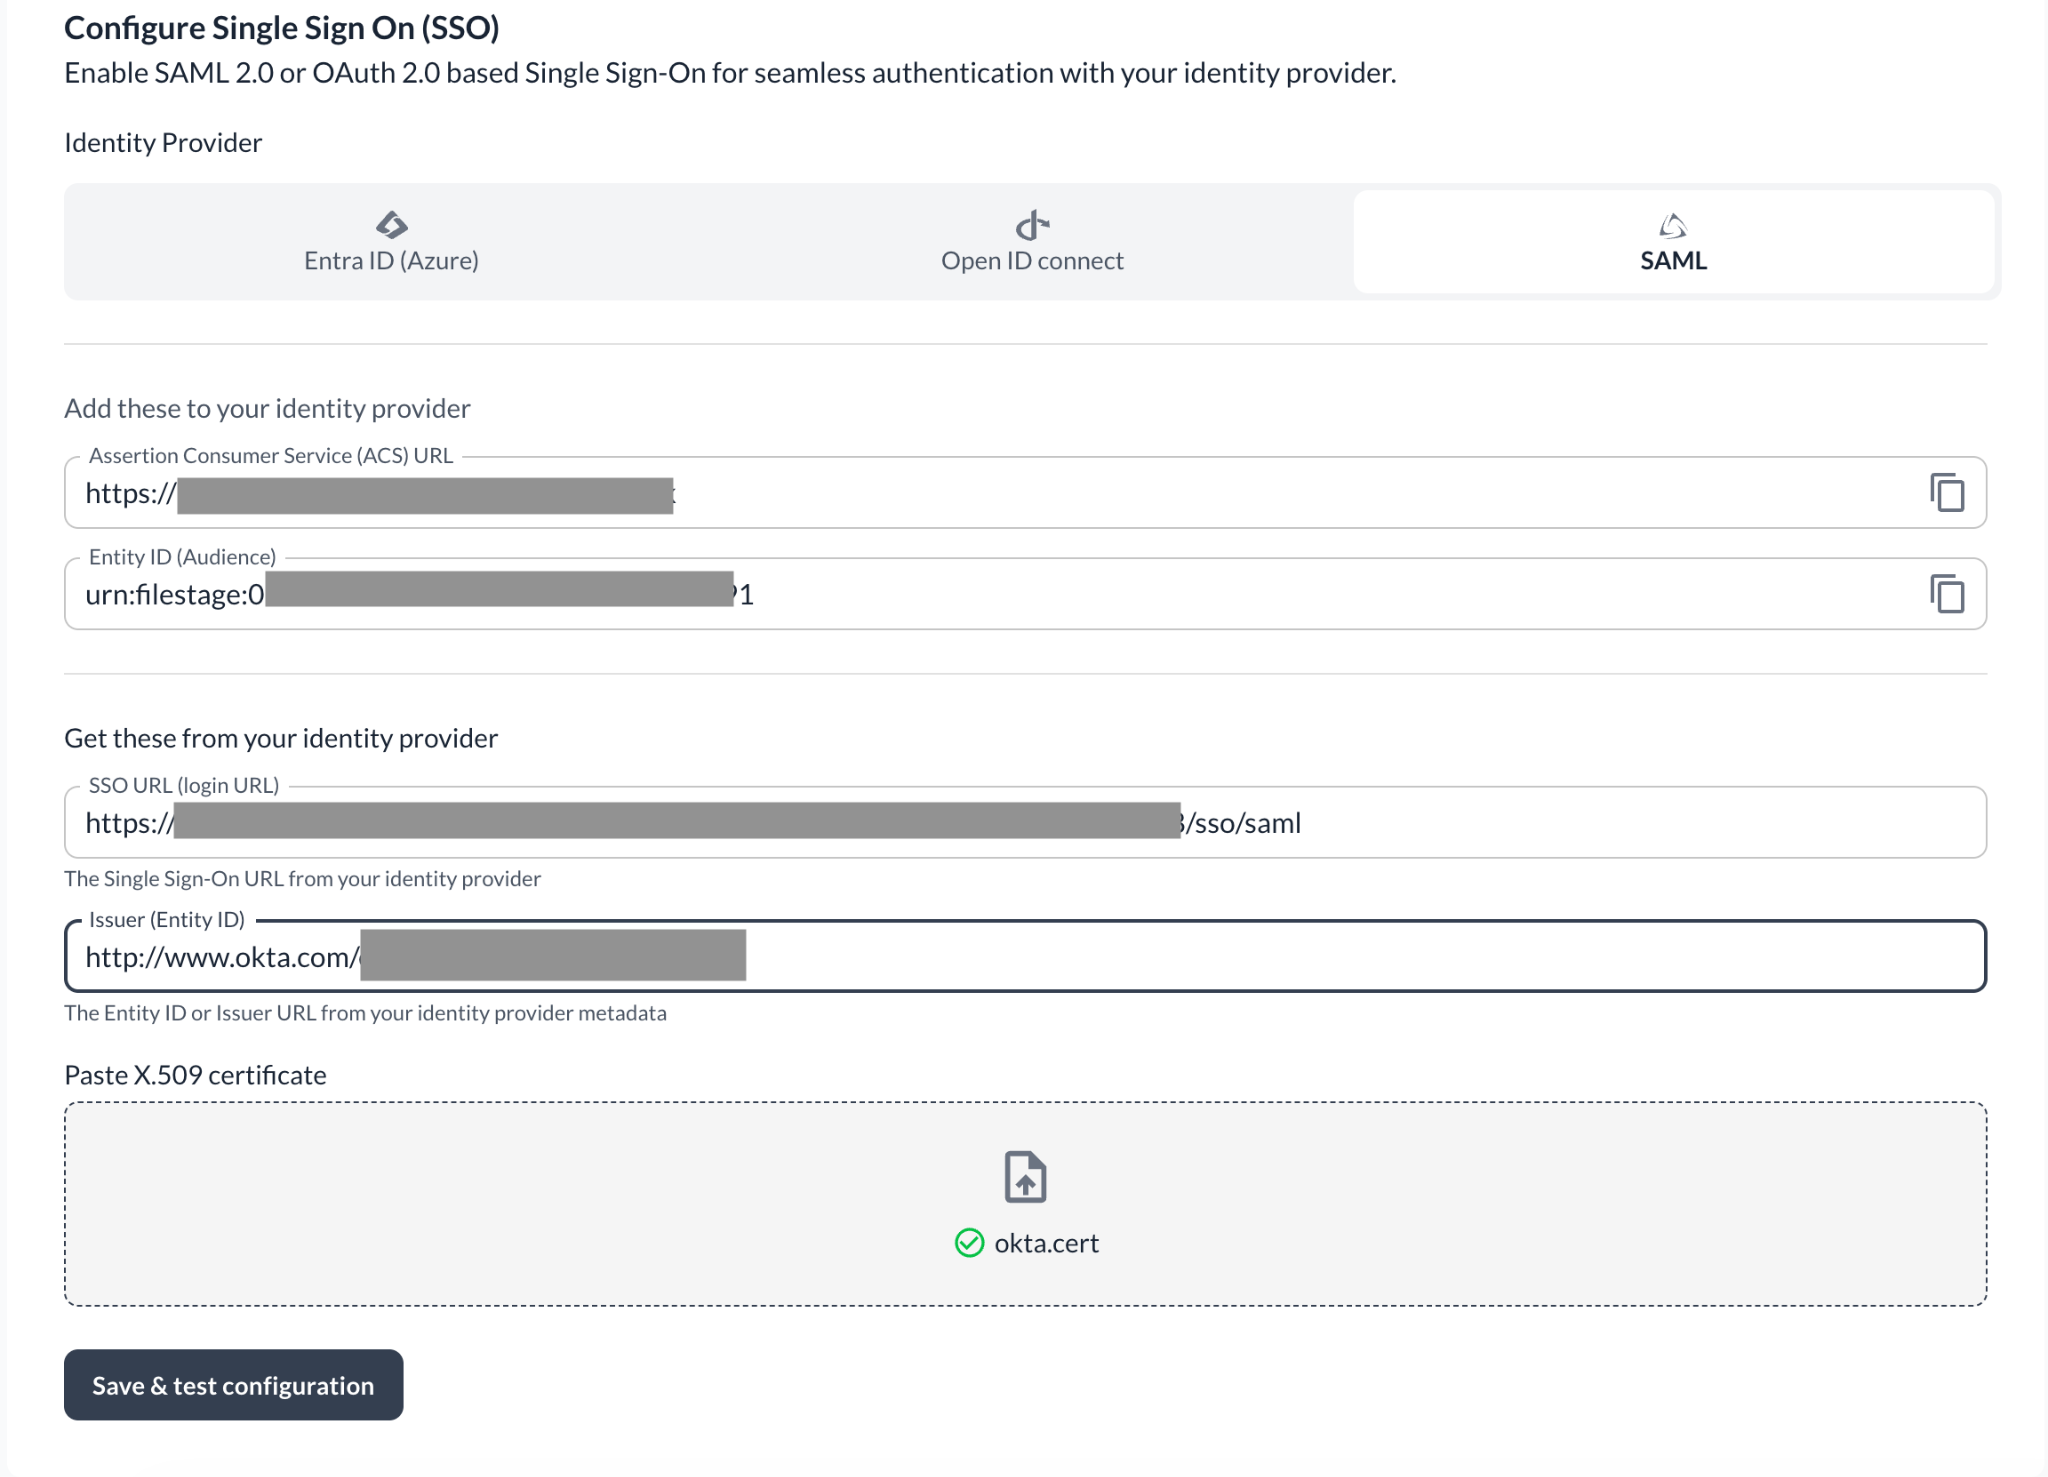 Click Save & test configuration - the verify section will appear at the bottom of the page.
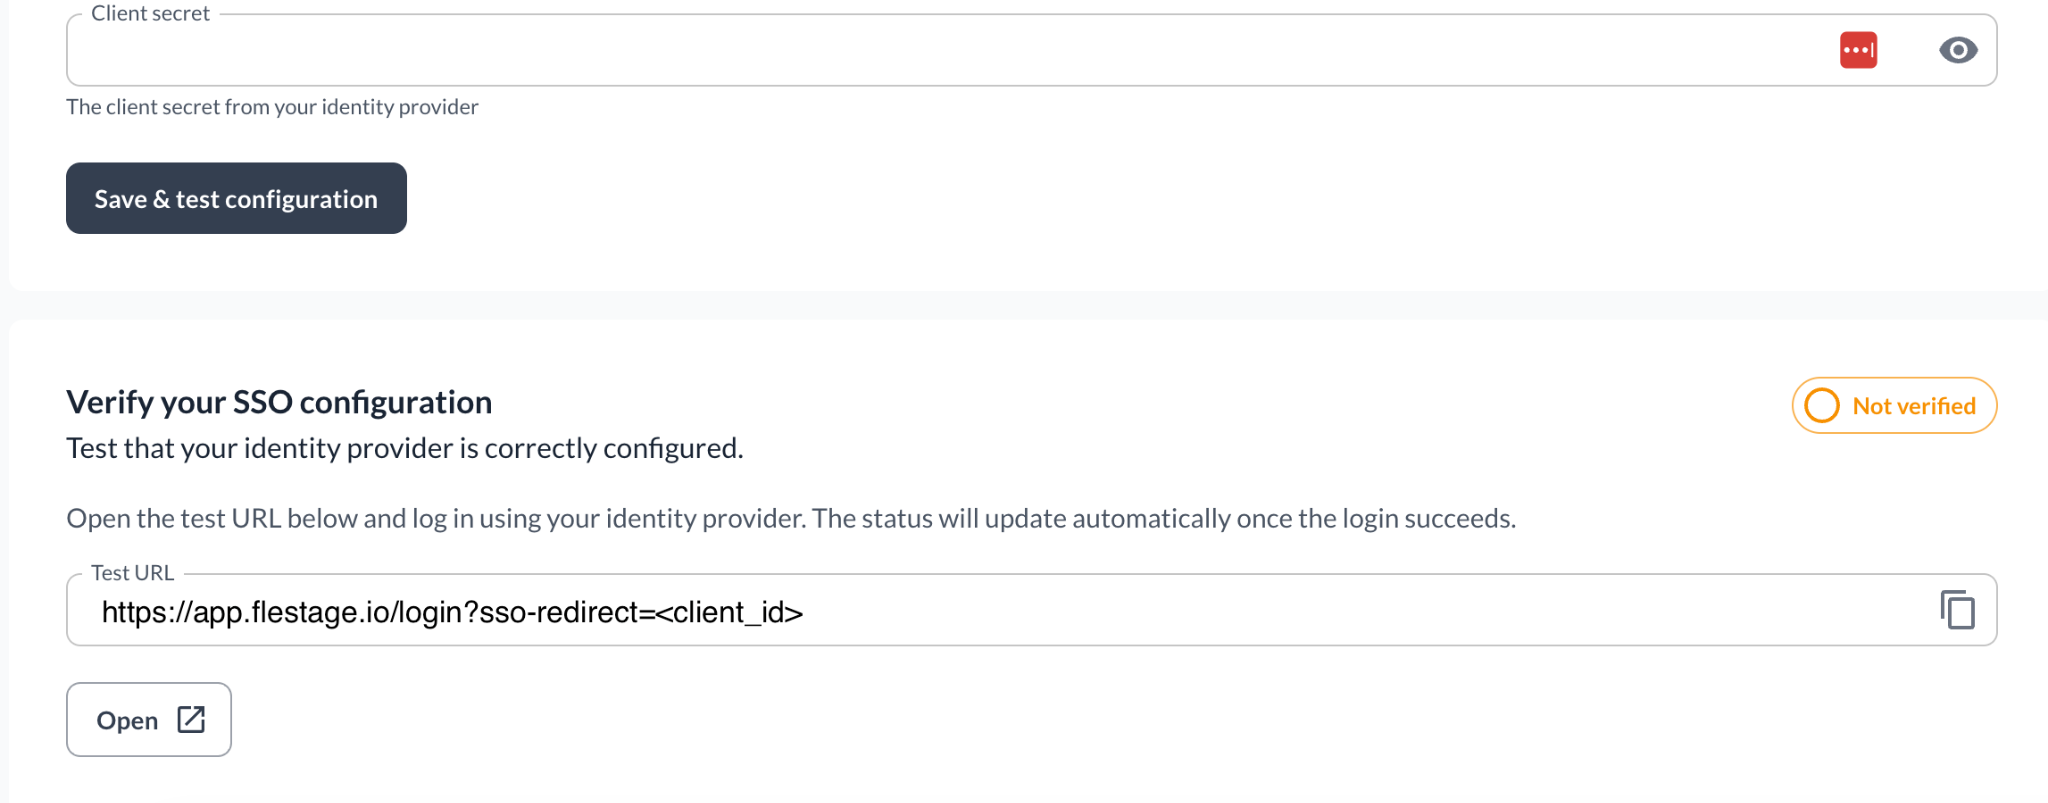 |
Step 4: Verify your SSO configuration

Once the verification is completed successfully, all your team members will be required to log in to Filestage via SSO only.
Copy the Test URL from the verify section. Sign out of Filestage, or open the test URL in an incognito window of your browser. Log in with your identity provider. If everything is configured correctly, the status switches to Verified and you'll see this confirmation:
 |
And that's it - from now on, your team members log in to Filestage with your identity provider.
💡 What’s next? Once you’re done, see how to manage your team members!
Let us know if you have any questions by reaching out to us on chat or emailing us at [email protected]. We're always happy to help!
